The Good Smile Cup Figure/Model Contest #2! (Figure Mods & Others Categories)

The contest has officially begun… (`・ω・´)

001
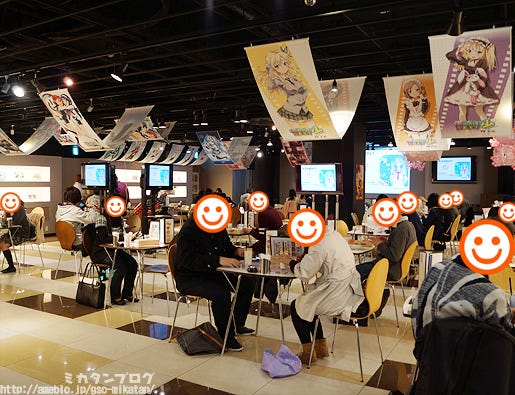
Votes are being cast!!

These two are busy placing their votes as I took this photo! I wonder which ones they decided on!! Which one will win?! (゜∀゜)

The winner of the grand prize (the overall winner of all four categories) will receive a lovely present from the company president! No wonder everyone sent in such lovely works!!

There were a total of four different categories to enter into this time around:

■ Built from Scratch: Things built from start to finish!
■ Kits: Things built with bought kits! (Modded versions included)
■ Figure Mods: Altered versions of Nendos, Nendo Petites, figmas, etc.
■ Other: Anything that didn’t fit into the categories above!

Today will be the Figure Mods and Other categories!

If you missed the Kit category yesterday, you can find it here!
The Good Smile Cup Figure/Model Contest #2! (Kits Category):
http://mikatan.goodsmile.info/en/2013/06/11/the-good-smile-cup-figuremodel-contest-2-kits-category/
002
Iguchi-kun & Noguchi-kun from the production team:
Nendoroid Miho Nishizumi Panzer Jacket Ver. with #IV Tank D-type!

003
Sasaki-kun from the production team:
Ironman Mk-X Brocken Gigant!

004
Nagai-kun from the design team:
Smile Company ACT 1.2.3!

005
Kahoyama-san from the planning team:
Forks, spoons and wooser!

006
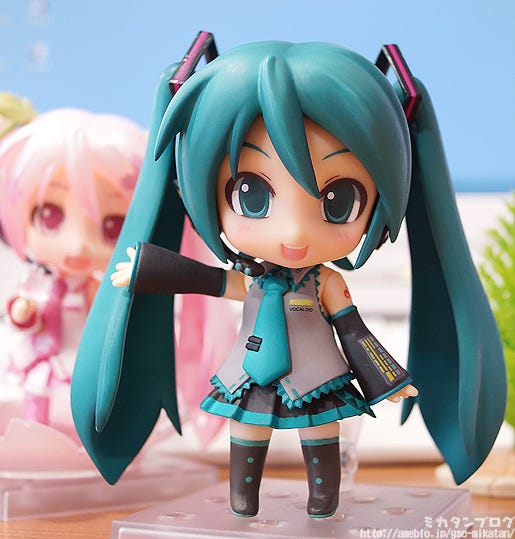
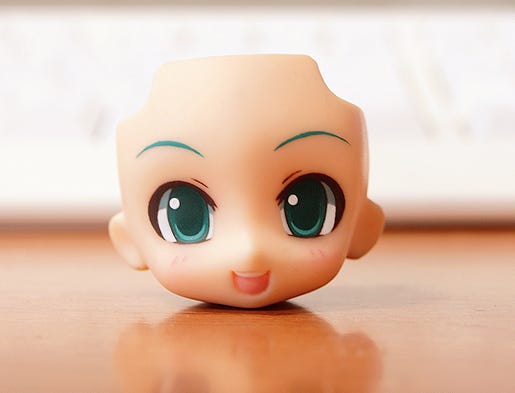
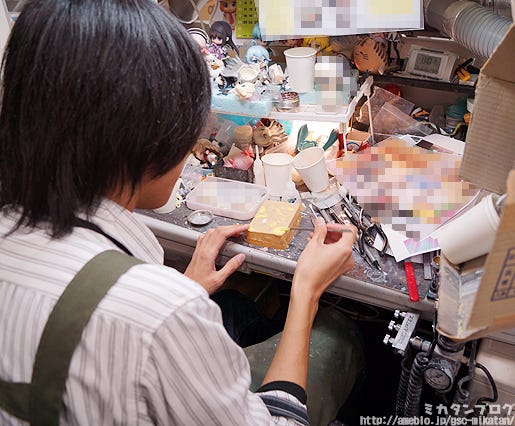
The 2014 new graduate’s work:
Nendo Petite: Vocaloid Series!

(This was a part of the job rotation that the new graduates went through, where they each painted a Nendo petite in their time with the production team!)
007
Fuumin from production and Oda-P from planning:
Miku Rings!

008
Takamatsu from Phat! company:
Anzu’s Plushie ver.2!

009
Kikuponyo-san from the sales team:
Animal Crossing: New Leaf: Real Risa!

 
That’s it for the Figure Mods and Others categories!

These two categories were both filled with impressive things!! There were plushies, foods, models and even rings! Everyone really took the “have some fun” part of the instructions to heart!

Making something with your own two hands – no matter what it is – will expand the hobby world and make it even more fun!

On Friday I’ll be finishing off this little series with the ‘Built from Scratch’ category! There are some very interesting entries to see!!

 
But that’s all for today!
I hope to see you all again tomorrow!! (・∀・)ノ゛

The Good Smile Cup Figure/Model Contest #2! (Kits Category)

It’s that time of the year again…

001
Time for the Good Smile Cup Figure/Model Contest!

A contest established for those working in the figure industry to make some interesting things and have some fun! We’re looking forward to seeing many entries once again this year! This time entries will be taken in various categories. Voting will take place after all the entries have been confirmed.

– Entry Requirements –
Anyone working at GSC or a related company that is interested in making a figure or model for the contest is welcome to enter! Anything from the most skilled to the silliest works are all welcome!

The Figure/Model contest by Tasshi from the production team!

The contest has successfully made it into the second year! Yay! ヽ(゚∀゚)ノ
Today I’ll be introducing each persons work divided into the four different categories!
002
Here we have the display space!

They’re all on display up in the front of the entrance to the offices for everyone to see!! This time there were four different categories to enter into!

■ Built from Scratch: Things built from start to finish!
■ Kits: Things built with bought kits! (Modded versions included)
■ Figure Mods: Altered versions of Nendos, Nendo Petites, figmas, etc.
■ Other: Anything that didn’t fit into the categories above!

From today I’ll be introducing each of the different categories, starting with the Kits category!

I’ll also leave the links for both last year’s contest as well as Max Factory’s own internal contest – be sure to take a look!
The Good Smile Cup Figure/Model Contest #1:
http://mikatan.goodsmile.info/en/2012/05/30/the-good-smile-cup-figuremodel…

Max Factory Internal Competition 2013: (Japanese)
http://ameblo.jp/max-staff/entry-11478313361.html
http://ameblo.jp/max-staff/entry-11480459665.htm
http://ameblo.jp/max-staff/entry-11481201526.html
http://ameblo.jp/max-staff/entry-11483361443.html
http://ameblo.jp/max-staff/entry-11494956670.html
009
Yuri-chan from the planning team:
Prinny!

003
Kawapon from the production team:
Tamiya 86 Model!

004
Sakai-san from Max Factory’s planning team:
STURM KAFER!

005
Katou-kun from the production team:
Vox Aura!

006
Katanaji-san from Max Factory’s manufacturing team:
Jinx!

007
Negishi-kun from the GSR planning team:
Flint MOBIL NASCAR Racer!

008
Noguchi-kun from the production team:
Appleseed Vignette!

a
Hayashi-kun from the production team:
‘Waa’!!

 
That’s all from the Kit category!!

As I mentioned at the start, the Kit category was anything made using bought kits, including any modifications made after the kit was complete. This not only refers to things like plastic models, but also the resin kits often sold at events like WonFes. Putting a figure together from pieces is amazing as is, but painting it with your own two hands makes it all the more special! Every single one of these seven entries were painted by hand by the entrants!!

Negishi-kun and Katuo-kun’s works also involved personal modifications for an even more impressive appearance – these modifications are not only great fun to look at for all of us, but I’m sure they were great fun to apply as well! Kits are a fairly easy way to get into the world of figures and painting, so I highly recommend giving them a challenge! They can be a lot of fun!!

 
The next section I’ll be taking a look at is the ‘Other’ section!

 
Anyway, that’s all for today!
I hope to see you all again tomorrow!! (・∀・)ノ゛

Placing Stickers on Blank Nendoroid Expressions!

Once again an interesting mail has arrived!

Hello Mikatan! I look forward to your blog all the time!The other day I bought a Nendoroid. It was a load of fun to swap all the cute parts around and I was very satisfied with my purchase, but there was one thing I’ve been a little stuck with. The Nendoroid came with a blank face and stickers to make a new expression, but I’m too afraid that I’ll mess it up when sticking the expression on! Is there some special way to make sure the stickers are in the right place and look cute?

That’s a very good question!! Σ(゚Д゚ )

I’m not sure if it’s a boy or a girl who sent the question through this time, but I’ll certainly try and help out either way!

Today’s blog will be a little article on how to stick expression stickers onto a blank Nendoroid face! I was actually wondering myself of there were any tricks to putting these stickers on! (`・ω・´)
%e3%82%b1%e3%83%93%e7%94%a8
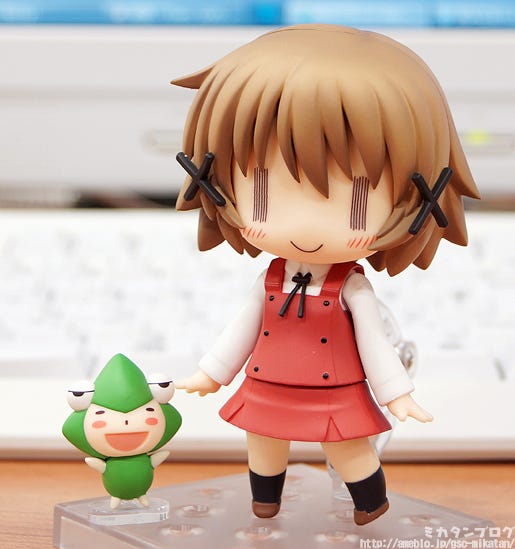
Today’s Nendoroid guest is Nendoroid Yunocchi!

Ume Aoki’s characters are amazing! They make for such cute Nendoroids! I have this huge urge to just play with Yunocchi now… but I can’t! This is work time! 😛

This was one of the Nendoroids that came with a blank face as well as this lovely set of expression stickers inside the box!
%e3%82%b1%e3%83%93%e7%94%a8
First you need to determine the position!

Unlike when you’re drawing an expression for yourself, the size of the eyes and mouth are already figured out and printed for you – but this also means that there is a single ideal place for each sticker!

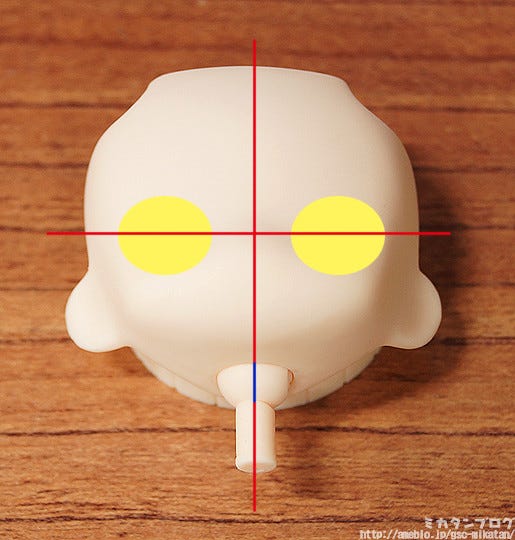
First determine where the horizontal center line is!

The very top of the nose is generally the overall center, but there are some easy tips to find the exact center part! If you twist the Nendoroid neck joint around till you see the parting line (the blue line above), that parting line will show you the vertical center!

Next, try to determine the vertical center line!

There is no easy way to determine the horizontal center like there is with the vertical, but Nendoroids (just like real people), have a little depression on their faces where the eyes should be. The idea is to stick the eyes on so they match up with these depressions. I’m going a little off the point here, but without these depressions on the face, the quality would seem much lower!

You need to picture these lines within your head while sticking the expression on in order to try get symmetry and good positioning. I really think this picturing the lines in your mind can help out a lot!
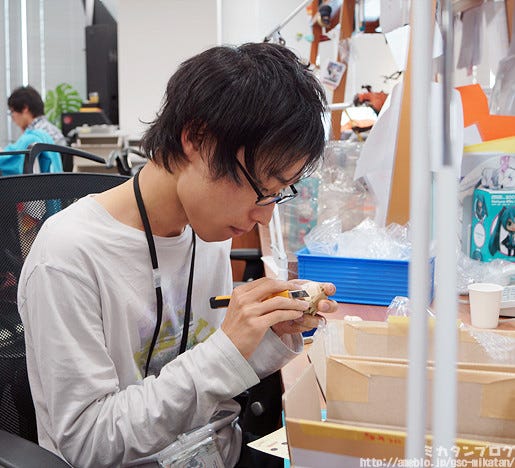
%e3%82%b1%e3%83%93%e7%94%a8
I want to start sticking on the expression… but first let’s ask Tori Bird about the more technical aspects of placing stickers!

Mikatan: “I want to stick some expressions on Yunocchi, got any advice?!”
Tori Bird: “As long as you decide on the position it’s really quite easy…”

Ehhh!! Don’t say that! I still have a blog to write!!

We need your advice as a experienced expert of the figure community! There must be some secrets! (`・ω・´)
005
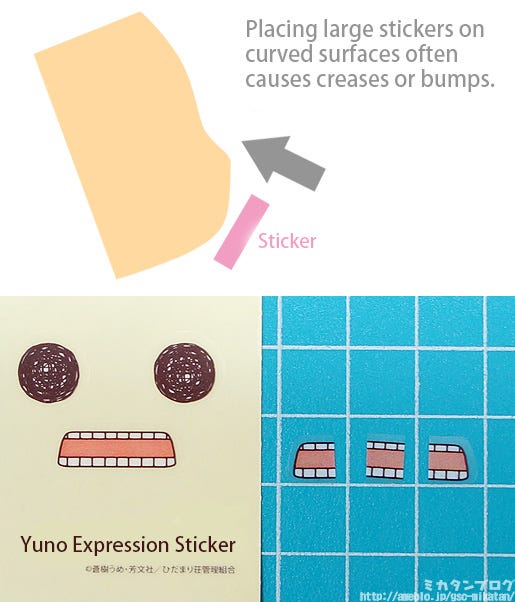
How to place large stickers on a curved surface!

There’s no problem with smaller stickers, but big stickers tend to leave creases or bumps when stuck onto curved surfaces… I’m told this is a fairly high-level technique, but let’s take a look!

In Yunochi’s case, we’re going to cut the mouth into three parts!

The reason the stickers are on a cutting board here is just to make them easier to see in the photos, when you actually try this, you can stick them onto the face as you cut them apart.
%e3%82%b1%e3%83%93%e7%94%a8
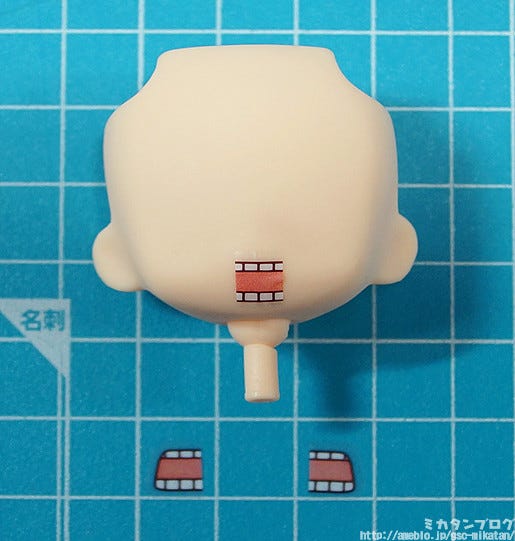
It’s best to stick the middle piece first!

If you start from the edges then it’s much harder to work out the overall positioning. The photo above has the sticker just lightly placed on the face part in order to get the positioning right.

Somehow this shot reminds me of Plastic Nee-san… 😛
%e3%82%b1%e3%83%93%e7%94%a8
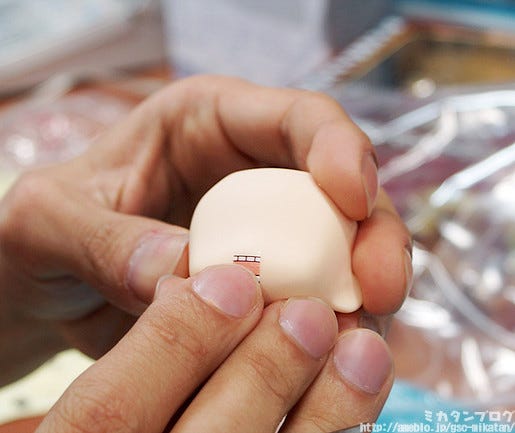
Use your finger to stick it firmly in place!

I asked Tori Bird if it was alright to use a cotton swab or something and he said there’s no problem, but you need to be careful not to get any of the cotton stuck on the stickers. Of course! Σ(゜Д゜;)

If the sticker still seems bumpy or wrinkled, then you can try correct it by making a small but with a craft knife and pushing down again on the sticker again. Just be very careful not to damage any other parts of the figure!
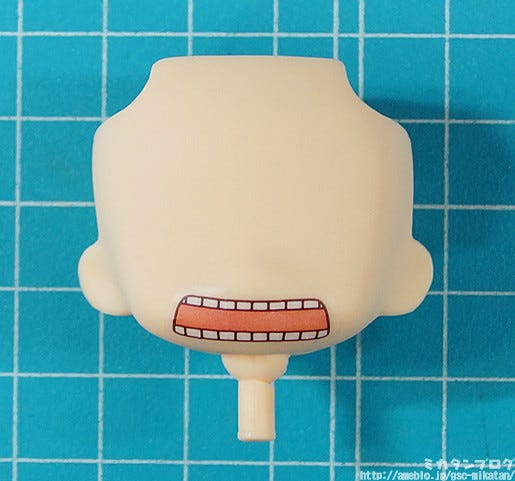
%e3%82%b1%e3%83%93%e7%94%a8
Stick the left and right parts on… and you’re done!

This is a rather complex method, isn’t it? ^^;

You also need to be careful to not leave any skin space between the stickers, while still also making sure they don’t overlap. But if you manage to get it done neatly it looks really nice!
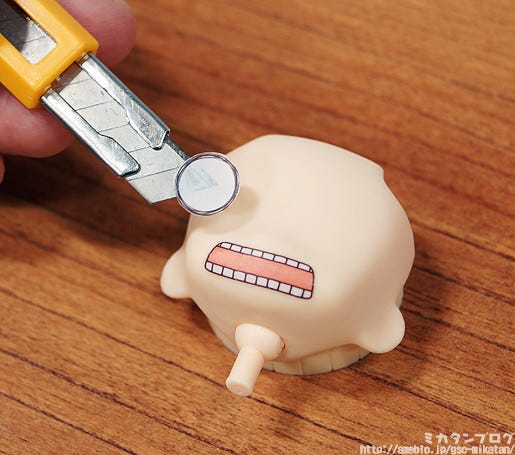
%e3%82%b1%e3%83%93%e7%94%a8
Let me try put the eyes on now!

Bird was kind enough to do the mouth for me, but I’ll do the eyes myself! I’m always worried I’ll leave fingerprints if I put the sticker on with my hand, so I decided to position the eye with a craft knife.

If you’re right-handed, start with the right eye first!

The most difficult thing about the eyes is getting them symmetrical! By starting with the right eye, the left eye will be a guide for you, making it easier to align!
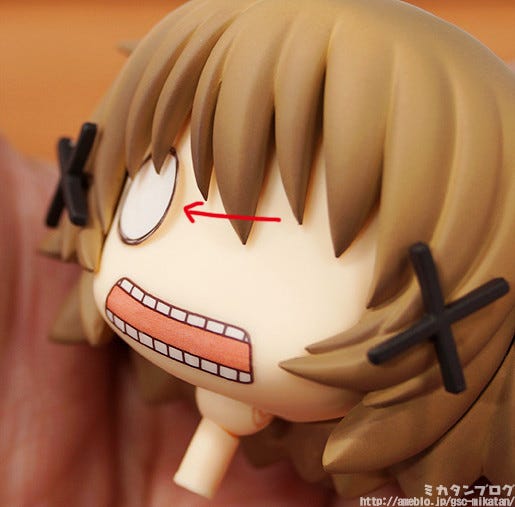
%e3%82%b1%e3%83%93%e7%94%a8
Be sure to check how it looks with the hair attached!

Before you stick the eye on completely, be sure to check how it looks with the hair attached. When sculptors are working on the expressions, they constantly have to check things like this!

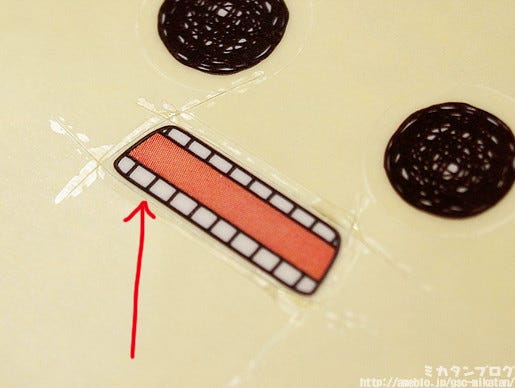
You can see from where the arrow is pointing that the sticker isn’t stuck on properly just yet. This is just for me to check! Now that I’ve seen it looks alright, I’ll stick it down properly.
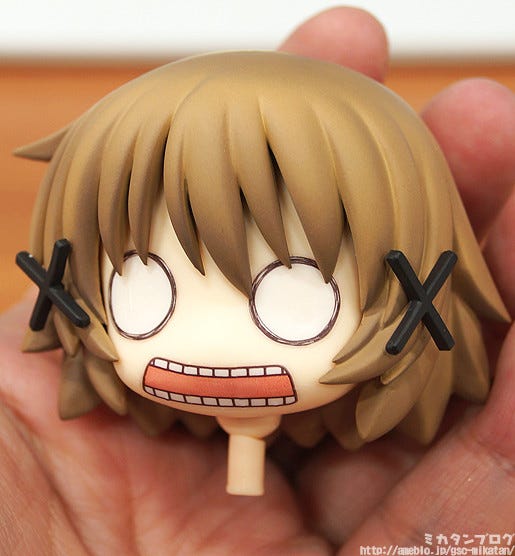
%e3%82%b1%e3%83%93%e7%94%a8
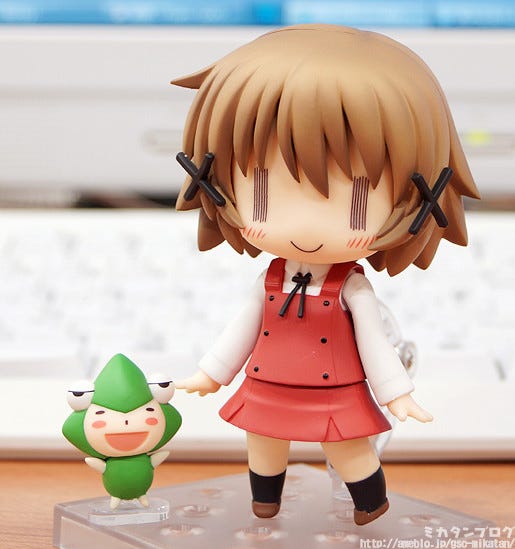
Complete ━━(゚∀゚)━━!!!!!

There we go! I think it came out looking rather nice! The curve on the expression for these eyes wasn’t bad at all, which is why I simply stuck them on as they were – there was no need to cut them.
%e3%82%b1%e3%83%93%e7%94%a8
But if you want even more quality…

If you cut off the extra, transparent area of the stickers before you stick them down, it’ll look even better! In Yunocchi’s case the stickers are very thin so I recommend a very fine craft knife if you want to try!

for those who are interested, the reason the stickers are so thin is so that once they’re stuck down they don’t protrude outward which would look a little strange. If they were any thicker it would be obvious that they were stickers.
%e3%82%b1%e3%83%93%e7%94%a8
I tried with another expression!

What do you think? I think she’s come out looking adorable! (That might just be because I stuck the expression on myself through :P)

As a final piece of advice, place stickers lower rather than higher!

Just like when I was painting my Nendoroid expression, when you first start sticking expressions on they tend to end up too high for some reason. Both Oda-P and Bird have told me this now and I still can’t figure out what it happens, but it does!

I know many people are too afraid they’ll mess up and tend to not try these things too often (I’m one of those people…), but I also think that doing things like this with your own two hands is one of the things that makes the hobby industry so fun! There are three of the same expressions included on each sheet with Nendoroids, so just keep trying and you’ll get it looking perfect!

It’s certainly easier to put stickers on than it is to paint the expression, but even just by placing the stickers, it still feels like you’ve put it all together yourself which is a lovely feeling! I really recommend everyone gives it a try!
But that’s all for today!
I hope to see you all again tomorrow!! (・∀・)ノ゛

© 蒼樹うめ・芳文社/ひだまり荘管理組合
Nendoroid Stands of the Past & Nendoroid Stand Tutorial!

The other day I received this email…

Hello, my name is Riru! I’m a big fan of your blog!

Ever since he was first announced I had been really looking forward to Nendoroid Kirito, so when he finally released I picked up two of him! However, this was the first time I’ve bought a Nendoroid, or a figure for that matter, and I wasn’t really sure how to set up the stand correctly. It made me think it might be nice to have an article that explains the basics of figures – things like setting up the stand and switching expression parts!

I managed to figure out the expression parts while worrying I was going to break something the whole time… but I’m still very confused about the stands. (I can’t seem to connect the parts together, and Kirito just won’t stand up nicely…)

Help me, Mikatan!!

There is no way I can ignore a request from a fellow girl!!

So today I’ll be writing a special article on Nendoroid stands! I hope it’ll be of use to Riru-san as well as any other newcomers to the figure world!!
001
But before we move onto today’s main topic…

I thought I’d start off with a short look into the history of Nendoroid stands and how they’ve evolved! In order to do so, we’ve come to the GSC stock room!

The box here is exactly what I’m looking for – the text reads ‘Round Nendoroid Stands’! I’ll be finding some older stands in here to show to everyone!
002
The first generation Nendoroid stands!

This stand really brings back memories for me! This is how Nendoroids used to stand!! For those who are interested, this stand belongs to Nendoroid #5 – Nendoroid Runaway Rin! These stands were just a circle with a U-shaped connection that held the Nendoroid up at the hips. I must also add that back with this stand, Nendoroids would fall over all the time! 😛

There was a slightly upgraded version of this stand which was articulated – it was used for Nendoroids #40-#50. The original Nendoroid Rin and Len made use of it!
003
The second generation stand!

This stand went by the nickname ‘The Chair Stand’ or ‘The Sitting Stand’! It was used by ‘seating’ the Nendoroid’s bottom onto the stand to hold them up. The stand you see here comes from Nendoroid #25, Nendoroid Kotona Elegance!

This was a lovely improvement from the U-stand, which let you pose Nendoroids with their lower half firmly in place and their feet just floating a little bit in the air. I remember being really excited when I first used this kind of stand!
004
The third generation stand!!

This was simply an improved version of the second stand! The connection to the circular stand was changed into a Nendoroid joint for more posing control! This stand was used from Nendoroid #63, Nendoroid Kureha!

There was a need to increase the angle of posing in order to pose Kureha with being pulled out from her, and thus this stand was created! It was actually around for quite awhile afterwards as well!
005
Moving on to Riru’s requested Kirito stand!

Kirito really is handsome isn’t he… even lying in the blister pack his expression is amazing! Nendoroid stands are generally found in the little opening at the very bottom of the blister pack. The stand is normally in a little packet – so let’s open it up and take a closer look!
009
The forth generation Nendoroid stand!

Also known as the ‘Square Stand’ or ‘Arm Stand’! A very different stand to the previous versions, as it has a square base instead of a circle and also has an articulated arm for various poses!

This stand started to be used from Nendoroid #120, Nendoroid Neko Arc: Ultimate Version! Initially it was made for the fully-posable edition series of Nendoroids, but then everyone realized that the stability and posability it offered was nice for any Nendoroid, and so it simply became standard!

The first thing to do is connect the side with the grey arrow!
008
Like this!

There are a number of holes on the stand – you can connect it to whichever one you want, except for the ones circled in yellow!

The circled ones are 4mm in size, the others are all 3mm in size. In case you’re wondering, the 4mm holes are used for Nendoroid Petites – which means you can display a standard Nendoroid with Nendoroid Petites on the same stand!

The red arrows show the articulated points!

These points basically separate the arm into a top, center and bottom part which can easy be moved around to create different positions! You can alter the height, alignment and angle the Nendoroid is facing – you can even display them jumping through the air!
006
The other side of the arm connects into the Nendoroid!

The connector is the part with the white arrow. You can see that the arm and the hole on the Nendoroid both have a hexagonal shape. The reason for the shape is that it allows for a nice fit, and makes it harder for the connection to accidentally come loose.

Occasionally, the hole may feel too stiff and just won’t connect to the Nendoroid nicely – this is normally when the temperature is low as the PVC plastic the Nendoroid is made from contracts in the cold. Try warming it up with a hairdryer or heater and then connecting it again!
007
Kirito: Complete!!

Now you just need to play around with the arm and get him into the position you want! By altering (1) you can change the angle and with (2) and (3) you can change the height he is standing at. You might find it easier to attach his optional sword onto his back after getting his position right on the stand.

If the arms feel loose and don’t seem to stay in place, grab a screwdriver and tighten the screws on the side – it fixed up the problem nice and quick! If the connection itself seems loose, try making the tip of the connector a little bit thicker with some glue in order to make it hold in place better. There is more information on how to do this in the link below.

DIY Figure Repairs Part 2: Reinforcing Joints
http://mikatan.goodsmile.info/en/2011/03/28/diy-figure-repairs-part-2-reinforcing-joints/
010
That brings my Nendoroid stand blog to an end!

I hope this was of some help to you, Riru-san! It was a rather crude explanation, but I hope you were able to get something out of it!

If anyone else has any queries, you’re welcome to send a mail through! (If you’re in a rush for an answer, it’d be best to send it through to the support team though!)

 
Anyway, that’s all for today!
I hope to see you all again tomorrow!! (・∀・)ノ゛


© 川原 礫/アスキー・メディアワークス/SAO Project

Jargon in the Figure Industry: Part 2

The jargon post on May 1st was rather popular!

Jargon in the Figure Industry:
http://mikatan.goodsmile.info/en/2013/05/01/jargon-in-the-figure-industry/

There were too many words to include in just one post so I only went through some of them, but even so I received a lot of messages from fans who learnt something from the post! Because of that, I decided I’d do a part two much sooner than I originally anticipated! (`・ω・´)
001
Today’s lecturer is once again Tori Bird!

Thank you once again, sensei! (`・ω・´)

By the time this blog post is upped, I believe he’ll be away visiting China… he’s always so busy, so I feel bad asking him to help with these posts all the time!

Just like last time, all the explanations are filtered by the Mikatan filter, so anything that’s too complex has been left out, but all the important info is still in tact! If you’re a part of the industry and think something isn’t quite explained right, let me know! I also included the Japanese words beside the English this time for those who are interested!

Mould ★★☆☆☆ (Kanagata)
006

This refers to the iron or other metal ‘template’ used to mass-produce figures. The moulds are made for each part separately based off the prototype. There are normally around 5-10 moulds for each Nendoroid, while a scale figure will have between 7-20 different moulds. For a more specific example, the 1/8th scale Ultimate Madoka made use of 13 moulds. 

Generally speaking these moulds can be used any number of times once they’ve been made, however sometimes when used too often, the metal can deteriorate causing the finer details of the sculpt to fall away. The previously mentioned T-1, T-2 and so on are used to make adjustments to the mould.

Example Use: “These tips look too dull, lets adjust the mould a little to fix them!”

More Info: http://ameblo.jp/gsc-mikatan-e/entry-10730147929.html

Injection Moulding Machine ★★★★★ (Shashutsuseikeiki)
007

Melted PVC & ABS is poured into a mould which is placed inside the Injection Moulding Machine, where it is then cooled to allow it to take the right form. Each one of these machines is manned by 1-2 people, who open up the door and take out each part for each figure as it completes. 

Even though the contents are cooled, they are actually still very hot when they first come out of the machine – sometimes water is poured over to prevent the shape from changing once the process is complete.

Example Use: “Try saying ‘Shashutsuseikeiki’ (Injection Moulding Machine) three times fast!”

More Info: http://ameblo.jp/gsc-mikatan-e/entry-10731094688.html

Cast Color ★★★☆☆ (Seikeishoku)
008

This refers to an unpainted cast created by the Injection Casting Machine. Parts that are skin-colored such as expression parts are often simply left unpainted as they are already the right color, and by not adding a layer of paint, unevenness can be avoided. There’s also no risk of paints rubbing off on other parts. 

Example Use: “Let’s just leave these parts as the cast color!”

More Info: http://ameblo.jp/gsc-mikatan-e/entry-10736119736.html

AQL Inspection ★★★★★ (AQL Kensa)

AQL stands for ‘Acceptable Quality Level’. During the AQL inspection, products go through a quality check and the number of defective parts must be under a certain pre-determined percentage. 

Example Use: “Once the AQL inspection is done we can ship out!”

China Southern Airlines ★★★☆☆
(Chuugoku Nanpou Kuukou)

An airline company that can quickly and cheaply provide tickets for urgent business trips to China for the manufacturing team. It also goes by the nickname “Chuunan”. 

Example Use: “I’m headed to China tomorrow through Chuunan!”

PO ★★★☆☆

002

Short for ‘Purchase Order’. Refers to the decided amount of each product that will be made. Without a PO in place and established with the factory, mass production of that figure simply cannot begin. 

Example Use: “Hurry up and get the PO done!” “The PO should be done by the end of the month.”

Draft Angle ★★★★★ (Nukikoubai)

003

In order to take the products out of the mould smoothly, some parts need to have a specific angle of inclination known as the draft angle. By adding this draft angle, the parts can be removed from the mould with much less friction and thus prevent unnecessary scratches or abrasions – all in all allowing for a higher quality part. 

This angle of inclination is generally not even 1mm, making it very difficult to make out with the naked eye.

Products that use a Draft Angle: Nendoroid Stands, graphig expression parts, bumps on Mechawooser, etc.

Surface Texturing ★★★★★ (Shibokakou)

005

This refers to the process of creating a fine texture (such as slight bumps) within the mould, in order to recreate that same texture on the final product. Sometimes this process makes use of sand and is thus also known as ‘sandblasting’. This creates a more matted appearance, prevents slippage and also makes small, unwanted scratches and marks less noticeable. 

Products that use Surface Texturing: The top side of standard Nendoroid stands, etc.

JJ ★★★★★ (Tori Bird’s Personal Vocab)

Short for the Japanese ‘Jirashi Jyouzu’, this refers to a long-waited sample coming through with a high level of completion. 

Example Use: “I’ve been waiting for this sample for ages! It’s a JJ! Just look at the great shape!”

That’s all for today! ヽ(゚∀゚)ノ
But there is still even more figure jargon to come!

Today’s words even included some things I had never heard of, such as the ‘draft angle’ and ‘surface texturing’! Even I have much to learn from the manufacturing team! I’m also sure the production team and other divisions also have all sorts of new words for us to learn!!

I’ll continue with these posts until I’ve covered all the words I can come across, then I can make a complete alphabetical list! (`・ω・´)
But that’s all for today!
I hope to see you all again tomorrow!! (・∀・)ノ

Jargon in the Figure Industry!

We’re currently in the middle of Golden Week!

006
Whether you’re still at work, relaxing at home or heading off on vacation, be sure to take good care of yourself during Golden Week! But at the same time make sure it’s a week to remember! (´∀`)

Today is one of the days in the ‘gap’ between public holidays, so I thought I’d do a bit of a relaxed post today.

I’ll explain some of the jargon used in the figure industry!

Just a bit of vocabulary for both those who are new to the figure scene, and also for those who just aren’t quite sure about some of the words that come up from time to time. Once you’ve read through this you might understand the world of figures a little bit better! (`・ω・´)

All the explanations are filtered by the Mikatan filter, so anything that’s too complex has been left out, but all the important info is still in tact. I hope I haven’t made any mistakes… 😛

007
Today’s lecture comes from Tori Bird of the manufacturing team!

A big thanks to him for his time! Let’s get started! (`・ω・´)

Prototype ★☆☆☆☆

001

This refers to something sculpted with a design knife or by hand from materials such as polyester putty, epoxy putty or clay. This prototype is then used to create casts in order to replicate each part of each figure. 

Normally about 4-5 sets of these parts are made from this original cast: one set is issued to the factory in China, another is sent for preparations at the factory, one is for painting use and another could be a sample, among other things. A ‘prototype display’ refers to the display of an unpainted figure, which is only coated with a surfacer, giving it the grey appearance you can see above.

Example Use: “Please send through the prototype to China sometime this week!”

Decomasu ★★☆☆☆

003

This is actually a shortened form of the words ‘Decoration Master’. This refers to one of the duplicate prototypes that has been painted. Often on the English blog this is also translated as ‘prototype’ , to avoid too much confusion with those who aren’t familiar with the figure world.

Normally two of these are made – one is sent through to the factory in China and another is kept for promotional use. These are what I review on the blog, before they appear on the GSC website.

Example Use: “I accidentally broke the Decomasu!”

Release ★☆☆☆☆

This refers to the time that a product goes up on the the GSC website (not the time the product is available for sale). It’s pretty much around the same time as the start of preorders, but because certain stores start preorders at a later stage than others, the term ‘release’ is used instead.

Example Use: “Please send the release text via email!”

PVC ★★★☆☆

The primary material used in the final product version of figures. PVC has a fairly sticky, soft feel to it which allows for very flexible shapes. When mixed together with a plasticizer, the degree of softness of the material can also be altered, which allows for the creation of the softer, more flexible parts often found on figures. Soft vinyl figures such as the 1/8th scale Mikudayo are hollow inside but also made from PVC. 

Examples of figures using ‘softer’ parts: Nendoroid Milky Holmes’ Capes / figma Anzu Futaba’s Shirt and more!

ABS ★★★☆☆

Another primary material used in the final product version of figures. It’s frequently used together with PVC on figures. It is considerably harder, more stable and better for casting than PVC, however it has a tendency to shrink in the manufacturing process which is its biggest downside. ABS is most commonly used for bases, weapons, robots – things that have a very exact shape.

Examples of Use: 1/8th Ultimate Madoka’s hair, swords on various figures, bases, etc.

T1 (T-One) ★★★★☆
004

This refers to the very first sample shape (such as the one above) which is sent through to the factories in China. ‘T’ stands for ‘Test Shot’. Once adjustments are made then they are sent back and forth, with each set of changes increasing the number to T2, T3 and so. Adjustments include to removal of unwanted marks or distortions, or changes to the fitting of the various parts of the figure.

These adjustments continue on and on until the OK is given, in which case a final version called ‘T-End’ is sent through and things move on toward the painting process. Once the T-End stage has been reached, it’s almost impossible to make further adjustments.

Example Use: “The T1 has arrived, so let’s get to checking it!”

1st (First) ★★★★☆
005

This refers to the first painted sample that is sent through to the factories in China. In order to differentiate them from the unpainted prototypes, the “T” is no longer used and the terms 1st, 2nd, 3rd and so on are used instead.

In the same way that that ‘T-series’ worked, any unwanted paint marks are removed and adjustments to the decomasu are made. Once these adjustments are all complete, it is referred to as the ‘Painted T-End’, and things can move along once again. The photo above of Nendoroid Dead Master is currently a ‘3rd’.

Example Use: “This is only the 1st, but it already looks pretty good!”

Signback ★★★★☆

002

This refers to the process whereby the sculpted and painted parts are given the OK, and then the date is written on them as two different sets are sent between the manufacturing team and the factory in China. The ‘signbacked’ versions and the production samples are then continuously compared to one and other to ensure that nothing goes off during manufacturing.

MF ★★★★★ (Tori Bird’s Personal Vocab)

MF stands for ‘Miracle Fit’. It refers to the point at which areas such as a Nendoroid’s neck, arms or other connected parts all fit together without any unnecessary gaps between them.

That’s all for today!

There’s still so much more I could cover…

I’m sure many of you who have been figure fans for awhile already knew a lot of these terms, but I hope this post may have made some small part more clear or explained some term you had never heard of before!

Perhaps I’ll cover some more jargon in the future! ヽ(゚∀゚)ノ

 
But that’s all for today!
I hope to see you all again tomorrow!! (・∀・)ノ

Sakura Miku Café & Project Diva -F- Café: Part 2

Part two of my Sakura Miku & Project Diva -F- Café report!

sakura-miku-cafe-project-diva-f-cafe-part-2
Yesterday I showed everyone how the store looked, but today I’ll be focusing on the food and drinks!! ヽ(゚∀゚)ノ

When it comes down to it, I guess the heart of any theme café is the menu! It was really hard to decide on what to get, but I eventually decided, so let me show everyone what I ordered! (`・ω・´)
009
Project DIVA -F- Curry: ¥980!

Aaah!! The carrots are the shape of the PS3 controls!! Σ(・∀・)
Plus the musical note in the centre between the rice and curry is made from cheese – which really brings out the flavour of the curry!!
012
The placemat that came with my curry!

Ordering meals from the DIVA-F menu allows you to get your hands on various different placemats! The design differs depending on what you decide to order, so take a look on the menu before you order if you want a specific design!

The placemat is of course yours to take home! You can also pay an extra ¥200 to have it laminated to keep it as good as new – simply ask the staff!
010
Sakura Udon: ¥780!

This is a lovely choice particularly for the girls, and you can even choose between hot or cold noodles! (I decided on warm!)

You simply dip the noodles into the sauce on the side (with cherry blossoms floating in it!) to add an absolutely amazing flavour!!
014
I’m getting quite full now, but I can still keep going!!
Sakura Miku 3-Color Dango: ¥680!

Each order includes three sticks each with three dango, plus green tea is also included! Each of the dango are also quite big, so if you’re feeling peckish it’s definitely a good choice!

Plus!! Don’t any of you think this plate looks familiar?
It’s based directly on the cherry blossom stand included with Nendoroid Sakura Miku!! The café team just made a few adjustments to use it in store!!
011
Ordering the udon or dango will get you this placemat!

You get to take home an adorable placemat illustrated by Puti Devil!! Just look at it, it’s almost too cute! You can enjoy this adorable Sakura Miku whenever you like!
013
Sakura Café au lait/Milk Tea: ¥580

This has some cherry blossom syrup in it, which really gives a slightly sweet taste that calms the nerves… I chose the café au lait, but you can instead pick milk tea if you prefer!

A little bit of cream is also provided on the side, allowing you to adjust the sweetness to your liking – the syrup is already quite sweet though, so just add a little bit at first until you get it how you like!
015
Sakura Beer: ¥680!

A mixture of the cherry blossom syrup and beer!! It’s super tasty!!

It has a slightly sweet taste to it, so I’d even recommend it to girls who don’t normally like beer!! You can also choose between both alcoholic and non-alcoholic versions!

Beer and viewing cherry blossoms go hand-in-hand with each other, and now everyone can enjoy the experience!
016
The coasters that came with the drinks!!

The left one came with the beer, and the right with the café au lait!
They’re also super adorable!! You just want to grab them all!! (((゜Д゜)))
017
By the way…

If you order from the DIVA -F- Menu, you’ll get a little medal that looks like this! But just what is this for…? Well…
018
You can use it at the in-store capsule machine after your meal!

There is a special capsule machine filled with Miku badges!! There are a total of 18 to collect!! Don’t forget to get your badge if you decide to order from the DIVA -F- menu!
020
There are also Sakura Miku badges on the opposite side of the register!

These don’t use the medal I showed before, each one costs ¥300! These ones are a lot bigger though – there are a total of six to collect and each features a Nendoroid-like illustration based on Puti Devil’s designs!

That brings my Sakura Miku & Project DIVA -F- Café report to an end!

Well… what did you think?

I’m really not that good when it comes to food reports (as those who watch the GSC live broadcasts will know), but I hope that at some point while reading this you thought ‘that looks tasty’, ‘that looks like fun!’ or ‘I think I should go too!”.

I’m sure there will be many more interesting theme cafés coming up soon for everyone to enjoy, so keep your eyes on the GSC Tetsu Café!! (`・ω・´)

Good Smile & Karaoke no Tetsujin Café
http://www.gstjcafé.jp/

 
But that’s all for today!
I hope to see you all again tomorrow!! (・∀・)ノ゛

Sakura Miku Café & Project Diva -F- Café: Part 1

001
The 5th floor of the Akiba Cultures Zone:
The Good Smile & Karaoke no Tetsujin Café!

Even though it’s a weekday, there are still so many customers visiting the store! Thanks everyone!! The theme of the café is very special to me, so I hope that everyone who comes by will enjoy it thoroughly!!

The previous photo was taken at the sales area in the café, which stocks goods from all the previous theme cafés! If you just want to stop by to use the sales corner without making use of the café, feel free to do so – you can get your hands on some really lovely goods!
003
A Sakura Miku tote bag!

Ooh!! It’s so cute, and only ¥1,300! I almost couldn’t resist buying it for myself…
It’s a very popular product, so there are times when it won’t be in stock though, so do keep that in mind!

By the way, Nendoroid Sakura Miku is also on sale at the café at the moment! There is limited stock of this too, but you can keep your eyes on the GSC-Tetsu Café Twitter account for stock updates! (Japanese)

GSC-Tetsu Café Twitter
http://www.gstjcafé.jp/
005
Time to head into the café area!!

There are currently four themes going on at the café: Vivid Red Operation, Boku wa Tomodachi ga Sukunai NEXT, Hatsune Miku Project DIVA -F- and Sakura Miku! Just inform the staff which theme you’d like to sit at!
019
The music in the café is Miku music!!

Plus the PVs found in the PS3 game ‘Hatsune Miku Project DIVA -F-‘ are all shown on the screens around the café! Songs collected on the KARENT website are also used as music for the café!

Your eyes, ears and mouth are in for a Miku treat!
006
Cherry blossom viewing at the Sakura Miku corner!

Last year we also had a Sakura Miku café, which went down very well with the fans. This year we have Puti Devil’s illustrations on display inthe corner for fans to enjoy. This Sakura Miku is just too adorable!! I swear the first time I saw this illustration I got goosebumps because she looked so lovely! 😛
004
I got a ‘DIVA-F’ themed table!

Which means I get to stare at all the cute Miku modules while enjoying my food!! I specially didn’t eat lunch today to save up for this, so I’m definitely ready for some food!! (I’m happy to get fat for Miku-san!! (`・ω・´))
008
The Project DIVA-F- Menu!

Four different meals, six desserts and six drinks – so much to choose from!!
… and I want them all!!!

– Meals –
Project DIVA -F- Curry
Miku-Luka Two Color Pasta
Rin-Len Loco Moco
MEIKO & KAITO Plate

– Desserts –
Tell Your World (Hatsune Miku)
Tokyo Teddy Bear (Kagamine Rin)
Yume Kui Shirokuro Baku (Kagamine Len)
DYE (Megurine Luka)
Haiwa Haini (KAITO)
Stay with me (MEIKO)

– Drinks –
Linkage (Hatsune Miku)
Scissors (Kagamine Rin)
Tricker (Kagamine Len)
Eternal White (Megurine Luka)
Requiem (KAITO)
Blue Crystal (MEIKO)

Plus every single product comes with a badge, meals comes with placemat and desserts and drinks come with a coaster! So much stuff!! (((((゜∀゜)))))

For more details, you can check the official website below!

– Hatsune Miku Project DIVA-F-café
http://www.gstjcafé.jp/theme-café/1585/
007
The Sakura Miku Menu!

There aren’t quite as many options for the Sakura Miku side, but the menu look so cute!! On the right side you can see Sakura Miku holding onto a white dango, which is one of the options on the menu! She’s so adorable!!

– Meal –
Sakura Udon

– Dessert –
Sakura Miku 3-Color Dango

– Drinks –
Sakura Beer
Sakura Café au lait/Milk Tea

This menu also comes with a place mat if you order the meal and a coaster for drinks and desserts! They feature Puti Devil’s super cute illustrations!! How could anyone say no to that?!

– Sakura Miku Café –
http://www.gstjcafé.jp/theme-café/1581/

Anyway, I’m starving so I’m going to order now, but…
I’ll be continuing this post tomorrow!!

I’ll be eating so much that you’ll never believe it’s just for one person!!
Those who want to see what the actual meals look like can look forward to it!

But that’s all for today!
I hope to see you all again tomorrow!! (・∀・)ノ゛

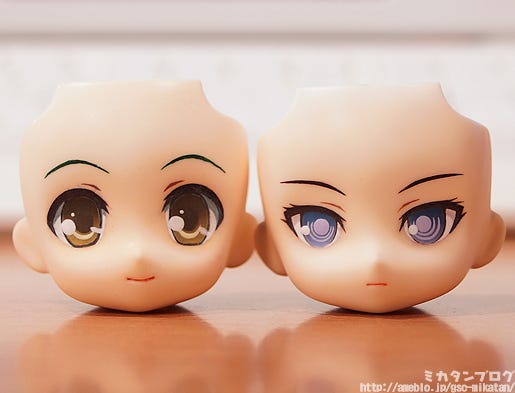
[Bonus] Painting a Nendoroid Expression: The Team’s First Expressions!

The expression painting series ended a few weeks back!

goodsmile company Mikatan's Blog English Version
Here we have the Mikatan Miku-san!

There are a lot of things that could still be improved, but I still think she looks cute for my first ever expression! 😛

You can do everything besides the gradient with pretty simple tools, and it’s actually so much fun to watch the expression slowly take shape! If you missed out on the series, be sure to take a look at the complete series linked below!

Painting a Nendoroid Expression Part 10: Adding a Matte and Blush
Painting a Nendoroid Expression Part 9: Adding in Highlights
Painting a Nendoroid Expression Part 8: Applying the Gradient
Painting a Nendoroid Expression Part 7: Preparing to Apply the Gradient
Painting a Nendoroid Expression Part 6: Pupils and Shadows
Painting a Nendoroid Expression Part 5: Mixing Colors and Eyebrows
Painting a Nendoroid Expression Part 4: Preparing to Apply Color
Painting a Nendoroid Expression Part 3: Continuing to Paint the Eye Borders
Painting a Nendoroid Expression Part 2: Painting the Eye Border
Painting a Nendoroid Expression Part 1: Basic Knowledge & Tools
goodsmile company Mikatan's Blog English Version
Today as a little follow-on from the series, I’ll be taking a look at some of the first Nendoroid expressions made by others!

Most of the staff in the production team didn’t seem to like the idea of me putting their work up on the blog, but I hope it’ll inspire other people to try themselves!

All the expressions in this blog (except for the last one) were all just done as personal practice – they were never used in any actual products.
goodsmile company Mikatan's Blog English Version
Seibu-kun from the production team!

The sculptor of Nendoroid Snow Miku: Strawberry White Kimono Ver.!

At the moment he only works on the sculpting and coloring of figures, but one day he is aiming to be able to do the expressions as well! The very first expression he made was this one!
goodsmile company Mikatan's Blog English Version
It does look a bit too spread out…

I also think the eyes are a bit slanted… it’s a nice simple expression though!

Just as Oda-P said, the first time you paint an expression, the eyes will almost always end up looking slanted. Even looking at my Miku expression above, the eyes are definitely not quite straight… expressions certainly aren’t easy!
goodsmile company Mikatan's Blog English Version
Expression Artist-chan #1

This is the painter who was in charge of all three of Nendoroid Snow Miku: Strawberry White Kimono Ver.’s expressions! While they were still in the rough stages I checked the expressions myself, and there were almost no changes that needed to be done!!

Kawapon taught all the expression artists, and the fact that they’re all so good at their job really shows just how well he taught them!
goodsmile company Mikatan's Blog English Version
These both look really difficult!!

Trying characters with such difficult expressions first must have been quite the challenge. The expression on the right is overall a little bit too big, and I think the eyes are a little bit too far apart. I think if the pupils were a little bit bigger and the line beneath the eye was shorter then it’d look great!

Of course that is all much easier said than done – I know I’d never be able to apply my own corrections. Once you try painting the expression yourself you realize just how hard it is!
goodsmile company Mikatan's Blog English Version
Expression Artist-chan #2

This is the artist behind the Nendoroid Petite Hatsune Miku Selection expressions! The set had many different fan-made characters that were all still basically the same character, which makes emphasizing the little features on the expressions all the more important.

They all came out looking absolutely adorable, so don’t miss out on them!

– Nendoroid Petite Hatsune Miku Selection –
http://www.goodsmile.info/product/en/3853/
goodsmile company Mikatan's Blog English Version
It’s not easy to get the lines equally thick on both sides!

You can definitely notice the difference in the thickness of the lines on the left expression here. This is really just a matter of practice, and the more you work on expressions the better you’ll become at judging the thickness of each line.The things you need to watch while working on the lines is that they look correct, cute and visible to the right degree.

If you compare these expressions to the ones above, you’ll notice that even though they’re the same characters they look considerably different! Even the smallest of details are important with expressions, so when just a few small things differ the expression can look completely different!!
goodsmile company Mikatan's Blog English Version
Lastly we have Oda-P!!

I’d be lying if I said this blog wasn’t made for this section! 😛

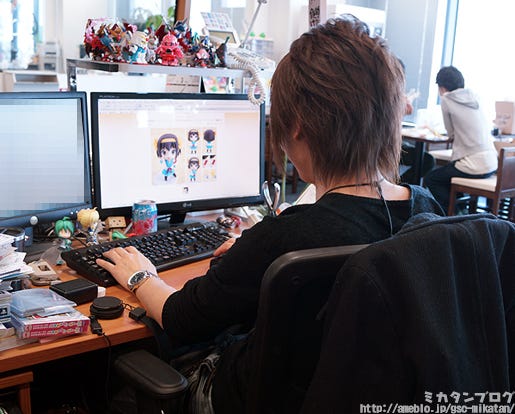
Oda-P can draw almost any characters expression in such a cute way now… but his very first expression was in fact… this one!
goodsmile company Mikatan's Blog English Version
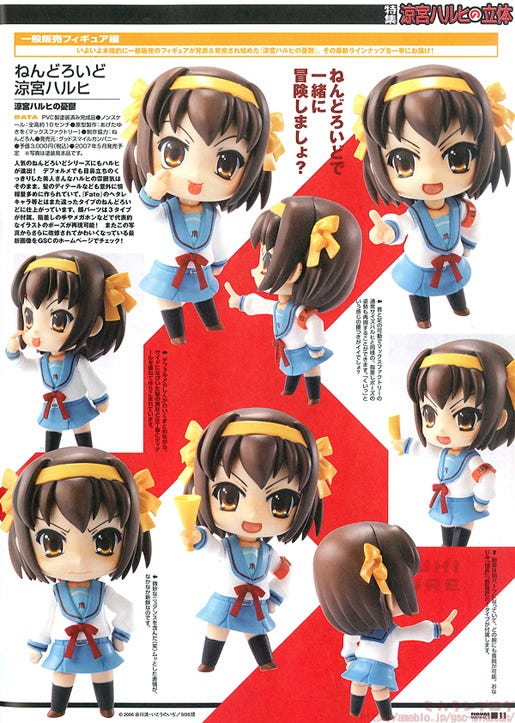
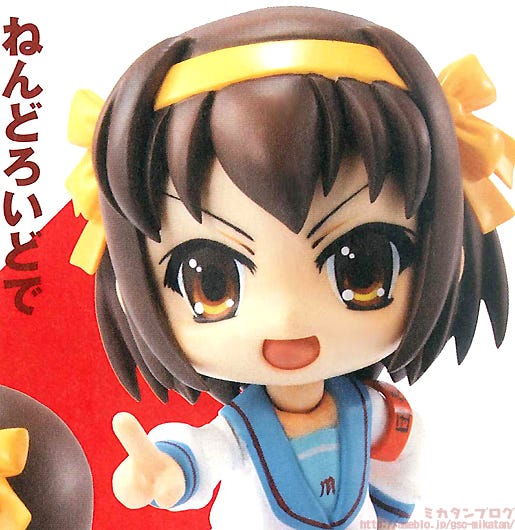
The fabled Nendoroid Haruhi!!

Apparently Oda-P spent just 4 hours working on this expression so that it could be put in this magazine in time. This is the March 2007 edition of FIGURE Maniacs – that’s from 6 years ago!!!

At the time, Oda-P didn’t think expressions could possibly take all that long, but once he started he realized just how much work they were! It’s one of those things that’s hard to grasp until you actually try it for yourself!!
goodsmile company Mikatan's Blog English Version
It certainly packs quite a punch…

It’s not too bad, right? Shortly after the magazine was published, Kawapon went and redid all of Haruhi’s expressions… which means these expression by Oda-P are actually incredibly rare!

Apparently Oda-P himself had specially been avoiding looking at them again, but went back to them just for this blog post! 😛

Conclusion:

Nobody is good at expression painting from the start!

The more you practice, the better you’ll become! Practice makes perfect!

This blog is here for all those that are trying to paint an expression and feel it isn’t going well. Just remember that everyone has to start somewhere! If you believe you can get better and are determined to do so, then you should be able to make perfect expressions with some practice!

Don’t forget about the Sculptor’s Tryout & Finisher’s Tryout: 2013 Spring!
The deadline for applications is Sunday, the 31st March!

Sculptor’s Tryout & Finisher’s Tryout: 2013 Spring
http://www.goodsmile.info/post/ja/3624/

Anyway, that’s all for today!
I hope to see you all again tomorrow!! (・∀・)ノ゛

The GSC Product Release Schedule Page

Hello everyone! This is Oonoshi from the Web team, you might remember me from a couple of months ago! Mikatan-sensei came down with a fever, so I’ll be taking over the blog for today once again!

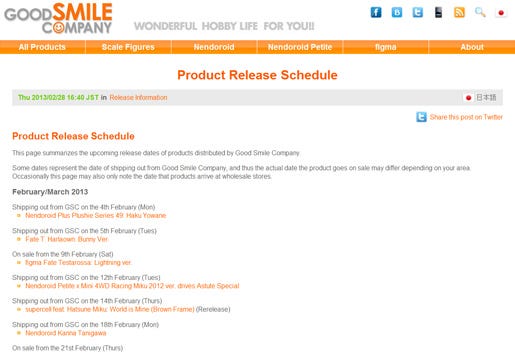
Today I’ll be taking a look at the Product Release Schedule on the GSC site!
A
I’ll be explaining all the different kinds of releases found on this page, and I have Nagaizumi-san from the sales department to help with the explanations! The three different types of release are

‘Shipping out from GSC’, ‘Arrival at Wholesale Stores’ and ‘On Sale’

There are quite a few different possibilities! When I first joined GSC, this was one of the first things I needed to learn. Let’s find out from Nagaizumi-san what each of them means! (`・ω・)


‘Shipping out from GSC’

Nagaizumi:
“This refers to the day which we send products out from the GSC warehouses out to wholesale stores. If you look at the schedule at the moment, this would mean that the recently released Nendoroid Kanna Tanigawa was sent out to wholesale stores across Japan on the 18th February.”

Ah-hah! So that means that the exact day which the figure reaches the different wholesale stores will differ. Plus the wholesale stores still need to send the products out to the consumer stores, so the exact date they’ll be available can differ depending on your location.

So for example, if Nendoroid Kanna Tanigawa was shipped from GSC on the 18th February, it would first take a day (or two for distant areas or islands in Japan) to reach the wholesale stores, and then it’ll still take another 1-2 days to reach everyone’s favorite hobby stores… which means you’d probably see her in stores from between the 20th and the 22nd of February.

Which means of course that Nendoroid Kanna Tanigawa is now on sale in stores, so don’t miss out on her! ^^


“Arrival at Wholesale Stores”

Nagaizumi:
“This refers to the day that the products should reach the wholesale stores. On the current Product Release Schedule, this would mean that the Nendoroid Petite: TYPE-MOON COLLECTION will reach all our wholesale stores on the 25th February. Unlike ‘Shipping out from GSC’, the products should reach wholesale stores all over Japan on that same date.

So the products will reach the wholesale store on that day, and thereafter be sent out to the respective consumer stores. In other words the products should be on sale slightly closer to the stated date when compared to the previous “Shipping out from GSC’.

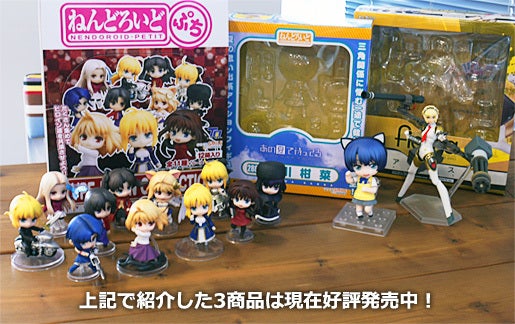
For example, the Nendoroid Petite: TYPE-MOON COLLECTION will reach the wholesale stores on the 25th February, and should be in stores from the 26th-27th February! That means that the set is also in stores now!


‘On Sale’

Nagaizumi:
“The ‘On Sale’ is quite special and usually only relates to the figma series. As you’d expect, it means that the product will be lined up in stores and on sale from that date.”

I see, I see. So figmas have a special release date that will always be the same across Japan. This has been the way Max Factory has worked it for some time now!

So for example, figma Aigis The ULTIMATE ver. will be on in stores and on sale from the 28th February!


goodsmile company Mikatan's Blog English Version
So that’s the reasoning behind the three different types of release dates. Be sure to check out the upcoming Product Release Schedule if you want to know when during the month a certain figure is expected to be available.

Obviously these dates are for Japan, so if you’re in a different country the products will take longer to reach you! Plus figures can also be delayed by various unforeseen circumstances such as the weather – we’ll keep the schedule updated with any changes!

I hope the next time you’re checking through the schedule this post will have taught you something!

But now I’ll be passing the blog baton back to Mikatan!