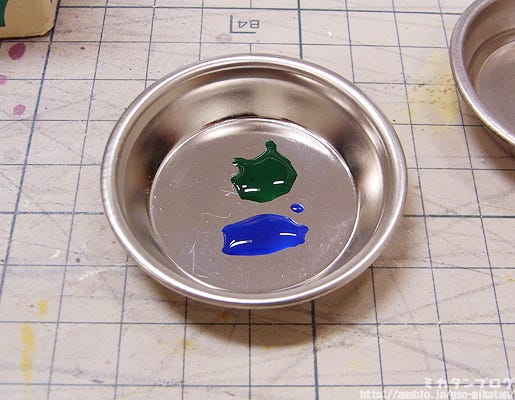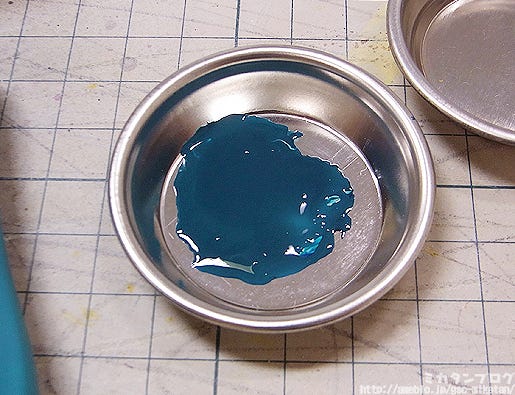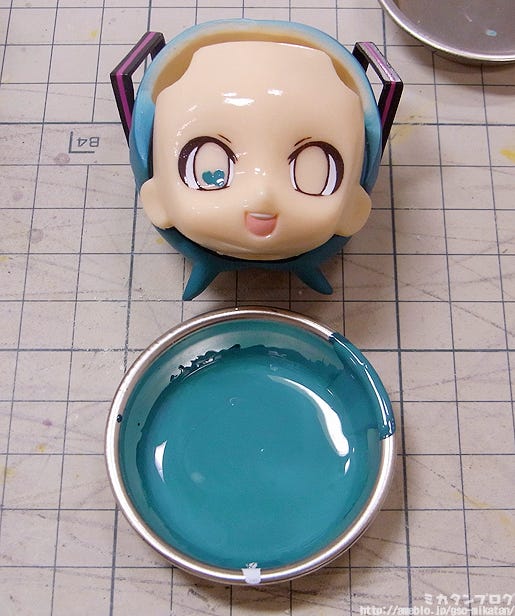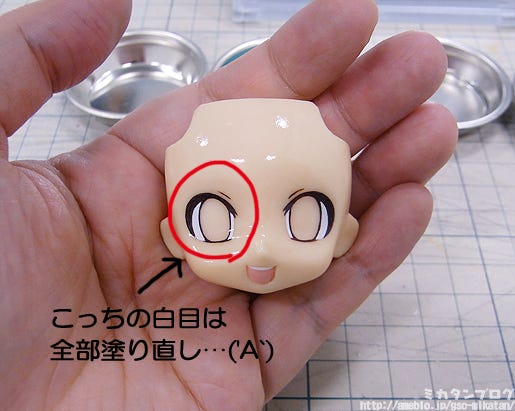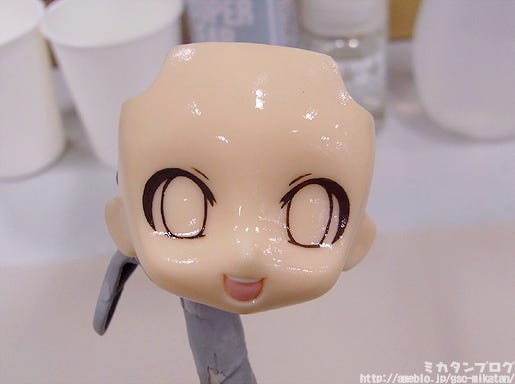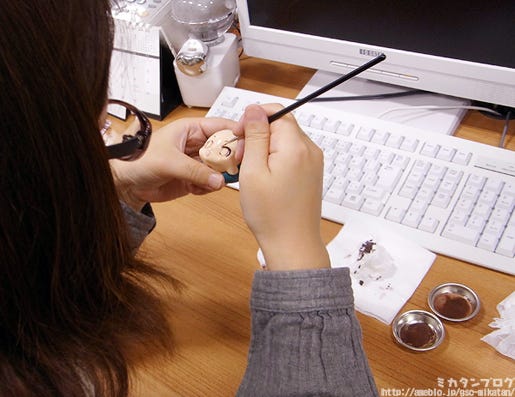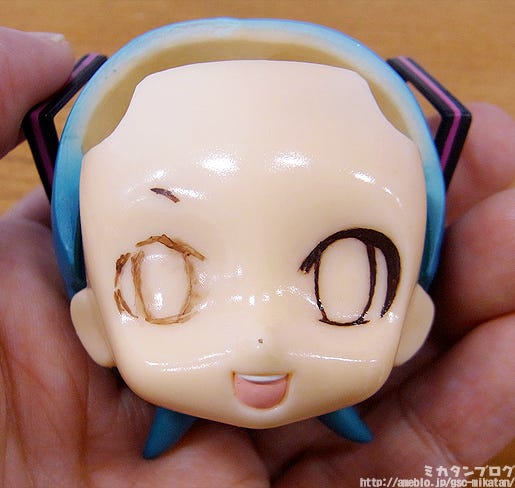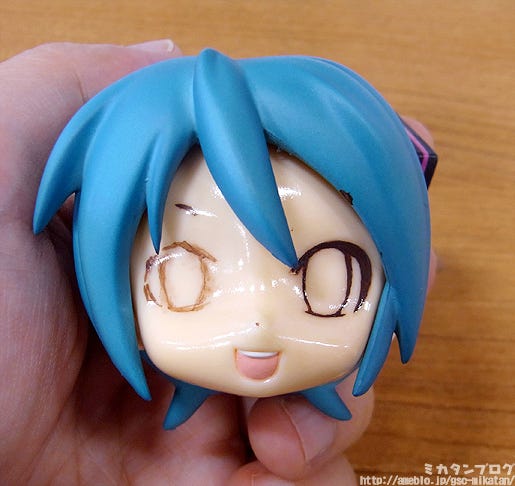
[Final] Painting a Nendoroid Expression Part 10: Adding a Matte and Blush

The grand finale of the expression series!
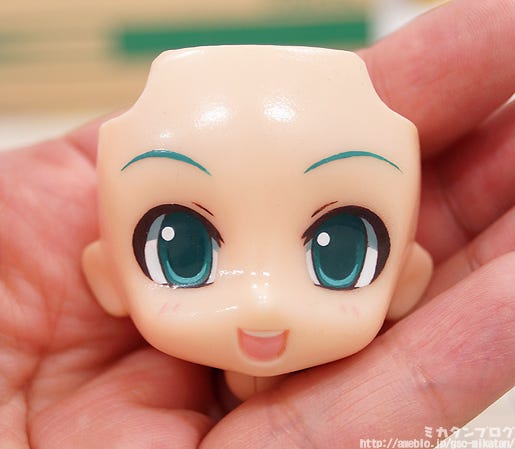
goodsmile company Mikatan's Blog English Version
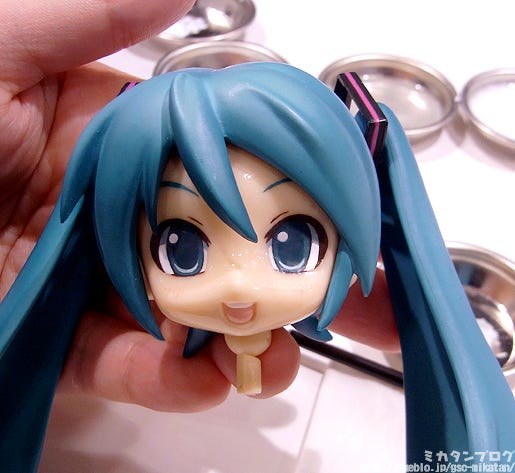
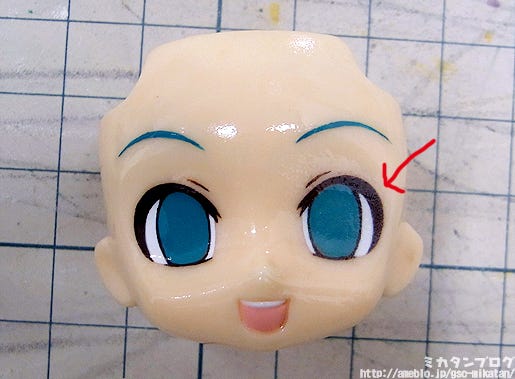
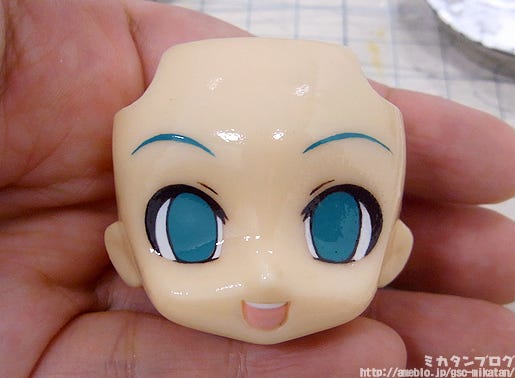
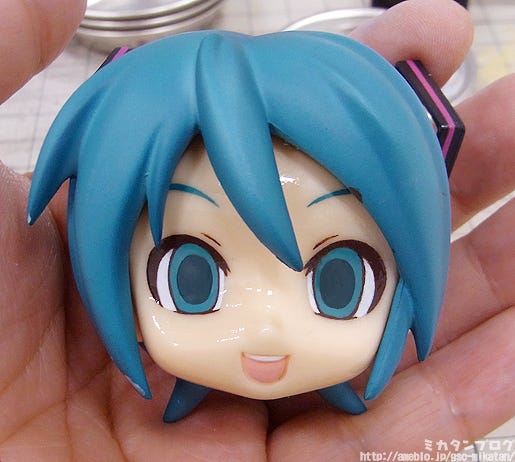
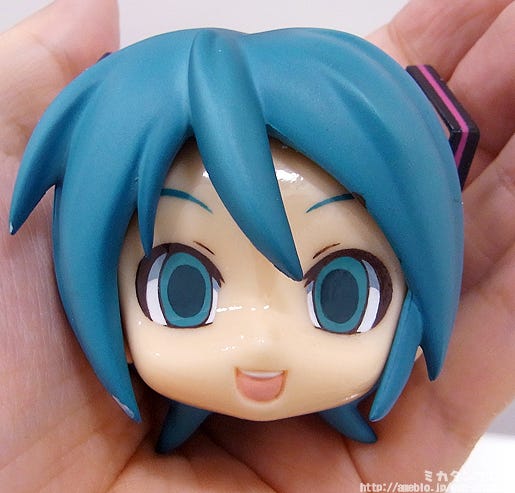
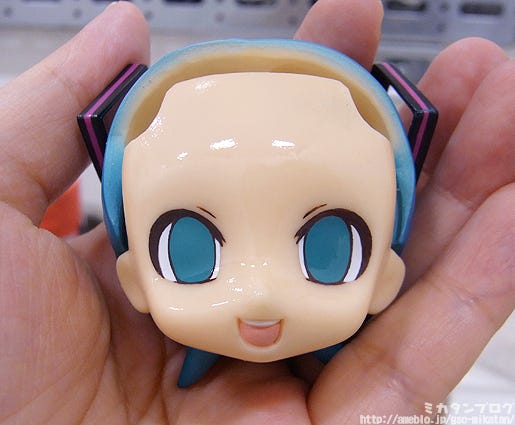
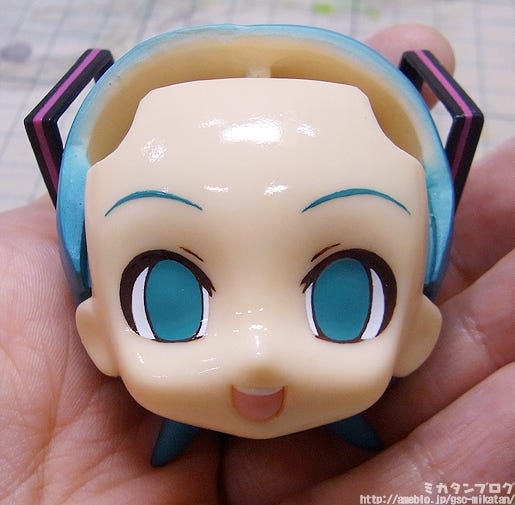
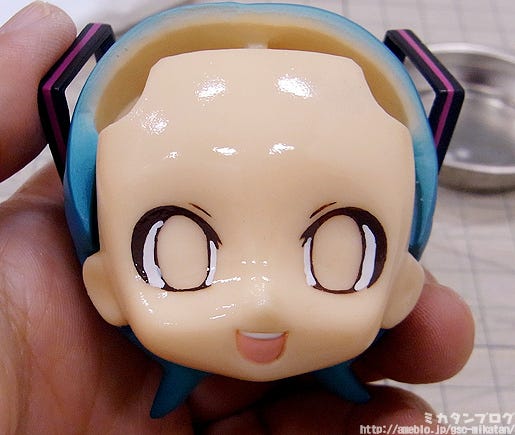
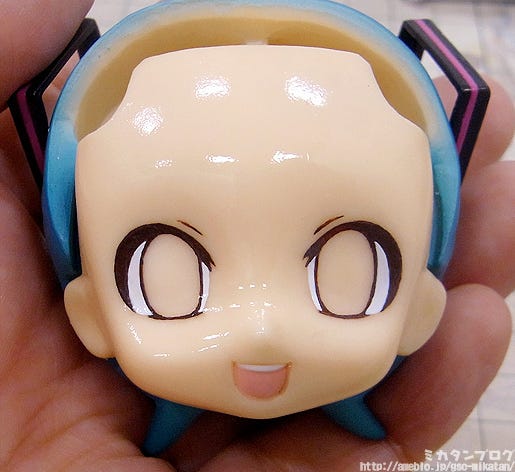
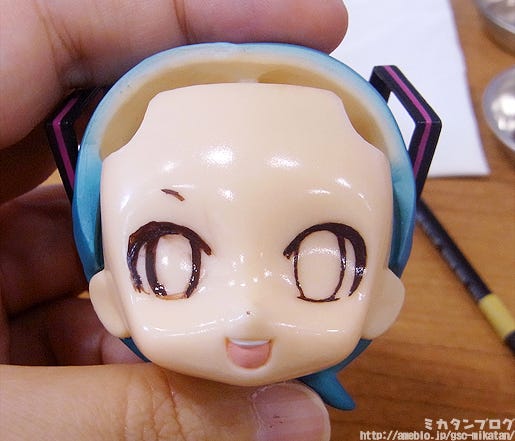
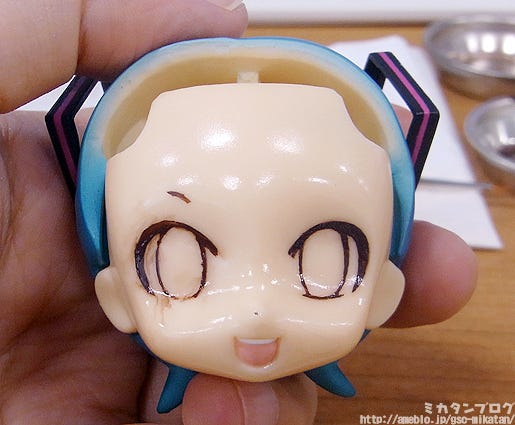
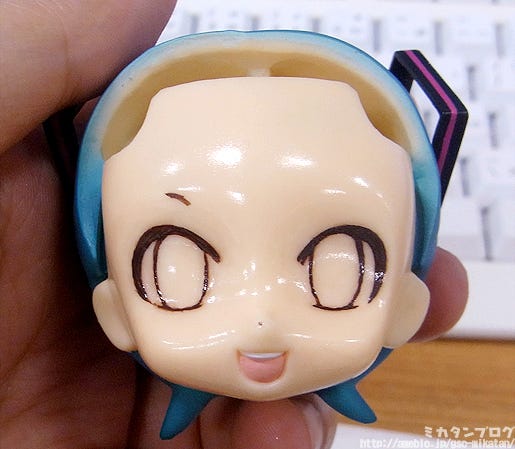
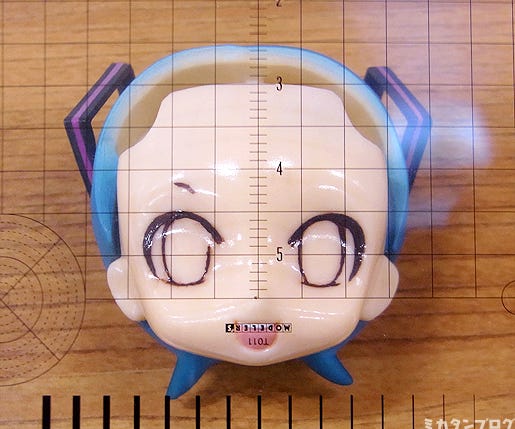
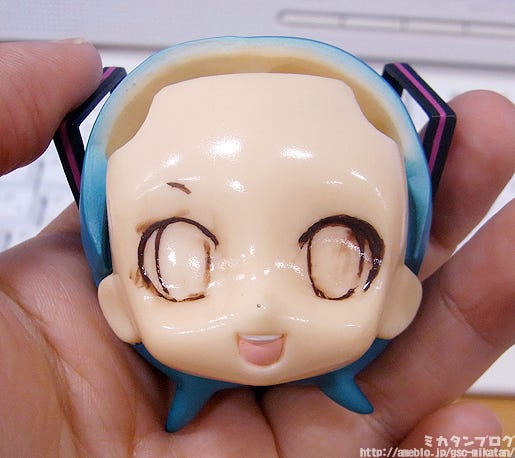
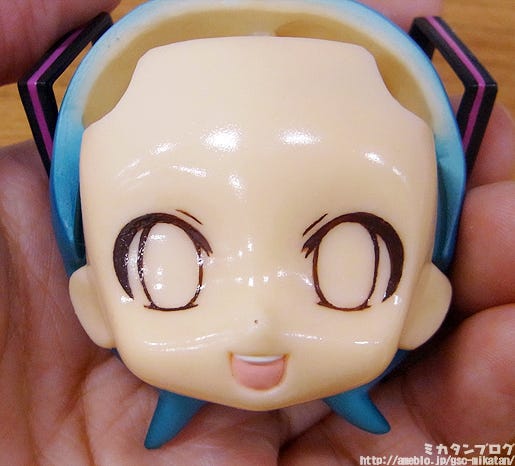
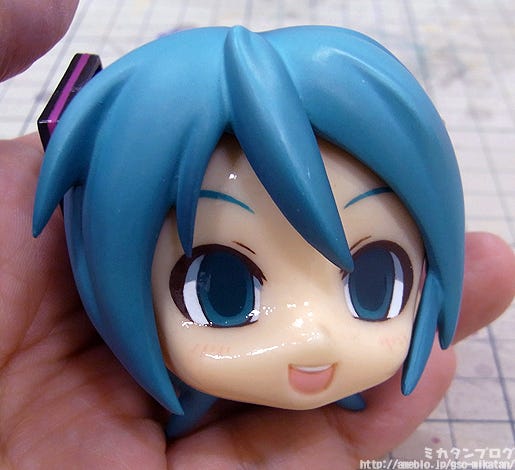
This is the expression as it stands!

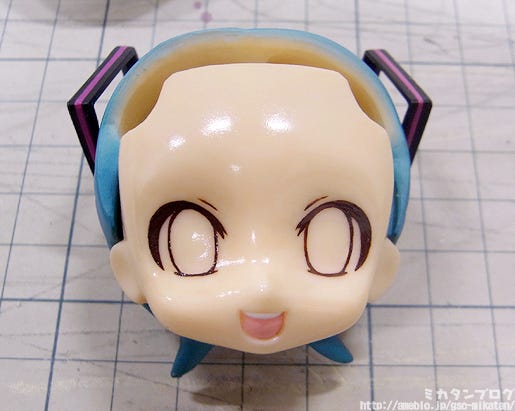
I started painting this expression back on the 7th November… it’s been almost three months and I’ve finally managed to get this far! It’s been a long journey!

At this point I’ve completed all the painting, I just need some finishing touches which I’ll do today! This includes getting rid of the shine on the face with a matte and adding in a little blush!!

You can find the previous posts in this series here:
Painting a Nendoroid Expression Part 9: Adding in Highlights
Painting a Nendoroid Expression Part 8: Applying the Gradient
Painting a Nendoroid Expression Part 7: Preparing to Apply the Gradient
Painting a Nendoroid Expression Part 6: Pupils and Shadows
Painting a Nendoroid Expression Part 5: Mixing Colors and Eyebrows
Painting a Nendoroid Expression Part 4: Preparing to Apply Color
Painting a Nendoroid Expression Part 3: Continuing to Paint the Eye Borders
Painting a Nendoroid Expression Part 2: Painting the Eye Border
Painting a Nendoroid Expression Part 1: Basic Knowledge & Tools
goodsmile company Mikatan's Blog English Version
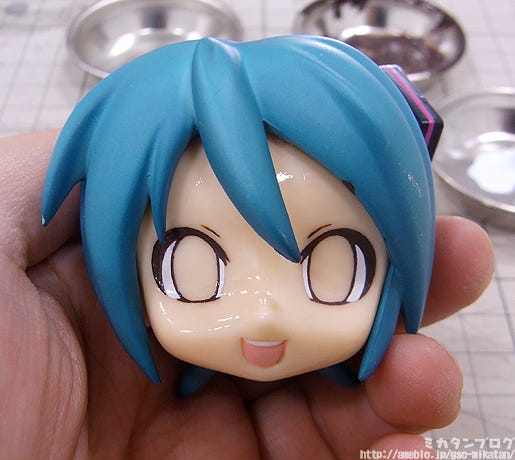
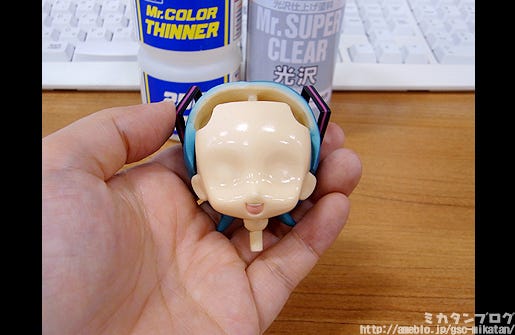
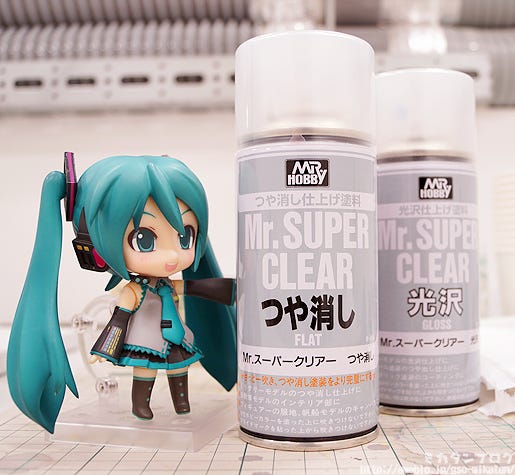
Time to remove the gloss from the face!

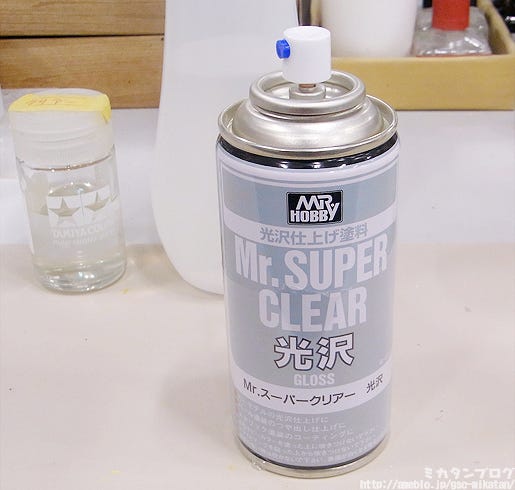
Each time I ‘saved’ my expression using lacquer paint I did so using the ‘gloss’ spray you see on the right hand side here – the smooth surface it creates is much easier to paint on.

But now the face looks too shiny, so I’m going to apply the matte on the left to make the face look less shiny and more like skin again!

– Saving with Lacquer Paint (Gloss) –
http://mikatan.goodsmile.info/en/2012/11/15/painting-a-nendoroid-expression-part-4-preparing-to-apply-color/
goodsmile company Mikatan's Blog English Version
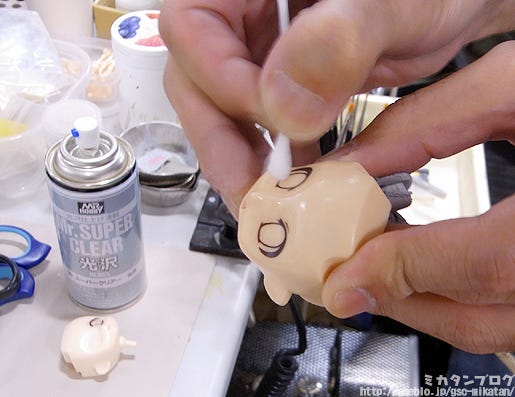
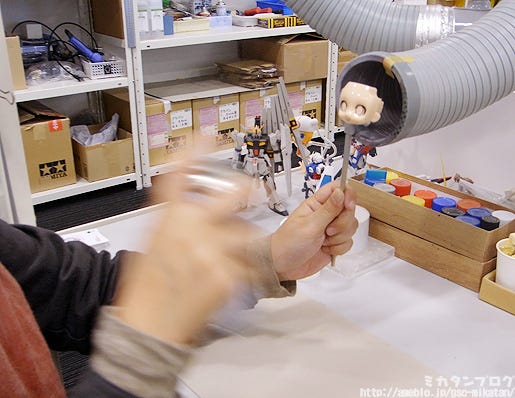
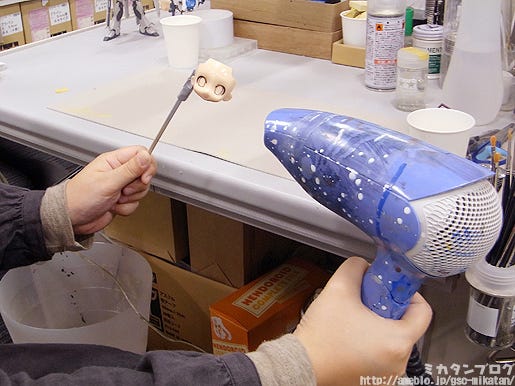
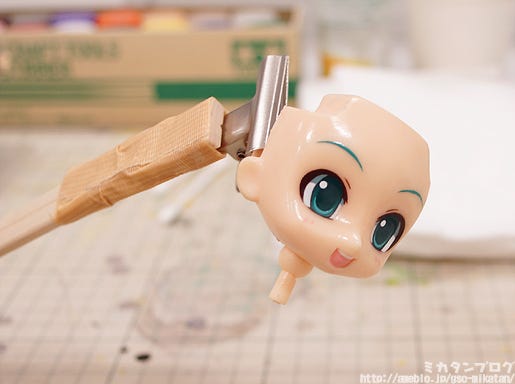
Spraying on the matte finish!

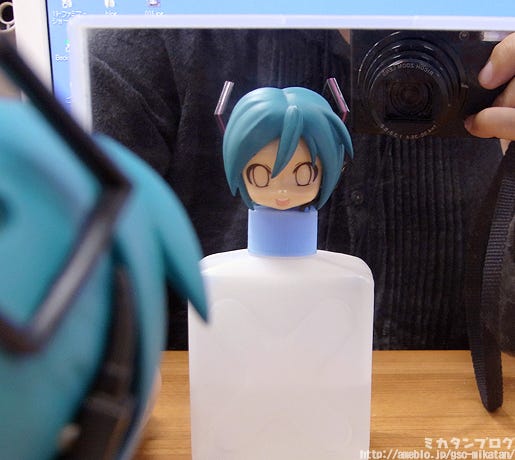
This works exactly the same way as the ‘saving’ did in the past – a quick spray, then some time to dry, then another quick spray… and so on!

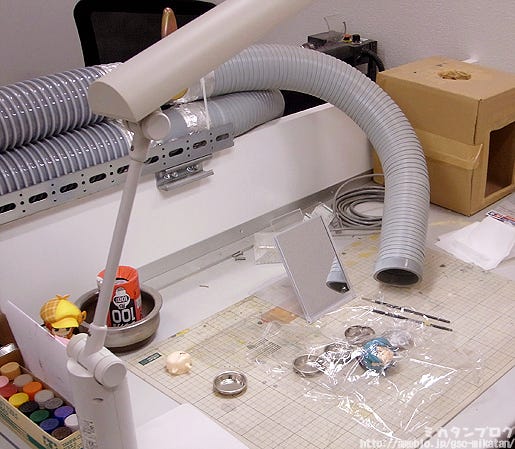
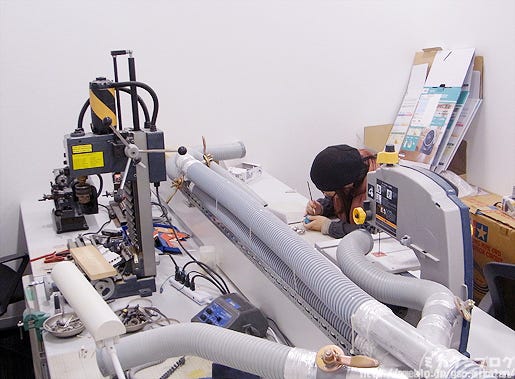
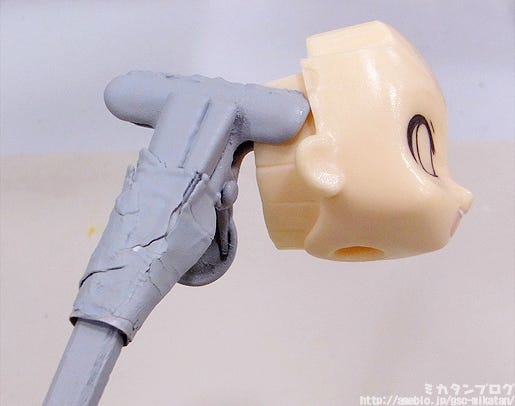
A little unrelated, but the stick with the clip holding the expression up for me here was made by Seibu-san from the production team! (Strawberry Snow Miku’s sculptor!) Everyone uses tools like this, but I felt like a part of the sculpting team when I was allowed to use one! 😛
goodsmile company Mikatan's Blog English Version
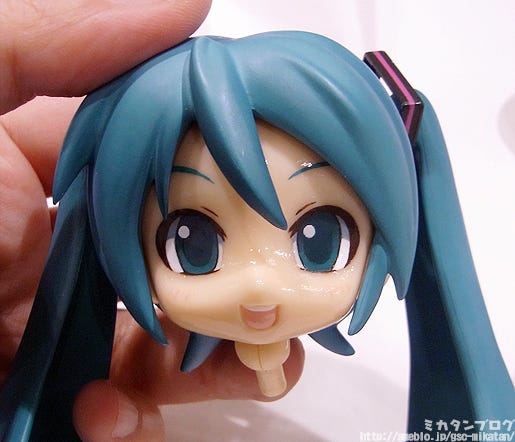
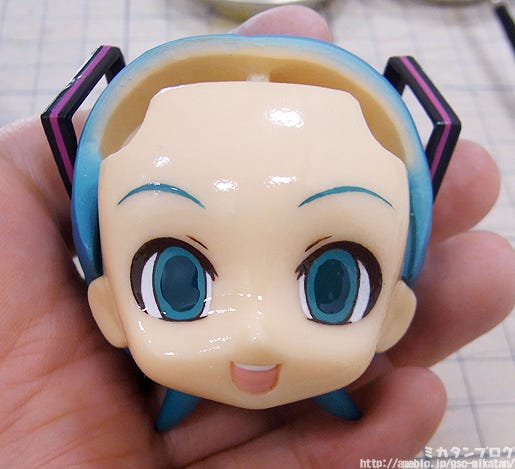
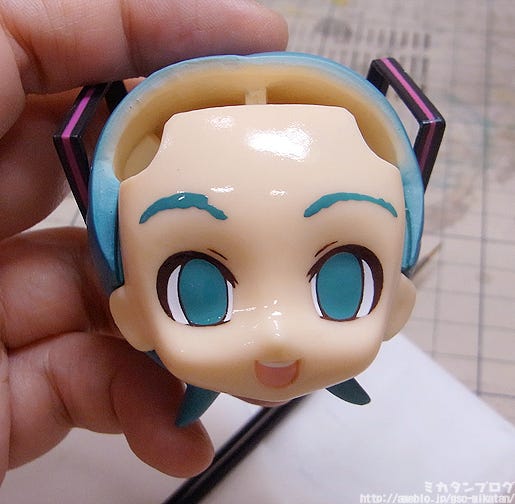
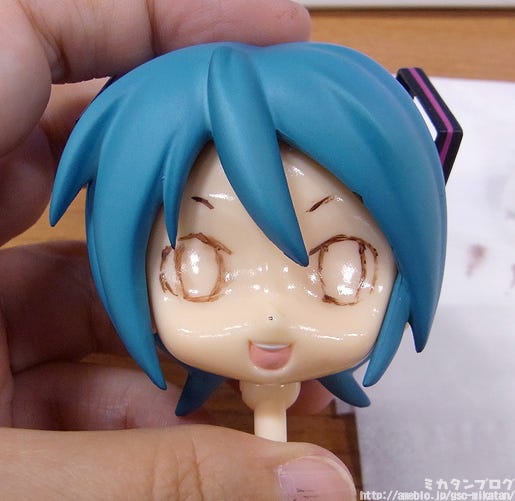
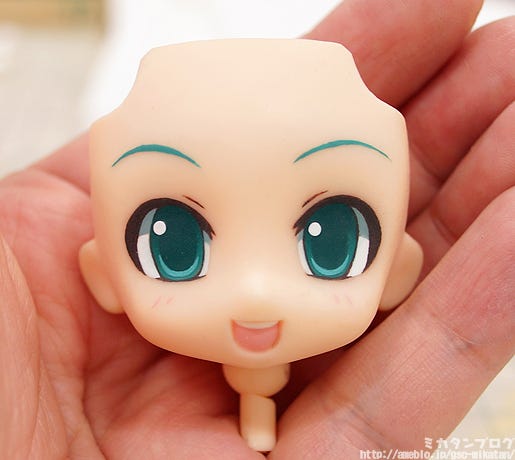
The shininess is all gone!

Ooh! It’s starting to actually look like a Nendoroid expression now!!

The bumpy bits from the lacquer layers and thicker paint that caused uneven areas actually also look a bit better now that I’ve put the matte layer on too!

Be careful though… if you put too much on it’ll end up looking a bit white and get a kind of rough texture, so be sure not to put too much on and mess up all the hard work!
goodsmile company Mikatan's Blog English Version
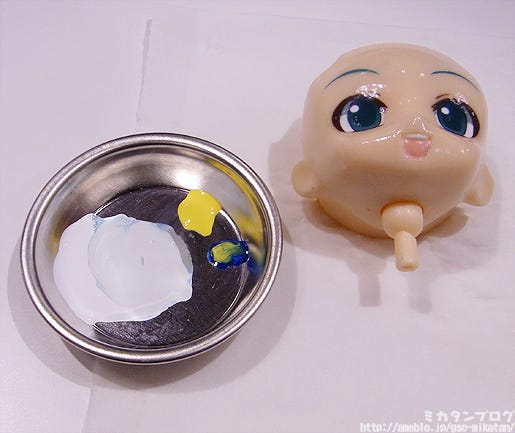
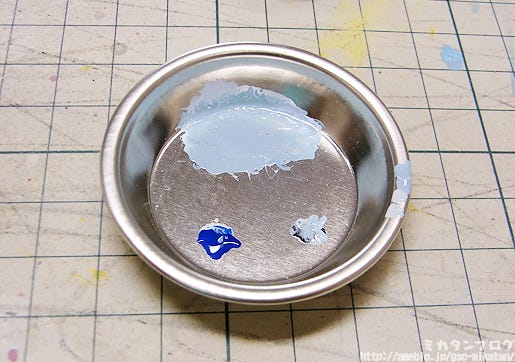
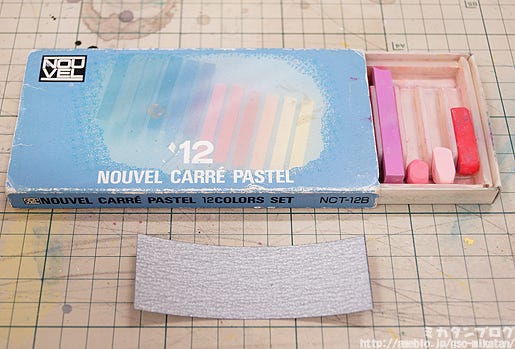
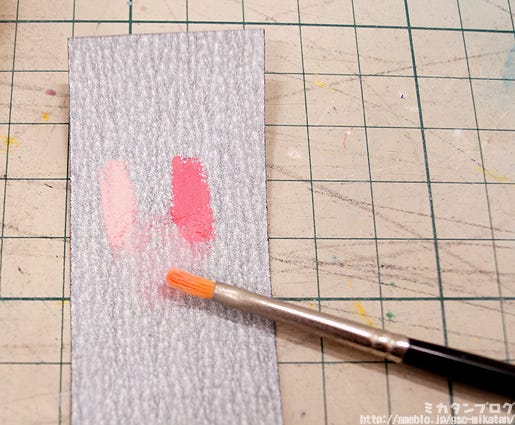
The blush will be added with pastels!

I’ve also got some sandpaper at the ready – you’ll see why in just a second…
goodsmile company Mikatan's Blog English Version
Rubbing two colors together on the sandpaper!

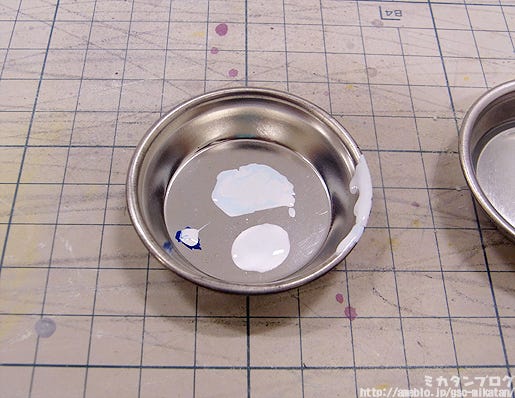
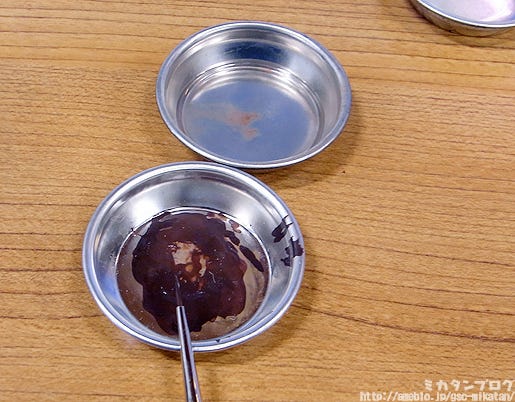
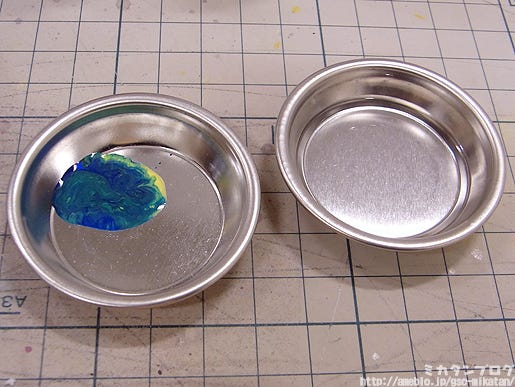
I can mix these two colors together to try and get the perfect blush color! The brush I’m using isn’t the same super thin brush I was using for the painting, but instead a brush with a flat head. This will allow for a cute, gentle blush!
goodsmile company Mikatan's Blog English Version
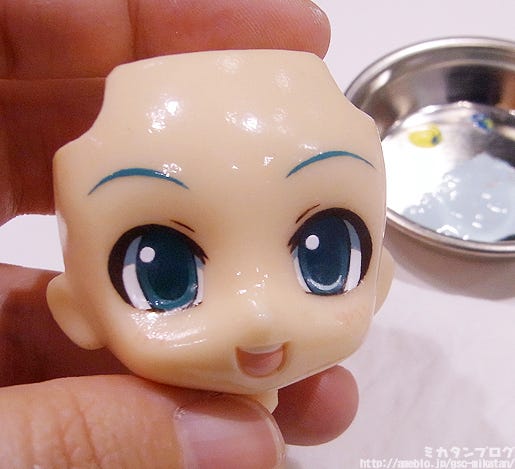
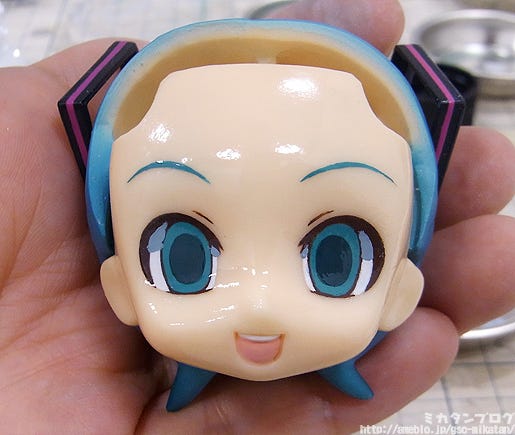
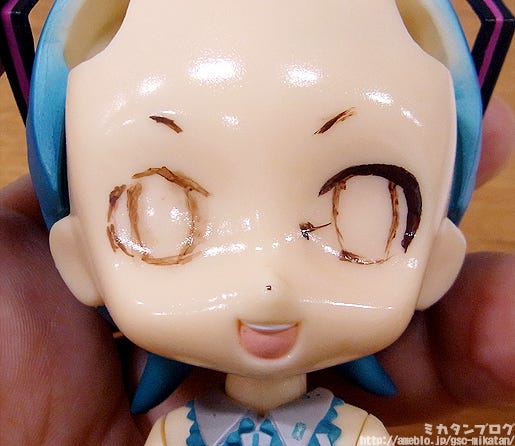
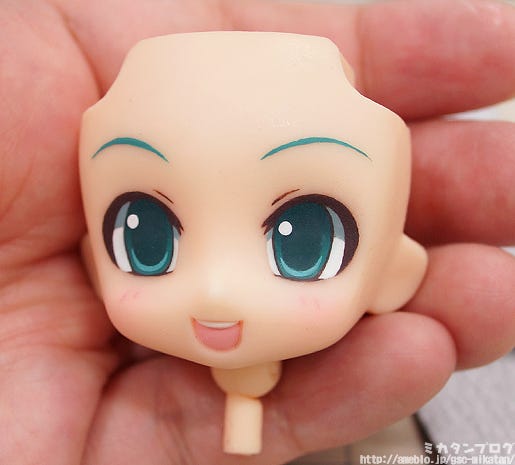
Added in the blush!

I definitely think it’s added a little bit of cuteness!! (*゜∀゜)=3

You just need to lightly apply the brush at the very top of the cheekbones to get this effect – pretty much just like real make-up! It was actually very fun applying the blush! I decided not to erase the darker blush lines, but you can of course choose to have them or not! (´∀`)
goodsmile company Mikatan's Blog English Version
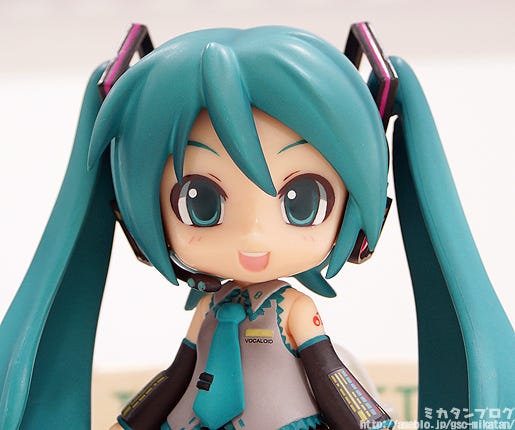
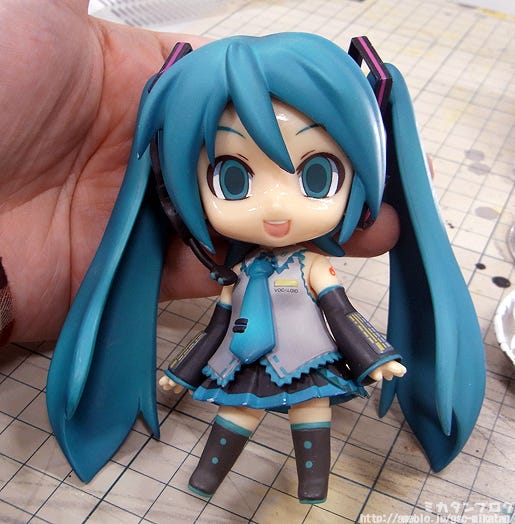
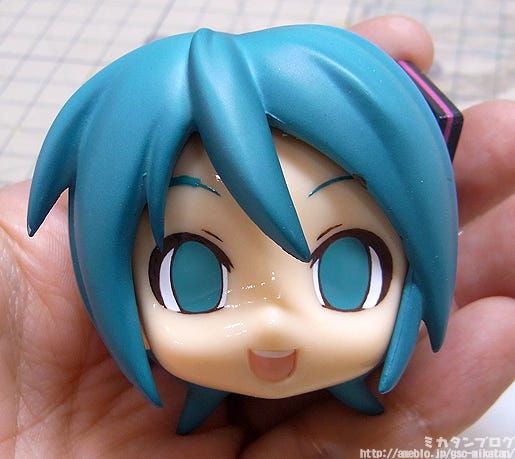
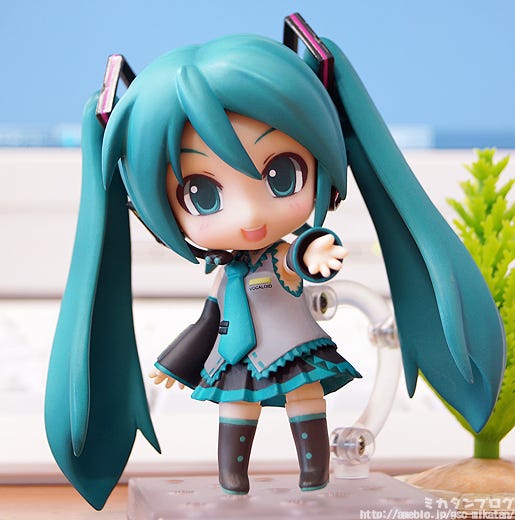
Miku-san, complete!!

She’s finally done!! At long last!!
It makes me so happy yo see the final product of my work!!
goodsmile company Mikatan's Blog English Version
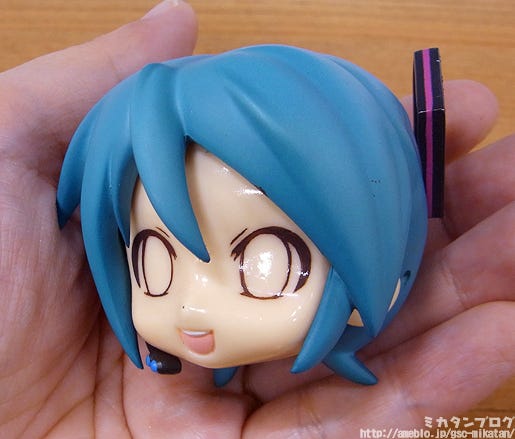
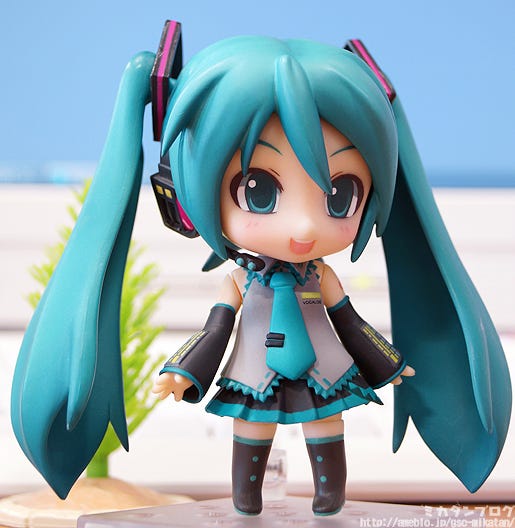
She looks quite cute from this angle!

Although I think I might just be biased about my own creation. ^^;

She is the Miku I poured all my heart into making, so of course she is super special to me!!
goodsmile company Mikatan's Blog English Version
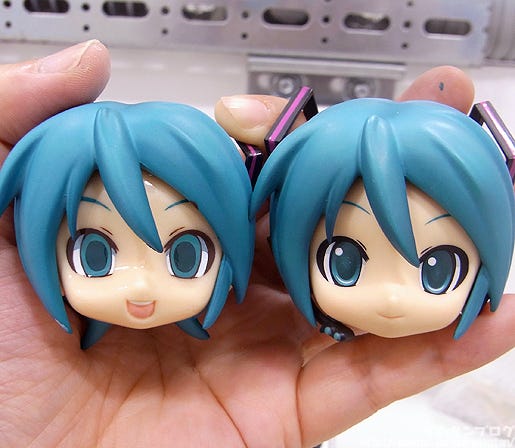
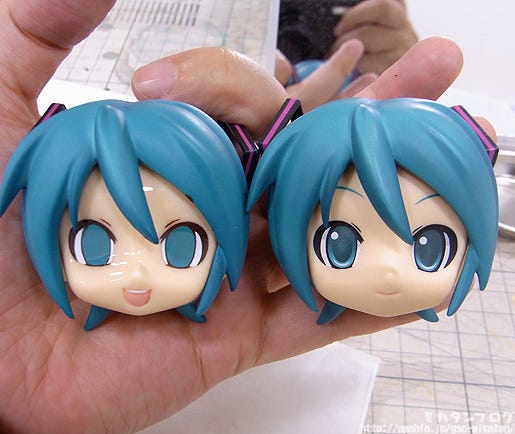
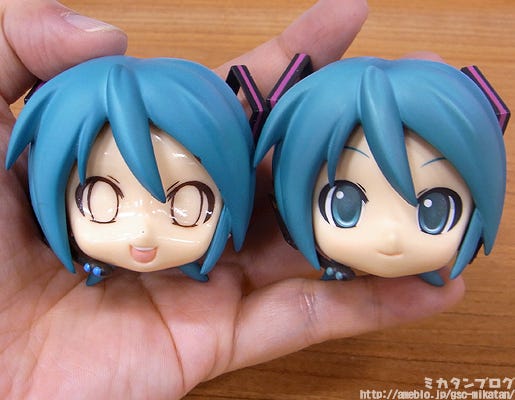
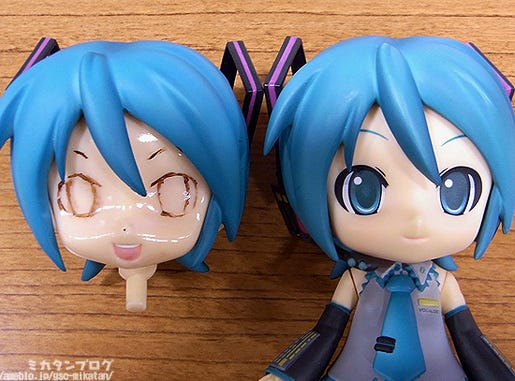
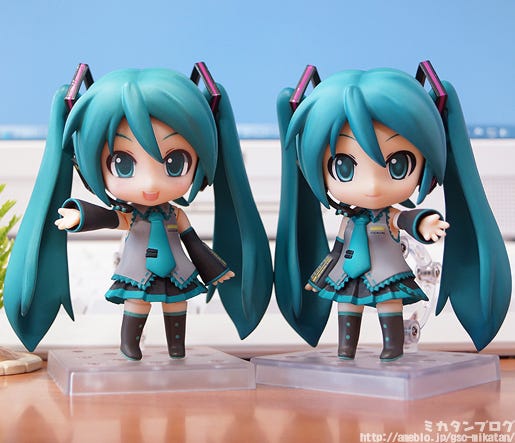
Together with the original Miku-san!

I honestly tried to copy the original Miku as much as possible… but she ended up rather different. The biggest differences were:

・ The eyes should have been 0.7mm further apart.
・ Both eyes needed to be 1mm lower.
・ The eyebrows needed to be thinner.
・ The shadow on the eye needed to be lighter.
・ The line at the bottom of the eye should have been rounder.
・ The base color of the eye should have been lighter.

I think that sums up most of the differences… but there is nothing I can do about these things now! 😛

When Aki took a look at it he was quick to say that the eyes should have been lower… after all my hard work he was so quick to point out the biggest error! Even though I saved the whole way along, it’s so depressing that I can’t go back to any of the places I saved at now… If I wanted to correct the position of the eyes now, I’d literally have to start from scratch!

The expression team is going to take a look and see if they can make any changes to make it look a little bit cuter for me, if anything comes out of that I’ll be sure to show everyone!
goodsmile company Mikatan's Blog English Version
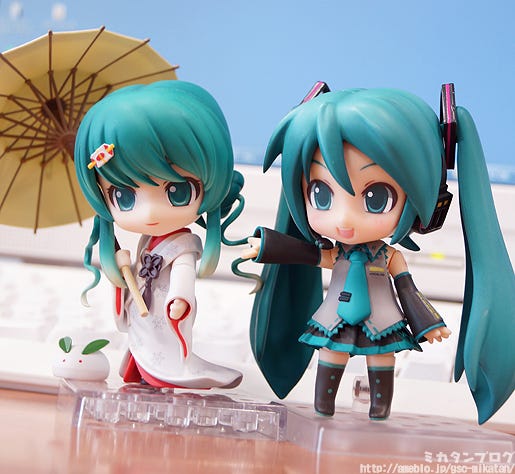
Displayed with Strawberry Snow Miku!

If you look from a distance, the gradient on my version is very hard to make out, while the gradient on the Snow Miku and original Miku-san both look beautiful no matter what distance you look from – even the gradient in the pupil is perfect! I guess this just goes to show the skill of a professional!
goodsmile company Mikatan's Blog English Version
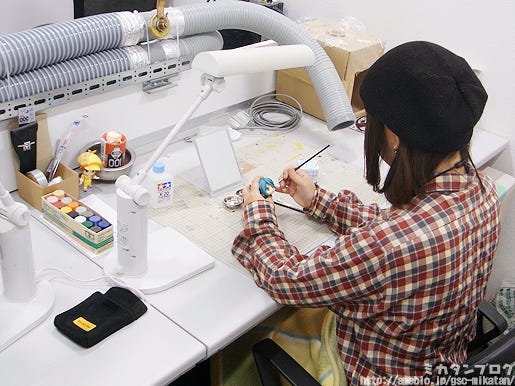
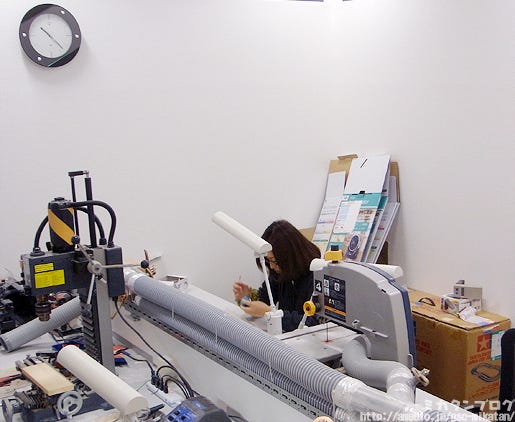
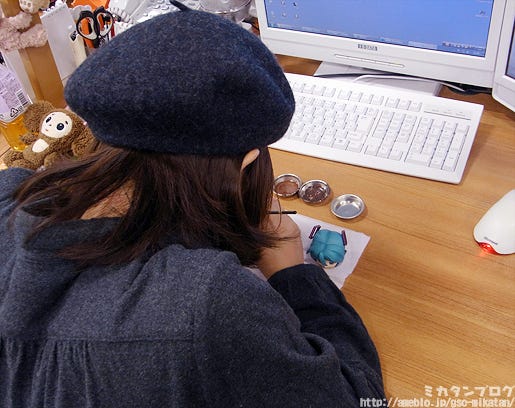
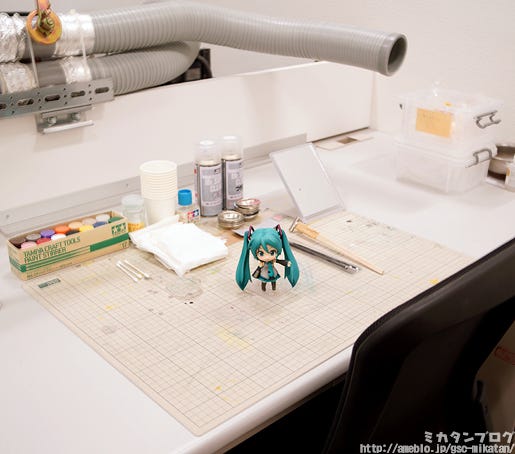
After three months, it’s time to bid this seat farewell!

I’ve been using this seat in the production studio whenever I worked on my expression… it’s quite sad that I won’t be using it anymore… although it was a lot of fun trying my hand at creating an expression, so perhaps one day I’ll challenge myself to do it once again!

The one thing I realized was that it takes much longer than you’d think to do all of this work by hand! (`・ω・´)

I honestly started this series expecting to finish this in just three days… I couldn’t have been more wrong! If you take one mistake too far you have to go back to step one, and each and every process takes time and careful preparation to complete.

I think the most difficult point was the outlines of the eye and the eyebrows. I’m sure with enough practice it would become much easier, but for me getting the lines to look right on a completely blank canvas was very difficult. You also need to be so careful to ensure that it looks right from any direction… if you focus too much from just one point of view it’ll end up looking distorted and off balance from another – and if you try and fix that you just end up messing it up from a different angle!!

But with all that said, the reward of completing the expression is amazing!
The face is the main part of any figure or doll, and if you’ve made it yourself it just means so much more!!

My conclusions:

· Expression painters are incredible!!

· Making things is lots of fun!!

Some people who can’t sculpt well at all sometimes have amazing talent with painting or creating expressions. When I tried my hand at sculpting it was a complete failure, but at least my expression came out looking alright – I think I’m much better at the painting side of things.

If you’re interested in things like sculpting and painting, consider taking part in the ‘Sculptors Tryout & Finishers Tryout 2013 Spring’! Unfortunately you do need to speak Japanese to apply!

– Sculptors Tryout & Finishers Tryout 2013 Spring –
http://www.goodsmile.info/post/ja/3624/ (Japanese)
But anyway, that’s all for today!
I hope to see you all again tomorrow!! (・∀・)ノ゛

Painting a Nendoroid Expression Part 9: Adding in Highlights

The day before WonFes!
It’s 9PM on February 8th, in the production studios!!

001
Everyone is hard at work while I prepare my expression!

If you’re unsure as to why I’m working on the expression the day before WonFes, it turns out that I’m being forced to complete it at WonFes!

If you missed out on anything, you can catch up on my expression painting escapades with these posts:
Painting a Nendoroid Expression Part 8: Applying the Gradient
Painting a Nendoroid Expression Part 7: Preparing to Apply the Gradient
Painting a Nendoroid Expression Part 6: Pupils and Shadows
Painting a Nendoroid Expression Part 5: Mixing Colors and Eyebrows
Painting a Nendoroid Expression Part 4: Preparing to Apply Color
Painting a Nendoroid Expression Part 3: Continuing to Paint the Eye Borders
Painting a Nendoroid Expression Part 2: Painting the Eye Border
Painting a Nendoroid Expression Part 1: Basic Knowledge & Tools

The paints you can see in the photo above are the different paints that I’ll need to use at WonFes, I quickly had to secure them before the event!

They are completely different to the paints I’ve been using up until now, so I needed to get a little practice in before the big day!
goodsmile company Mikatan's Blog English Version
Preparing to practice with the paints!

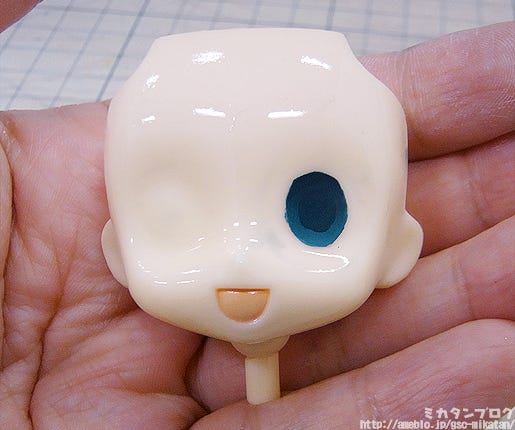
I was worried that this paint would dissolve all my hard work so far, so I quickly made a mock up version of what I currently have completed – the base color, pupil and gradient.

Somehow I think I’ve managed to get the gradient looking nicer on my quick mock-up compared to the actual version, but let’s just ignore that little fact for now and move on…
goodsmile company Mikatan's Blog English Version
Mixing up the paint to test!

I’ve been using enamel paints up until now and these definitely have a different feeling to them, but I’m sure it’ll work out! I’m told that these paints dry very quickly, and once they dry they do become a bit powdery.

They are however very safe paints, which is why we are using them at the event. They might not be ideal for expressions, but I’m sure they must have their own specific uses elsewhere.
goodsmile company Mikatan's Blog English Version
I’ll be adding highlights to this at the event!

The stare looks just as impressive as ever! I’ve worked really hard on this, so I’ve actually become quite attached to her now!! 😛

I tried to add a little blush to her expression to make her look a little bit cuter, but it was much harder than I expected to get the balance right on both sides! I thought it would just be a few quick lines, but they actually ended up taking quite a long time… I was working on it until the last train!

Everything about this expression ends up taking so much longer than I expect!
goodsmile company Mikatan's Blog English Version
February 10th: WonFes!!

Now that I think about it, WonFes was already 2 weeks ago!
Time has been flying past far too quickly!
goodsmile company Mikatan's Blog English Version
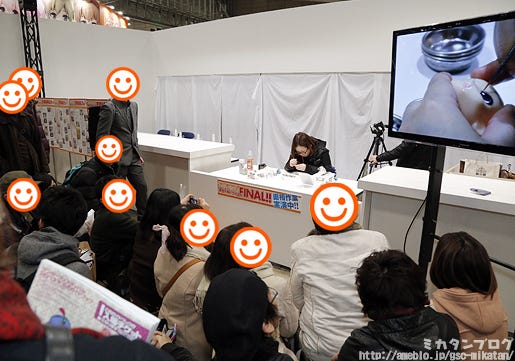
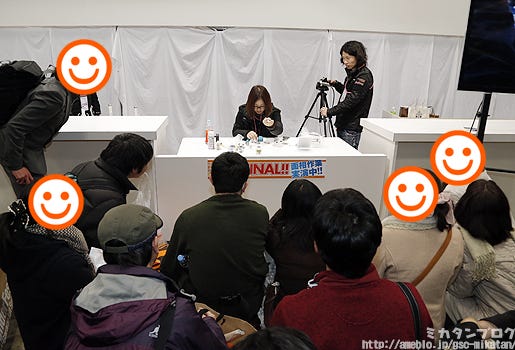
My expression painting started at 2PM!

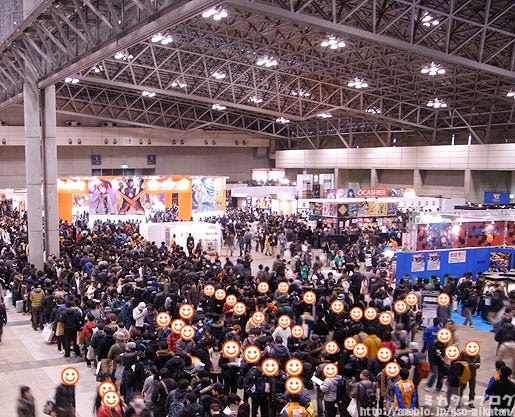
I really didn’t expect so many people to come by, a big thank you to everyone who came to watch!! I don’t know why you’d want to spend your time watching me, but it was an honor anyway!! ^^
goodsmile company Mikatan's Blog English Version
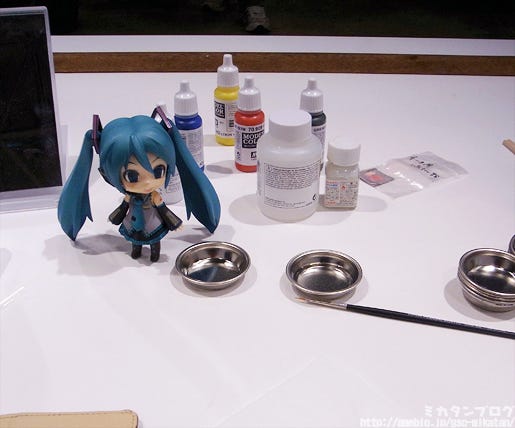
These were the tools for the day!

All I needed were paints, paint dishes and a a paint brush!
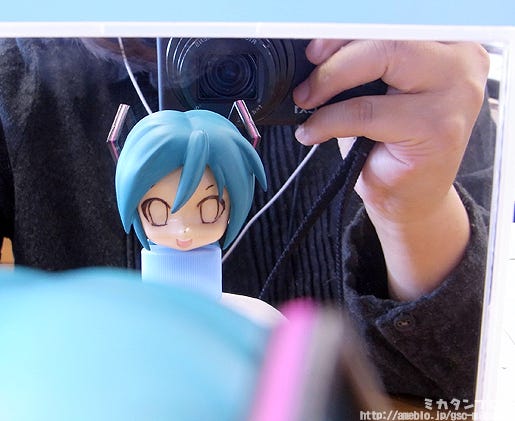
I also had a mirror with me to check symmetry!
goodsmile company Mikatan's Blog English Version
I had 2 and a half hours to work on it!

The monitor on the right has a close up on my hands so everyone could see exactly what was going on – it definitely helped to show off my incompetence, but at the same time it gave everyone a good close up on exactly what needed to be done, which was nice!

Before I started I was so nervous that I was drenched in sweat, but I slowly managed to calm down once I got started and realized everyone was there to watch over me, not judge me! Thanks again to everyone who was watching!!
goodsmile company Mikatan's Blog English Version
Completed the upper highlights!

Hmm, I might have made them a little bit too big…

But anyway, nothing I can do about it now, I don’t have time to adjust it any further for now, so I’ll just move into the lower highlights now.
goodsmile company Mikatan's Blog English Version
Mixing colors for the lower highlights!

The upper highlights were simply done with white, but the lower highlights (known as “crescent moons”) need to be a color similar to the base color.

Normally this would go in a cycle of mixing the color and testing the color until it was perfect, but because I don’t have that much time I’m just going to try this out and hope for the best!!
goodsmile company Mikatan's Blog English Version
Added in one of the crescent moons!

It’s come out far too white!! The color should definitely have been closer to the base color…

There is no time to rework it though, so I’m going to move on ahead once again! (This blog is a very abridged version of the work I actually went though… I needed to erase and redo the highlights a few times!)
goodsmile company Mikatan's Blog English Version
Highlights complete!!

At this point it was already around 4:30PM!! At this point I still wanted to add matte and more of a blush to the expression.

I actually went all the way out of the event hall to get the matte layer done, but WonFes seemed like it about to end, so I had to end my expression work for the day!
goodsmile company Mikatan's Blog English Version
On display for everyone to see!

The title of the painting at the event was “Painting a Nendoroid Expression: Final Part”, but it ended up not really being completed to the very end!

But everyone still gave me a round of applause, which really meant a lot to me! I was so happy I actually teared up a little bit! I’ll don’t think I’ll ever forget the way I felt having everyone applaud my work. Thanks so much everyone!!

goodsmile company Mikatan's Blog English Version

I made a few more adjustments after WonFes!

While I was working on it at WonFes the size of the upper highlights and the color of the ‘crescent moons’ were annoying me, so I decided to fix them up! I know she’s not perfect, but I think I’ve done the very best I can to make this Miku-san!!

While I was working on the expression I accidentally erased the blush a bit too, so I’ll need to rework that as well. I’m getting used to dealing with these silly mistakes now. 😛

Tomorrow I’ll create the very last post in the series!

I’ll add a matte and complete the cheeks to finish up the expression!

It’s been a long journey!! I originally wanted to finish this in three days, and I simply can’t believe how long ago that was!!

I don’t think I’ve ever had such a long series of posts on the blog either! But I hope you’ll all read through tomorrow to the very end of the series!!
But anyway, that’s all for today!
I hope to see you all again tomorrow!! (・∀・)ノ゛
 

Dekacchu Kirari Moroboshi

Only 11 days left until WonFes!!

001
The WonFes countdown has now officially begun! All of the WonFes product samples are also arriving, so it’s quite stressful in the GSC offices making sure everything is ready for the event!

But that also means that for the next 5 days, I’ll be reviewing the WonFes products! ヽ(゚∀゚)ノ

If you’re wanting a review of one of the WonFes products, then keep an eye out on the blog for the next few days!

– Winter 2013 WonFes Products –

■ Homura Akemi: you are not alone.
■ Nendoroid Snow Miku: Strawberry White Kimono Ver.
■ Nendoroid Petite: IDOLM@STER Cinderella Girls –
    Anzu, Kaede and Rika + Live Stage Set
■ figma Rin Shibuya
■ figma Anzu Futaba
■ Tomokazu Seki: Glenfire
■ Dekacchu Kirari Moroboshi

Today I’ll be taking a look at… this cute giant! (`・ω・´)
002
From IDOLM@STER Cinderella Girls:
Dekacchu Kirari Moroboshi!

From the popular social game ‘IDOLM@STER Cinderella Girls’ comes a special version of one of Phat! Company’s new Minicchu series, a much bigger ‘Dekacchu’ version of Kirari Moroboshi! She is approximately 4 times bigger (220mm) than the Minicchu version, so fans can enjoy even more cute power from the lovely Kirari!

This Dekacchu comes from Phat! company, who also brought us the upcoming Minicchu Cinderella Girls figures!

But this version of Kirari has been supersized by the planning team’s Takamatsu! Both him and I are the two biggest ‘Passion’ players here in the offices! (Kirari is a Passion type in the Cinderella Girls game, so I ‘m really exited to see this giant version of her!)
003
But anyway, let me get on with the product review!

A size comparison with a Minicchu and a figma!

You can see here just how big she is!! She is 186.2cm tall! ‘Dekai’ means ‘Huge’ in Japanese, so compared to the ‘Mini’ in Minicchu – you can see where the name ‘Dekacchu’ comes from! It’s still a great size to hold in both hands though!

I think I’ll take Kirari for a tour around the offices, so you can compare for yourself and get a good feel for her impressive size! (`・ω・´)b
004
Standing on the photocopier!

She really is super cute and super huge!! The photocopier looks like a stage to me all because Kirarin is standing on it! (I think I’m going mad… :P)

006
Displayed with a coffee machine!

If Kirarin were to pour me a cup of coffee, I don’t think I’d ever drink anything but coffee for the rest of my life! (Yep… definitely going mad. :P)
005
Compared to the size of someone’s head!

It looks like this lucky fellow is about to have Kirarin step on his head!
Could there be a greater honor?! ^^
009
The giant GSC-Seijin also loves her!

I think this is the first time I’ve ever felt jealousy toward a plushie doll…
007
She’s good friends with Jumbo Miku!

Miku is very glad to have some friends that are about the same size as her!

There are so many places I can think to put figures like this on display… the entrance hall, your room, your bed, on the sofa… they’ll look great almost anywhere, not to mention you get to spend every day with them!!
008
From IDOLM@STER Cinderella Girls:
Dekacchu Kirari Moroboshi!

 
She will be available at the WonHobby booth at the 2013 Wonder Festival (Winter)!

There will also be one week of online orders, so if you can’t make to the event, you can also order them online. (But they’ll me made to order, so they’ll only be delivered in June.)

You can find more info on the WonHobby 17 website!

– WONDERFUL HOBBY LIFE FOR YOU!! 17 –
http://www.whl4u.jp/ (Japanese)

 
And finally, a quick notice! (=゚ω゚)ノ
001
The Character Charm Collection: Puchimasu! are being rereleased!!

There are only 10 in the picture above, but there are actually a total of thirteen to collect: Haruka-san, Makochii, Yayo, Io, Chicchan, Miura-san, Koami, Komami, Chibiki, Takanya, Yukipo, Afuu and Chihyaa!

They’re all up for preorder again from today!

If you missed out on the first batch, don’t miss out on this opportunity to get your hands on them!
011
Tomorrow I’ll take a look at these two!

Just from playing around a little with them, I can see they are incredibly high quality!! Not to mention the extra parts are simply amazing!

 
But that’s all for today!
I hope to see you all again tomorrow!! (・∀・)ノ゛
 
 
© NBGI
© Crypton Future Media,Inc. www.piapro.net
© 窪岡俊之 © NBGI

Something a Little Different: Reviewing Kagamimochi! (This has Nothing to do with Figures!)

I made a tweet the other day…
“Should Wednesday’s blog be a continuation of the expression drawing, or a rice cake review?”
010
Why are rice cakes so popular?!

I suppose I understand the reason quite well myself… they’re so delicious! I got so many for New Year’s myself!

The most specific rice cake or ‘mochi’ related to the New Year is ‘kagamimochi’, so today I’ll be doing a review of one of those for fun! Those who wanted the expression series to continue, don’t worry – I’ll be getting to it soon!!

Alright, let me go find some kagamimochi!

… I asked around a bit, only to find out from Seki-sama that GSC doesn’t actually have any kagamimochi!

W-What?!

But if I don’t have any how can I do my review! 🙁

At first I thought maybe I could still run out and buy some at a convenience store or something to grab one… Seki-sama even called Tokyo Solamachi for me to ask if they still had any in stock… but unfortunately they were all sold out!

Sorry Seki-sama!! I promise I won’t take any more of your precious time!!
011
The Nitroplus Offices!

The floor above the GSC offices is Nitroplus’ offices! It looks so fancy here… plus, I think I can see a kagamimochi sitting right there by the entrance!

I can only imagine how strange it must have sounded when I asked to borrow it, but the Nitroplus staff were strangely understanding and said I was welcome to! It’s so lovely to work around such kind people!!

A big thank you to the Nitroplus staff!!
001
Kagamimochi!!

Kagamimochi are sets of two round, flat rice cakes, in which a smaller one is placed on top of a larger one. They are put on display during the new year as an offering to the gods, more specifically to the God of Grains, ‘Toshigami’.

‘Kagami’ means mirror, while ‘mochi’ means rice cake. The name ‘Kagamimochi’ originated from the fact that the shape resembled an old-fashioned kind of round copper mirror, which was used in religious ceremonies. It is said that the shape was taken from one of the three sacred treasures, ‘Yata no Kagami’ or ‘The Eight-Span Mirror’.

It really is an impressive offering! It’s gorgeous!!

Not to mention this particular one is a Madoka special! As expected of Nitroplus!!! (This was apparently a product sold by Brain POLICE Light.)

It almost feels bad to unwrap it all and not just review it as it is, but today’s review is of the rice cake itself – so I’ll just have to take off all the decorations carefully!
002
All unwrapped!

It was hard to get a good look at the shape while all the decorations were still on, but now you can see lovely balance of the actual thing!

Kagamimochi is all about getting a good balance of the two round rice cakes as they are placed on top of each other!
003
This is how the other side looks!

It’s practically identical to the front!! Σ(゚Д゚)

It’s quite hard to see from these photos, but you can quite easily tell which side is the front by looking at the letters on the sheet at the bottom.
004
The mandarin at the top can be removed!

Traditionally the mandarin is supposed to be displayed on top of the Kagamimochi, but on this one you can move it around wherever you please! The mandarin isn’t actually real, it’s just made from plastic, so it won’t go off!

It’s definitely a product that Kagamimochi fans will consider amazing quality! (this feels just like a figure review!)
005
A picture from a low angle!

The lower layer is definitely gives the whole thing a nice sense of stability. If you put a shadow across it like this, it feels a lot more like an offering!
006
The narrow connecting section!

This is definitely the sexiest curve on this Kagamimochi! All these photos actually still have a transparent plastic cover over the actual rice cake part… it’s like it’s still wearing it’s clothes!
007
So smooth and shiny!!

Take a good long look at this picture… what do you see?

Don’t you think it looks a bit like a girl’s body?
Maybe it’s just my mind being weird… 😛
008
It also comes with a small offering stand!

The actual Japanese name of the stand is a ‘Sanpou’, which is the kind of stand you put the Kagamimochi offering on! There are three holes on three sides of the stand, while the forth remains closed! It really gives it a much more gorgeous feeling suited to New Years to have it displayed up on here!
009
Kagamimochi!!

These are traditionally opened on the 11th January!

Get in contact with a Japanese supermarket, or other food stores if you have any preorder or sales queries! 😛

But that’s all for today!
I hope to see you all again tomorrow!! (・∀・)ノ゛
… is what I’d normally say, but today that isn’t the case!

I’ll be off on a business trip to China for the next three days!

I don’t want everyone to wait for prototype reviews, so in that time, I have three people to take over the blog for me and show off some lovely figures!
They are Gou from the sales team, Shuu-chan from the planning team and Nutty from the production team!

I’m sure they’ll provide a slightly different viewpoint for the reviews compared to me, so they should be quite an interesting read! I hope everyone will take a look!

I will actually be stealing the GSC Newcomer’s blog for the days I’m away for some reports from China, so if you’re interested, you can read up about China over here – they’ll only be in Japanese though, sorry!

GSC Newcomer’s Blog
http://ameblo.jp/blog-shinsotsu2012/

Anyways, I hope to see you all on the Newcomer’s blog over the next few days, or instead next week back on this blog!

Gou-kun… I leave the blog in your hands now!! (・∀・)ノ゛


© Magica Quartet/Aniplex・Madoka Partners・MBS

2012 GSC Product Rankings

Only a few days left until the end of 2012!

This is the last blog update for the year!

I hope everyone has had a good 2012! When you look back on an entire year it’s hard to remember a lot of what happened, but here at Good Smile the biggest event of the year was definitely the move to the Skytree!! It feels like we’ve been here for over a year already… the time passes by so quickly!

As normal I’ll have the Good smile Sales Ranking as the last post, but this year there are some other interesting rankings as well! ヽ(゚∀゚)ノ

All the statistics in this post are based on products that were released in 2012. The products that have been announced, but not yet released are not included! So let’s take a look at some of the Good Smile Stats over the past year!

– Number of Products by Company – 

*Includes Goods *OEM Products not included.

Good Smile Company : 141
Max Factory : 62
Gift : 29
Phat! Company : 28
threeA : 19
FREEing : 19
Good Smile Racing : 17
Penguin Parade : 14
WING : 2
CHRONOGEAR CREATIVE : 2
Culture Japan : 2
SEVENTWO : 2
ASCII Media Works : 2

The number of products each company released!

These stats obviously only relate to the products that Good Smile Company was involved with in regards to distribution. I can’t believe how many Good Smile Company products were released this year – it includes the smaller things like iPhone cases and the lottery prizes, but even so… that’s a lot of products!!

– Products by Product Category 

*All company’s products included. *OEM Products not included.

Nendoroid : 92
Scale Figures : 64
figma : 48
threeA : 19
Nendoroid Plus : 16
Nendoroid Petite : 15
Good Smile Racing : 15
Rubber Straps : 5
Other : 65

Next we have the category rankings!

The web team simply can’t believe that so many Nendoroids were released this year! Next year we’re going to aim for 100!! ^^

There were also a huge number of scale figures – they are definitely the category that require the most work, but they’re definitely worth the work, and they’re as popular as ever! The ‘Other’ section includes things like straps, plushies (that aren’t Nendoroid Plus), T-shirts and various other things!

– Products by Gender –

*All company’s products included. *OEM Products not included.
*Each product sold in a set is counted separately.

Female : 308
Male : 82
Mecha : 30
Other : 10

The genders of all 2012 Products!

As is to be expected, there are far more females in the line-up, but there were actually quite a few male figures this year too! I wonder if they’ll increase even more next year…?

The ‘Other’ section here includes things like pliers, or the suction and clip stands!

Products by Hair Color 

*All company’s products/goods included. *Each product sold in a set is counted separately. *Products without hair not included. *Colors as determined by Mikatan

Blond : 79
Brown : 69
Black : 66
Pink : 38
Blue : 35
Green : 24
Purple : 22
White : 16
Red : 13
Orange : 13
Light Blue : 11
Gray : 7

An interesting ranking by hair color!

This table shows which hair colors were used most often in 2012 on our figures! Blond hair look took the highest place, but brown and black were quite close behind. It’s a rather interesting ranking to read through!

– Mikatan Blog Ranking –

Crown_2 1st Place: 1/8th Scale Ultimate Madoka (Painted – Part 1) 
http://mikatan.goodsmile.info/en/2012/06/07/18th-scale-ultimate-madoka-painted-part-1/

Crown_12nd Place: Miyazawa Model Exhibition 
http://mikatan.goodsmile.info/en/2012/11/06/miyazawa-model-exhibition/

Crown_13rd Place: Nendoroid Miku Dayo 
http://mikatan.goodsmile.info/en/2012/11/02/nendoroid-miku-dayo/

4th Place: Minicchu IDOLM@STER Cinderella Girls 
http://mikatan.goodsmile.info/en/2012/11/14/minicchu-idolmster-cinderella-girls/


5th Place: Miku Hatsune : Cheerful Ver.  
http://mikatan.goodsmile.info/en/2012/03/08/miku-hatsune-cheerful-ver/

6th Place: 1/8th Scale Sayaka Miki
http://mikatan.goodsmile.info/en/2012/01/25/18th-scale-sayaka-miki/

7th Place: Nendoroid Sakura Miku
http://mikatan.goodsmile.info/en/2012/04/08/nendoroid-sakura-miku/

8th Place: Nendoroid Aichi Sendou
http://mikatan.goodsmile.info/en/2012/11/13/nendoroid-aichi-sendou/ 

9th Place: 2 Days Until WonFes! The GSC Offices Before the Event!
http://mikatan.goodsmile.info/en/2012/07/27/2-days-until-wonfes-the-gsc-offices-before-the-event/

10th Place: Project mirai cafe & Miku Live Party 2012
http://mikatan.goodsmile.info/en/2012/03/12/project-mirai-cafe-miku-live-party-2012/

The most viewed blog posts this year!

The most viewed post was the prototype review of the 1/8th scale Ultimate Madoka which was released yesterday! In just one day the Japanese blog received over 200000 views of that post… that’s just how much attention that figure was attracting!

Another post that I was interested in was the 8th place – Aichi-kun! I posted him on twitter as well and was amazed at how fast he spread across the internet!! Thanks to everyone who reads the blog, and everyone who passes on the posts to friends!!

– Combined Local and Overseas Sales Ranking –

*Nendoroid Petites counted per box-set.

Crown_21st Place: Ultimate Madoka

Crown_12nd Place: Nendoroid Snow Miku: Fluffy Coat Ver.

Crown_13rd Place: figma Mami Tomoe

 
4th Place: Nendoroid Petite: Puella Magi Madoka Magica

5th Place: Megurine Luka: Tony ver.

6th Place: Nendoroid Hatsune Miku: Append

7th Place: figma Kyouko Sakura

8th Place: Saber & Saber Motored Cuirassier

9th Place: Nendoroid Hatsune Miku: Yukata Ver.

10th Place: figma Sayaka Miki

 
11th Place: Nendoroid Kyouko Sakura

12th Place: Nendoroid Petite : Uta no Prince-sama

13th Place: Nendoroid Sayaka Miki

14th Place: Saber: Zero ver.

15th Place: figma Black Rock Shooter: TV ANIMATION ver.

16th Place: figma Link

17th Place: Nendoroid Shuukan Hajimete no Hatsune Miku

18th Place: Nendoroid Saber: Zero Ver.

19th Place: BLK Limited Edition (with figma BRSB)

20th Place: Nendoroid Erio Touwa

 
21st Place: Nendoroid Sena Kashiwazaki

22nd Place: Racing Miku: 2011ver.

23rd Place: figma Ika Musume

24th Place: Nendoroid Golden Darkness

25th Place: Nendoroid Nyaruko

26th Place: Homura Akemi

27th Place: Nendoroid Aisaka Taiga

28th Place: Nendoroid Saber Lily (Rerelease)

29th Place: Nendoroid Petite: Racing Miku Set 2011 Ver.

30th Place: figma Nadeko Sengoku

Finally, a word from GSC President Aki regarding the 2012 ranking!

003

A big thank you to everyone for yet another wonderful year! I hope that all the products everyone has bought this year have brought a smile to your face!

Looking through all the sales data this year shows that the figure market thrived again, which has left GSC with great results for the year. There are more and more new figmas and Nendoroids headed out to fans all over the world. I also believe that through various market creation techniques including the recent lottery products, we have been able to expand the figure market to more people who have never bought figures before. This year has led all the companies in the industry to compete with a higher standard and with more precise products, allowing more and more people to understand the wonders of the figure of the world than ever before.

The overseas market, particularly Asia, has seen a large increase in sales which is very encouraging. It’s wonderful to be able to share the joys of figures with the international world. The GSC website, twitter and Facebook have pages in English, French and Chinese for fans all over the world.

With the detail, precision and presentation of figure prototypes reaching new levels of quality all the time, one has to wonder just how perfect a figure can eventually become – it’s a challenge that cannot be turned down. We’re producing five, if not ten times as many products as we were just a few years ago now, and each of those is competing to be the best – it really shows off the passion of those who work on them – although I think it can drive them a little bit mad sometimes too.

However, we are researching and trying out various new production techniques in attempts to make things more automated and to save on labor. Ultimate Madoka, who was just released, includes one of these new techniques in her design – it’s not easy to spot what it is, but you’re welcome to try and figure that out!

Over the past few years we’ve seen so many wonderful series which have led to the growth of the figure market, and all the time I’ve been thinking it’s time to move things onto the next step. Next year we’ll be taking all the planning, sculpting, direction, manufacturing and support from the fans that have been building up over the years and turning it into a truly wonderful year!

I hope that everyone will be watching over us as we move out of our 11th year, and into our 12th from May this year!

And with that…

Mikatan Blog 2012 has come to an end!!

There have been so many times this year that I thought I wouldn’t get through it, but the staff have really got me through some tough times – I once again managed to update the blog almost every weekday this year!

To everyone who loves figures,
To everyone who reads this blog,
To all those who help out with the blog…

Thank you all for yet a wonderful year!!

The blog has been going on for six years, and I hope it’s been of some use to everyone! I’ll be continuing next year in the hopes that I can pass on the wonders of figures to everyone once again! I hope you’ll all be there to cheer me along!

The next blog will be on the 7th January (Mon)! (`・ω・´)ゞ
(I’m actually going to China… I hope I’ll be back in time…)

But that’s all for today!
It’s been really cold this year, so take care of yourselves over the new year!

I hope to see you all again in 2013!!

Painting a Nendoroid Expression Part 6: Pupils and Shadows on the White of the Eye!

Nendoroid Painting, Day 6!

goodsmile company Mikatan's Blog English Version
I have to finish this before the end of the year!! (((゚Д゚)))

I’m actually having so much fun with this, so I’m thinking about challenging another expression next year and trying once again! I don’t want to bore everyone reading the blog though, so I want to get through this one sooner rather than later! Wish me luck!!

You can find the previous posts in the series here:
Painting a Nendoroid Expression Part 5: Mixing Colors and Eyebrows!
Painting a Nendoroid Expression Part 4: Preparing to Apply Color
Painting a Nendoroid Expression Part 3: Continuing to Paint the Eye Borders
Painting a Nendoroid Expression Part 2: Painting the Eye Border
Painting a Nendoroid Expression Part 1: Basic Knowledge & Tools

Alright, time to save with some lacquer paint and get to work!
goodsmile company Mikatan's Blog English Version
Uh-oh…

I’ve already messed up with my save!!

When you need to ‘save’ you spray clear lacquer over the expression, but I sprayed too much over the right eye! I only meant to spray a little bit, but it all came rushing out…

This causes the paint to go lumpy, and the borders to blur…!

If you look close up, you can see the expression looks all grainy and the lines aren’t neat… I had done it nicely before, but I got overconfident and now I’ve gone and made a mistake… if you want to see the correct way to apply the lacquer, I discussed it in detail in this article: Painting a Nendoroid Expression Part 4: Preparing to Apply Color
goodsmile company Mikatan's Blog English Version
Many painting corrections later…

To correct the blurred outlines I had to increase the size of the lines around the eyes a little bit… the lines look so messy now though, but I’m just going to continue on and see how this comes out. 😛

This is the second time I’ve started out the blog with an error now… I already have such little time to work on the expression, and I end up spending most of it on correcting my mistakes!! 🙁
goodsmile company Mikatan's Blog English Version
Let’s move onto painting the pupils!

This time I’ll be using white, green and blue! The pupils make use of a slightly darker shade than then base eye color. Here I got some advice from Reiichi Itou, who has worked on a number of Nendoroids including Haru-chan, Kuma and Tsubasa Kazanari!

When you mix colors and end up with a dark color and try to make it lighter, you almost always end up with far too much paint. It’s normally better to start out with a lighter color (in this case white) and then add the darker colors into that (the green and blue) until you are happy with the color. Good luck, Mikatan! d(@^∇゜)-♪

Thank you for the advice, I’ll try it right now!!

Last time I mixed a darker color first and then added more and more white to get the right color, and ended up with far too much paint!!
goodsmile company Mikatan's Blog English Version
Color mixing complete!

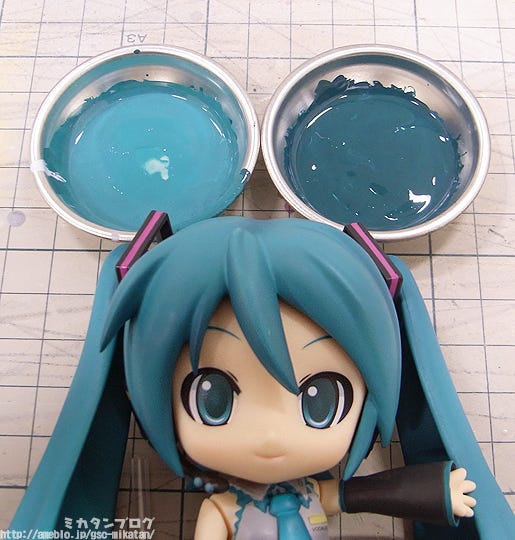
I think this color looks about right… the one on the left is the previous color I mixed for the base color of the eye, the one on the right is the freshly mixed color for the pupils. I’ll have to actually paint it on to get a good feeling for whether or not the color is right…
goodsmile company Mikatan's Blog English Version
A quick splash of paint!

Hmm… I wonder if the professional finishers manage to get this right on the first try every time… I’ve painted on far too thick a layer here, but I’m going to just have to continue with this and see how it goes!
goodsmile company Mikatan's Blog English Version
Fixing up the shape with enamel thinner!

There we go, that looks a little bit better. I’m still far more worried about that lumpy area and the messy line that I caused at the start of this post… But anyway, Hiro-san and Kawahara-san had some advice for me regarding the pupils!

Hiro-san:
The pupils are really important! The position and size both have to be perfect, or else they’ll cause the left and right eyes to be facing different directions!

Kawapon:
It’s easier to get the direction of the eyes right if you paint the pupils relative to the eye!

I see, I see…

I understand what they’re saying, but I’m not sure whether or not I’ll be able to actually make use of the advice when working on my painting! By the way, I’ve constantly been making use of a mirror to make sure that the symmetry of the expression wasn’t off!
goodsmile company Mikatan's Blog English Version
Mixing colors for the darker shadows!

The top of the white of the eye always has a slightly darker shadow. This color actually differs quite a lot between characters – take a look at your Nendoroid collection and compare! I’ll be using a mix of white, blue and black for Miku!
goodsmile company Mikatan's Blog English Version
I’ll never get it right on the first try…

My painting always overflows over onto the borders… but that can be fixed up with some enamel thinner, so it’s not a problem!
goodsmile company Mikatan's Blog English Version
There we go!

Without the highlights in the eyes, she actually looks a bit creepy though…

There are a number of other areas that are still bother me as well, but I just have to move on and see how it turns out! I’ve been trying to fix the messy eye borders the whole time while I’ve been working on the pupils, I think it is starting to look at least a little bit better now – if you compare it to the photos above you can see I did make a few changes!
goodsmile company Mikatan's Blog English Version
Comparison with the original!

As always, the eyes look like they’re tilted the wrong way… I wish I could fix it!!

I think overall the lines look alright, but the inner corner of the eyes have too much white which cause the eyes to appear tilted.
goodsmile company Mikatan's Blog English Version
Attached to the Miku body!

I had to censor this last time as it looked so horrible… but so many people said they wanted to see it, so this time I’ve left it for everyone to cringe at! If I left it any longer without showing it, I was worried that people would start actually anticipating something that looked good. 😛

But… she looks so evil!!
I’m so sorry, Miku!! Forgive me!!

This was actually the cutest angle I was able to find… the whole time I was working on the painting I kept regretting that I hadn’t made the eyes slightly lower and further apart… I’m sure that would have made her look a lot cuter! I wish this was Photoshop where I could just quickly CTRL+Z and redo whatever I needed to…

When you try doing something like this yourself, you really realize just what craftsman the sculptors and painters really are…

The next post should be the final in this series!
It’ll feature masking, gradient and highlights!

If the masking takes too long, it might be split into two posts though! We’ll have to see how it works out!
But anyway, that’s all for today!
I hope to see you all again tomorrow!! (・∀・)ノ゛
© Crypton Future Media,Inc. www.piapro.net

Painting a Nendoroid Expression Part 5: Mixing Colors, Base Colors and Eyebrows!

Nendoroid Painting, Day 5!

goodsmile company Mikatan's Blog English Version

It’s been three weeks since I was last here! Σ(゚Д゚;)

This was just a series I started on a whim, but it’s actually become very popular with people in the figure industry and serious hobby fans! I was quite surprised at the response, but also very happy!

You can find the previous posts in the series here:
Painting a Nendoroid Expression Part 4: Preparing to Apply Color
Painting a Nendoroid Expression Part 3: Continuing to Paint the Eye Borders
Painting a Nendoroid Expression Part 2: Painting the Eye Border
Painting a Nendoroid Expression Part 1: Basic Knowledge & Tools of the Trade

If you missed out or forgot what happened in the past (like me…), then feel free to go back and read them!
goodsmile company Mikatan's Blog English Version
There have been some changes since I was last here!

There is a new light stand, and someone placed some wrapping over the figure and paints! I’m not sure who was responsible, but I’m very grateful! Thank you!
goodsmile company Mikatan's Blog English Version
This is where we ended last time!

I had just filled in the whites of the eyes. Basically as you work through the different parts of the expression, you simply need to follow this process!
Paint with enamel paint
Clean up messy areas with enamel thinner
‘Save’ with lacquer clear.

When you look at it like that it looks quite simple, but it’s a lot of hard work!
goodsmile company Mikatan's Blog English Version
Now I’ll be working on the iris!

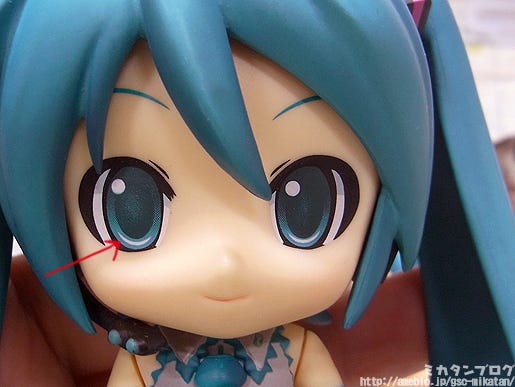
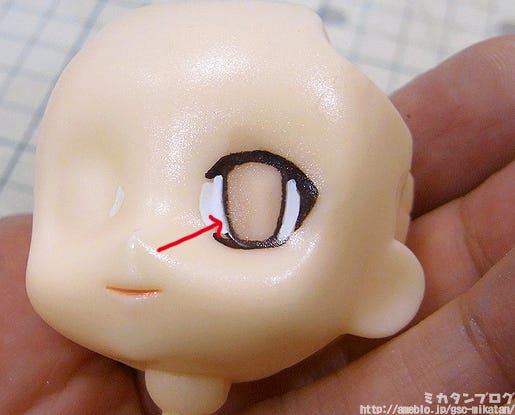
I’ll be using the very lightest color you can see in the iris – the area at the bottom where the red arrow is pointing. First I’ll need to mix up this color!
goodsmile company Mikatan's Blog English Version
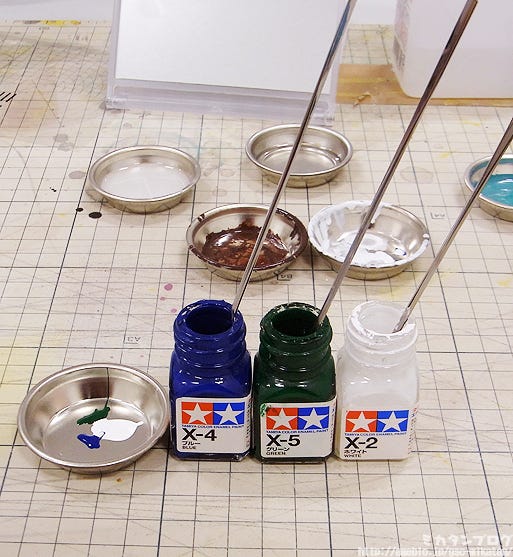
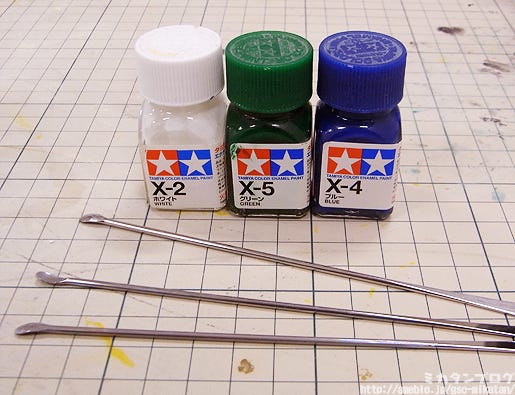
I’ll be using these three colors!

White, green and blue – the three colors of Miku!! I make use of these ear-bud shaped rods to get the right amount of paint into the trays!
goodsmile company Mikatan's Blog English Version
Hmm… I think that’s about right?

I think I might have a bit too much green… I haven’t actually mixed any white into this yet though, I’ll do that last.

I’ve learnt myself that you want to get a good feel for the color before adjusting the brightness, so I mix the other colors till I think the color looks good, then add in the white.
goodsmile company Mikatan's Blog English Version
Mixed together! It looks a bit too blue now…

If it’s too blue, I just need to add in a bit more green! You just need to continue mixing colors until you think it looks right – once the blue and green look right I’ll move into the white in the same manner!
goodsmile company Mikatan's Blog English Version
Color mixing complete!

Now I’ve ended up with way too much paint… this is what happens when you keep mixing more and more paint to try and get the color right… 😛

I guess too much is better than too little in the end! Getting the right color actually takes a lot more time than you think…

I also put a little dab on the eye to see if it looked right!!
goodsmile company Mikatan's Blog English Version
Then something terrible happened…

I applied some enamel thinner to remove the test dab of paint, and the white of the eye came off as well!!

I forgot to ‘save’ after painting on the white!!!

This photo was taken after I had reapplied the white… I’m so hopeless. Those who don’t quite understand what I mean by ‘saving’ with lacquer paint, be sure to check the previous articles where I explain in a bit more detail!
Painting a Nendoroid Expression Part 4: Preparing to Apply Color

The main reason I forgot that I hadn’t saved is that professionals actually paint both the white of the eye and the iris before they apply the lacquer to save. I was hoping to be just as good as them and completely forgot when I tried to wipe away my test color…

The reason you can’t just ‘save’ as many times as you like with the clear lacquer, is that the layer gets thicker each time and it won’t look nice after too many coats.

Of course, if you don’t save between the two parts you have to ensure you don’t mix the white and the iris colors! (((゚Д゚)))

You’d have to erase everything and repaint both the white and the iris every time you made a mistake. If I had to do that I’d never finish this blog, so I think I’ll just save at each stage! 😛
goodsmile company Mikatan's Blog English Version
This time I painted lacquer over to save the white…

Then I tried to paint on the iris once again!

I think the color has come out quite nicely! Maybe I should have added a bit more white to make it a little lighter… but I think it’s good enough for me, so I’m going to move on ahead!
goodsmile company Mikatan's Blog English Version
Comparison time… and something doesn’t feel right!

I can already see that the overall shape of the eye looks different!
They look all bent out of shape!!

I want to fix it!!

But I can’t change things now that I’ve saved with the lacquer layer!

Nooooooo!!! 🙁
goodsmile company Mikatan's Blog English Version
These are the… eyebrows?

I thought maybe it was just looking a bit strange because there weren’t any eyebrows yet, so I quickly drew on some rough ones.

I’m using the same color for the eyebrows as I did for the base color of the iris, but I’m told that the actual Nendoroid Miku uses a slightly darker version of the color used for her hair!
goodsmile company Mikatan's Blog English Version
Making adjustments with the fringe!

The eyebrows are not only made to be symmetrical, but also need to be adjusted to match up nicely with the fringe. Miku’s fringe in particular has different lengths which makes these changes even more important – the eyebrows can look very different once you attach the fringe! Although, I guess you could also say all of that about the eyes as well 😛

I’ve received a lot of mail from readers that said that it would be easier to make a single eye in Illustrator, flip that around and then print them out as decals. In the case of mass-production in China, the eyes are are done as stamp printing and thus are done with something like Illustrator – but when it comes to the prototype, they are always done separately. They are never simply mirrored across – that just ensures that the detail lives up to our standards!
goodsmile company Mikatan's Blog English Version
Eyebrows completed!

Alright… I still think the eyes are a little skew, but it’s definitely making progress!! Let me try and put it all together now….
goodsmile company Mikatan's Blog English Version
It’s even worse than I thought!!

W-What is this?! It’s not even remotely cute!! It’s not Miku at all!!

I think if I showed this to everyone now you’d all lose your motivation… so I’ll save it for the end…。ヽ(゚∀゚)ノ

Just when I thought it was starting to go well, I was actually quite wrong… make that very wrong! I guess this is the difference between an amateur and a professional. 😛

Anyway, next time I’ll be working on the shadows on the white of the eye as well as the pupils! I think I’ll be able to complete this series in the next two posts or so, so I hope you’ll all enjoy what is to come and read through to the end!
But that’s all for today!
I hope to see you all again next week!! (・∀・)ノ゛

(C)Crypton Future Media,Inc.
www.piapro.net

Painting a Nendoroid Expression Part 4: Preparing to Apply Color

Nendoroid Expression Painting: Day Four!

goodsmile company Mikatan's Blog English Version
Today I’ll be borrowing a room from the production team!!

I’ve been working at my own desk up until this point, but the fumes from the thinner have been affecting me more than I expected, so I decided to move to a room that’s designed for things like this!

It means I’ll be working around a number of strange machines and tools, but I don’t mind confined areas, especially when I can get down to work on something I enjoy! (`・ω・´)
goodsmile company Mikatan's Blog English Version
This is where we left off last time!

I had just finished the borders of the two eyes! I actually made a few more alterations after I was done with the previous blog… 😛

This is so much fun!

I had to keep working until I thought it was the absolute best I could do!
goodsmile company Mikatan's Blog English Version
Soak a bud in water and clean off unwanted marks!

After a number of changes the paint tends to cling onto the face a bit, but you can just use some water (not thinner) on a cotton bud to clear away the unwanted paint.

You’ll probably be quite surprised as to how dirty it can get while you’re working on it. This photo is actually Hiro-san cleaning it up for me – but I am doing all the actual paintwork myself! (`・ω・´)

015
Now it’s time to move onto the next step!

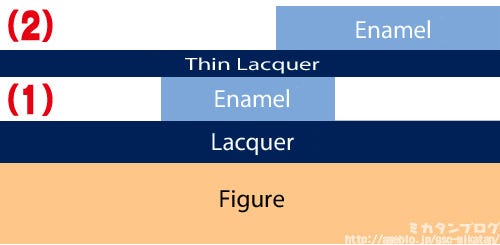
At the moment we have enamel paint on top of lacquer paint (1). Now I’ll be spraying on a thin layer of clear lacquer to ‘save’ the borders!

By doing that, the paint at (2) will not cause any problems with the painted lines at (1)!ヽ(゚∀゚)ノ

For more details on what I’ve done in the past, feel free to read the previous articles in this series:
Painting a Nendoroid Expression Part 1: Basic Knowledge & Tools of the Trade
Painting a Nendoroid Expression Part 2: Painting the Eye Border
Painting a Nendoroid Expression Part 3: Continuing to Paint the Eye Borders
004
These are what you need for this step!

Lacquer clear, lacquer thinner and an airbrush!

These are all available at model stores – although I’m sure many of you are worried about how hard it will be to use the airbrush…
goodsmile company Mikatan's Blog English Version
In fact, I am as well, so I’ll be using this instead!

A spray can that does the same job!

You can use this just as it is, so you don’t need to go through the effort of getting the airbrush ready! As a newcomer to all this, I think it’ll be much better for me to use the easier option…
goodsmile company Mikatan's Blog English Version
Secure the expression with a clip!

Make sure the clip is securely in place with some elastic bands or tape. I’m borrowing a clip normally used to apply surfacer, that’s the only reason it looks all gray – so don’t worry about that.

Right, let’s get started!!!

I’ve spent about 20 hours painting these lines on, so I’m really nervous now… I don’t want to mess the whole thing up now!
goodsmile company Mikatan's Blog English Version
There is a technique to the spraying!

・ Don’t press the sprayer down too hard! Just half way is fine!
・ Hold it about 20cm away and spray, moving left and right 2~3 times!
・ Make sure to cover it completely, and also try to ensure it is evenly distributed!

If you spray too close you’ll end up applying too much, so make sure you are far enough away from the expression when spraying! (Although, if you’re too far it won’t coat properly at all, so you really need to try and find the perfect place.)

You can’t just spray it all quickly at once, or else the enamel paint will dissolve! Σ(゚Д゚;)

If you remember from before, the eye borders are made with enamel paint, and lacquer will cause it to dissolve. But to help avoid this…
goodsmile company Mikatan's Blog English Version
Dry with a hair drier after each layer!

Repeat this process about three times!

You don’t finish the coating all at once, but instead repeat this spray/dry process a number of times. By doing this, you can avoid having the eye borders dissolve from the strength of the lacquer!
goodsmile company Mikatan's Blog English Version
This is an example of a failure!

I was scared to try on Miku first so I tested the distance I should be spraying at on this expression first. This example only used a single coat of of lacquer clear, but because of that the coating was too thin and the enamel thinner caused the eye borders to dissolve…

You can’t spray on too much, and you can’t spray on too little… it’s a very fine balance that requires a great amount of care!
goodsmile company Mikatan's Blog English Version
The expression should appear glossy at this point!

Ooh! I think I’ve managed to get it right!! Yay!! Now I’ve got my layer of lacquer on top of the eye borders!

Of course that means I can no longer change the borders! (((゚Д゚)))
goodsmile company Mikatan's Blog English Version
Mixing the color for the white of the eyes!

Oda-P said I could just use white, but I decided I wanted to mix a little bit of blue in anyway! (I guess we’ll find out if it was a good idea later…)

The tools I’m using were all introduced in the first post of this series, which you can find here: Painting a Nendoroid Expression Part 1: Basic Knowledge & Tools of the Trade
goodsmile company Mikatan's Blog English Version
Painting the white of the eyes!

Of course with my amateur skills I didn’t manage to paint them neatly within the borders…

The white here is clearly going over the borders – but this is exactly why we sprayed the lacquer clear on top of them! Now we can simply use enamel thinner to clean up the areas where the white is crossing the borders, and it won’t affect the eye borders at all thanks to the layer of lacquer.
goodsmile company Mikatan's Blog English Version
Complete!!!

I’m finally getting somewhere with my expression!! It’s so much fun to slowly but surely make progress like this!!

Although as I paint the color inside, the differences between the two sides becomes more and more clear… (‘A`)

In fact it already looks completely unsymmetrical…

But this is the best I can do right now, and I’ll be sure to see it all the way through!

I’ve really had a lot of support from all the sculptors here at GSC, and I’m very grateful for all their advice and help! If there was anything I didn’t understand they would quickly come to my rescue and give me some directions when I was worried about something.

I hope that everyone reading through these posts is enjoying them as much as I’ve been enjoying trying to do this myself, and I’ll be continuing this special corner the next time I have some free time!
Anyway, that’s all for today!
I hope to see you all again tomorrow!! (・∀・)ノ゛
(C)Crypton Future Media, Inc. www.crypton.net

Painting a Nendoroid Expression Part 3: Continuing to Paint the Eye Borders

The project I started on a whim…
Nendoroid Painting, Day 3!

010
It’s been quite tight on my schedule to keep this up, but the right eye has come out looking really nice so I’m really exited to get back to work on it now!! (…at least, I thought it looked nice :P)

I’m a little bit clumsy with my fingers, but I really like making things like this so I don’t really mind if it doesn’t come out perfectly! Although I definitely did have some frustrating times while working on it, it has all been worth it!
goodsmile company Mikatan's Blog English Version
Today I’ll be continuing to work on the eye borders!

I’m using the exact same setup as I did yesterday. If you leave the paint in the tray for a day it’ll harden up, but you can use thinner to return the hardened paint back into a liquid form.

As a side note, when you mix colors together, always consider using a little more than you think you’ll need… it’s better than having to try and mix up the exact same color again!
goodsmile company Mikatan's Blog English Version
Time to work on the left eye!

Now that I’m looking at this photo myself I can see the lines I made were definitely much too thick here. It’s better to have the paint more fluid and not as thick as I have it here – it’ll help in painting finer lines.
goodsmile company Mikatan's Blog English Version
Cleaning up the lines with thinner!

I painted the right eye border on relatively easily, but for some reason the left eye just isn’t working out! I’m told there are two reasons for this!

・ It’s harder for right-handed people to draw the left eye!
・ You’re trying to create symmetry with the right eye!

Now that I think about it, it’s also harder to draw the left eye for me on illustrations – it’s the same concept just in figure form! Plus I need to worry about making the left eye look symmetrical to the right eye… this isn’t going to be easy…
goodsmile company Mikatan's Blog English Version
I’m definitely making some progress!

But… something definitely doesn’t feel right…

Something I only managed to notice now…
goodsmile company Mikatan's Blog English Version
The eyes are too high!

I didn’t notice this at all when I had only completed the one eye! Apparently it’s actually a mistake that lots of newcomers to Good Smile end up making.

After all my hard work I didn’t want to believe that I was going to have to do it all again…

goodsmile company Mikatan's Blog English Version
In my depressed state, Hiro-san and Mesuka gave me some interesting tools to work with!

Hiro-san is the sculptor responsible for the BRS and Dead Master Nendoroids, and Mesuka sculpted the Nendoroid Petite Madoka Magica figures! They came to my rescue in my time of need!!

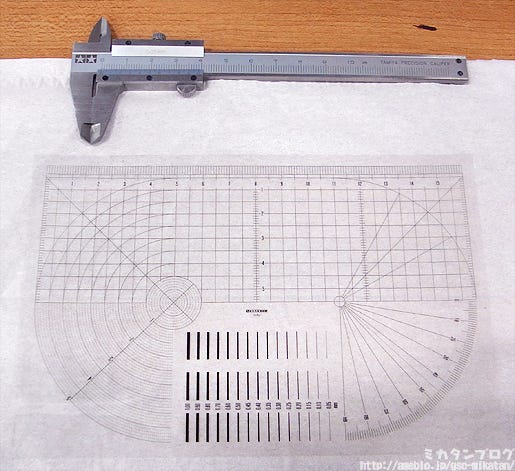
The tool at the top of this photo is called a Vernier scale, which measures the width of things (in this case, the size of eye). The tool at the bottom is to ensure that different parts are level.
goodsmile company Mikatan's Blog English Version
Let’s try using it!

Using the Vernier scale seemed a bit too far past my level, so I decided to make use of this transparent ruler-like tool. As you can see, the upper eyelashes and outer eye lines aren’t actually matching up at all…

The fact that I’m doing this has now spread across the offices, so a lot of the sculptors stop by to see how I’m doing… when Kawara-san came by he told me I should take a look at my paintwork in a mirror…
goodsmile company Mikatan's Blog English Version
━━(||゚д゚)━━━ !!!!!

It looks terrible!!

Not only are the eyes at different heights, they’re not even remotely symmetrical! They look completely distorted!

It’s hopeless! I’ll have to do it again!

goodsmile company Mikatan's Blog English Version
This time I’ll pay attention to height and symmetry!

I’ve fixed up the eyebrow and I’ve been moving the eyes downward… but…

Every time I fix something, the balance breaks somewhere else and that needs fixing! It’s an endless spiral of corrections!

At one point I just became completely lost as to what I was trying to do anymore. I couldn’t tell which lines were the right ones and which ones I wanted to erase…
goodsmile company Mikatan's Blog English Version
I will get this looking right!

I want to go back in time and hit myself for ever thinking this would be easy.

Anyway… I kept at it while looking at it upside-down, from the sides, from the top and in the mirror from earlier, slowly but surely painting and then erasing lines until I felt it the lines were starting to look better. The thinner has quite strong fumes, so you also need some willpower to overcome those and continue to work… 😛

It’s been a total of ten hours now…
goodsmile company Mikatan's Blog English Version
Complete━━(゚∀゚)━━!!!!

This post is obviously cutting out quite a lot… I actually ended up completely erasing and redoing the right eye again. It really wasn’t going how I wanted it to, so I erased the whole thing and once I started from scratch again it actually came out looking much better – determination is the key to success!

Plus, if I ever do this again I’ll know not to just work on one eye at a time, but to work on both and keep a good balance between them!

There is however personal differences on how exactly you prefer to do it, for example Hiro-san says he does 70% of the one eye and then 30% of the other, and then goes back and finishes them up. I guess it’s just up to you to find the way that works the best for you – practice makes perfect!

goodsmile company Mikatan's Blog English Version
Comparison Shot!

goodsmile company Mikatan's Blog English Version
A look from a different angle!

goodsmile company Mikatan's Blog English Version
This is how it looks in the mirror!

I guess the symmetry looks okay… although that one eye looks a little off… is it?

Arrgg!! I think it is!!
But if I change something now it’s just going to end up throwing the balance off somewhere else, so I’m going to have to move on like this for now.

…to be honest, I meant to complete the painting in three posts.

But now I can say with confidence that this is just like playing some kind of impossible game… it’s fun, but it’s certainly not easy! To think that Oda-P can complete this neatly in a day and a half… I have a new found respect for him!
a
But anyway, with the borders out of the way we can move onto using some color! I can save my game here and continue another day!

But unfortunately I can only load that save once…

Now I’ll be using an airbrush to paint a think lacquer layer over the eye border – a very thin layer. But wait… shouldn’t the weak enamel paint be dissolved if lacquer paint is painted over it?

Normally that would be the case, and all my hard work drawing the eye borders would go to waste… but that’s exactly why you need to make a very thin layer!

I’ve never used an airbrush before… I wonder how this is going to turn out…

Oda-P (Currently Overseas):

“In the worst case scenario the paint will get smudged. It’s something that every newcomer had to go through, so don’t worry.”
(((( ;゚Д゚))) I’m worrying!!
Anyway, I only managed to finish the borders of the eyes for now… but this special corner will have to go on hold for awhile! As soon as I have a bit of spare time again, I’ll continue with my painting attempt! (To be honest, I really want to continue right now, so hopefully it won’t be long!)

Next week we’ll be taking a look at a couple of new prototype figures, so look forward to them!
Anyway, that’s all for today!
I hope to see you all again next week!! (・∀・)ノ゛

(C)Crypton Future Media, Inc. www.crypton.net

Painting a Nendoroid Expression Part 2: Painting the Eye Border

Nendoroid Painting Part 2!

Last time we took a look at the tools, but this time around I’m going to actually start with the painting!

goodsmile company Mikatan's Blog English Version
I should really hurry up and get started, but first…

This photo is to scale!

The Nendoroid head looks so much smaller when you know you’re going to be painting on it yourself!

goodsmile company Mikatan's Blog English Version
First off, I drew on some rough lines!

I drew these on while the fringe was attached to make sure they were in a good position. I’ll explain more about these rough lines a bit later, but basically they can be erased easily so it doesn’t really matter how messy they look!
goodsmile company Mikatan's Blog English Version
The road to success is to copy the best!

I definitely need something to base my painting on seen I don’t have any real experience, so I’ll be copying the eyes from this Miku Nendoroid!

I know very well that I wouldn’t get very far if I tried from scratch, so I’ll keep this Miku on the side as a reference model!

goodsmile company Mikatan's Blog English Version
I decided to start with the upper eye lashes!

Unfortunately they seem to have come out a bit thick and crooked… I also managed to brush some paint onto the left side of the eye… I’m sorry Miku!!

But you don’t just paint once and be done with it! You need to paint and erase over and over again until the expression looks right!

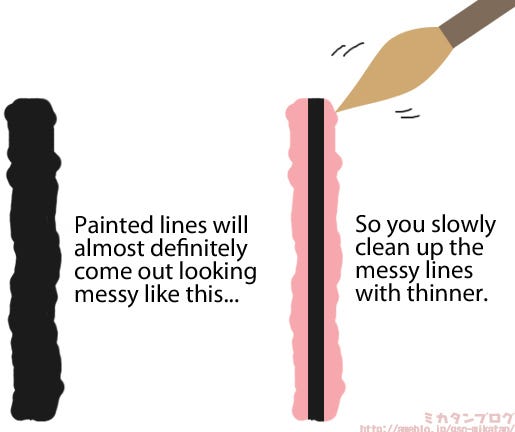
Let me try explain with a picture!

007
The left represents what I’ve done so far!

Now I’ll take the wobbly paint lines and make them look neater by using enamel thinner! In other words I’ll basically be erasing the pink section on the image above, to create a straighter, neater line!

That’s the basics of it least, so let me give it a go!

goodsmile company Mikatan's Blog English Version
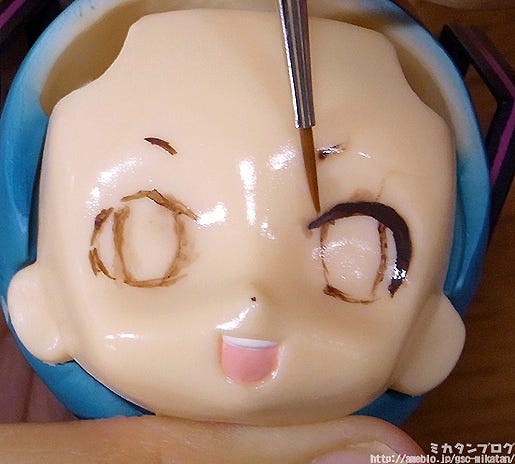
Cleaning up the outer eye!

Here I’ve actually used too much thinner, which is causing the paint to smudge a bit!! At least the line itself does look a little bit neater!
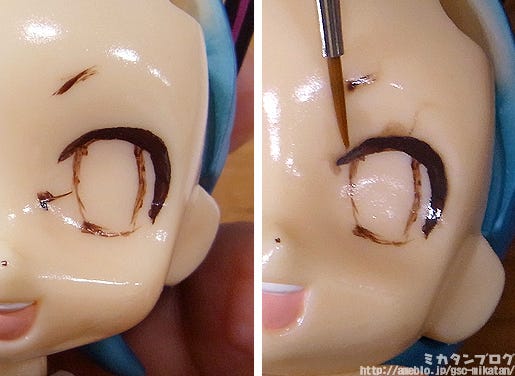
goodsmile company Mikatan's Blog English Version
A comparison of the two!

You really only need the tiniest drop of thinner, I used too much (Just dab a small amount on the brush and then dry it a little bit before applying it to the figure). You don’t need to worry about the smudges as they can be cleaned up quite easily later on.

010
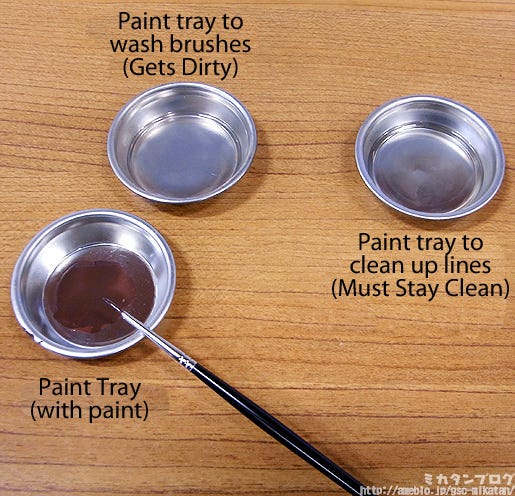
You’ll need three paint trays!

The top two filled with enamel thinner.

The one on the left is to clean the brushes. Once paint collects on a brush it’ll slowly get harder and harder to use, so make use of the enamel thinner to clean off the paint from them when you’re done with a color. That means that the thinner on the left can get dirty without a problem – you’re just using it to clean off the paint.

The one on the right is for thinner used for cleaning up the lines as I was previously doing on Miku. You need to keep paint out of this thinner, as if it gets dirty you won’t be able to remove the unwanted lines neatly. If you think it’s looking a little dirty, consider replacing the thinner with some fresh thinner to continue your work.

Its best to have two brushes, one for paint and one for thinner!

I was using a single brush for ages, and only after awhile did I realize it would be much easier with a second. ^^;

goodsmile company Mikatan's Blog English Version

After erasing and painting on over and over again…

2 and a half hours have passed!!

… and I’m still having fun!!

You really have to concentrate or you make mistakes so easily… but the thought of completing Miku’s expression is enough to keep me going!!

I also get the feeling that people who are good at drawing will find it much easier to draw the expression on than others. The main difference would probably be the fact that you need to keep the face stable with one hand while drawing with the other – it’s really not that easy when you’re not used to it…

Oda-P gave me some advice, saying that I should hold my pinky finger to the head part to help keep it stable, and it really did help me quite a lot! If you’re trying this for yourself, be sure to try the pinky trick!

goodsmile company Mikatan's Blog English Version
One eye complete━(゚∀゚)━!!!

The lines look a little wobbly still, but I think it came out looking alright! Yay!

goodsmile company Mikatan's Blog English Version
I put the hair part back on!

Looking good!! Σ(゚∀゚三゚∀゚)

Everyone said the expressions were really hard to work with, but I think this will come out looking great!! Maybe it’s time for me to leave the WEB team and join the Nendoroid team!

…or so I thought…

But then I found out…

the hard part was just about to begin…
I’ll be continuing this blog tomorrow!!
I hope to see you all again then!! (・∀・)ノ゛
(C)Crypton Future Media, Inc. www.crypton.net