Nendoroid Expression Painting: Day Four!
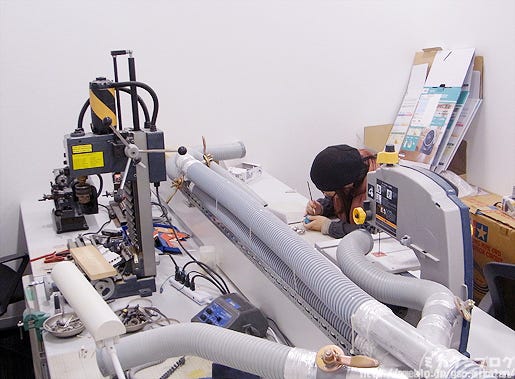
Today I’ll be borrowing a room from the production team!!
I’ve been working at my own desk up until this point, but the fumes from the thinner have been affecting me more than I expected, so I decided to move to a room that’s designed for things like this!
It means I’ll be working around a number of strange machines and tools, but I don’t mind confined areas, especially when I can get down to work on something I enjoy! (`・ω・´)
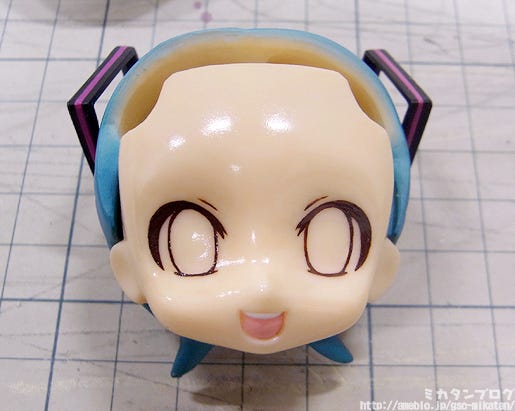
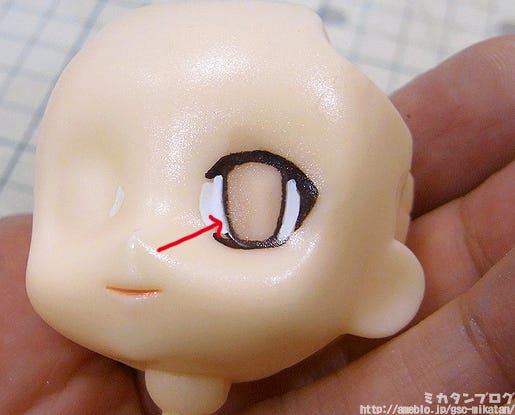
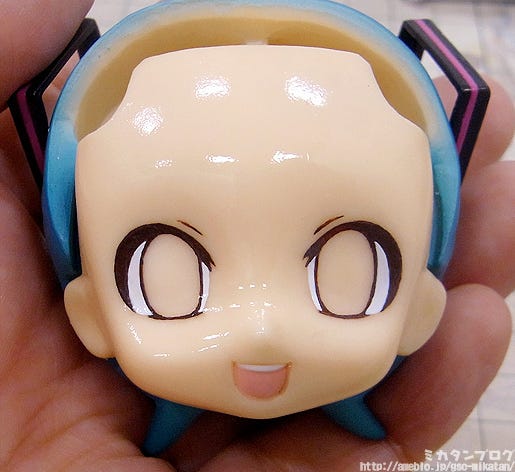
This is where we left off last time!
I had just finished the borders of the two eyes! I actually made a few more alterations after I was done with the previous blog… :P
This is so much fun!
I had to keep working until I thought it was the absolute best I could do!
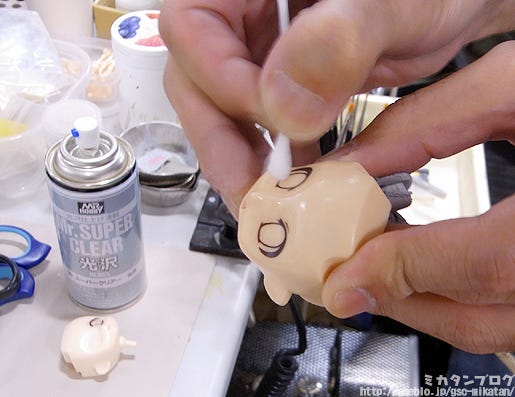
Soak a bud in water and clean off unwanted marks!
After a number of changes the paint tends to cling onto the face a bit, but you can just use some water (not thinner) on a cotton bud to clear away the unwanted paint.
You’ll probably be quite surprised as to how dirty it can get while you’re working on it. This photo is actually Hiro-san cleaning it up for me – but I am doing all the actual paintwork myself! (`・ω・´)
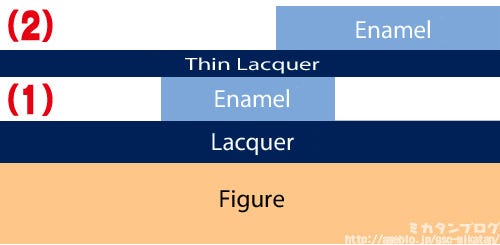
Now it’s time to move onto the next step!
At the moment we have enamel paint on top of lacquer paint (1). Now I’ll be spraying on a thin layer of clear lacquer to ‘save’ the borders!
By doing that, the paint at (2) will not cause any problems with the painted lines at (1)!ヽ(゚∀゚)ノ
For more details on what I’ve done in the past, feel free to read the previous articles in this series:
Painting a Nendoroid Expression Part 1: Basic Knowledge & Tools of the Trade
Painting a Nendoroid Expression Part 2: Painting the Eye Border
Painting a Nendoroid Expression Part 3: Continuing to Paint the Eye Borders

These are what you need for this step!
Lacquer clear, lacquer thinner and an airbrush!
These are all available at model stores – although I’m sure many of you are worried about how hard it will be to use the airbrush…
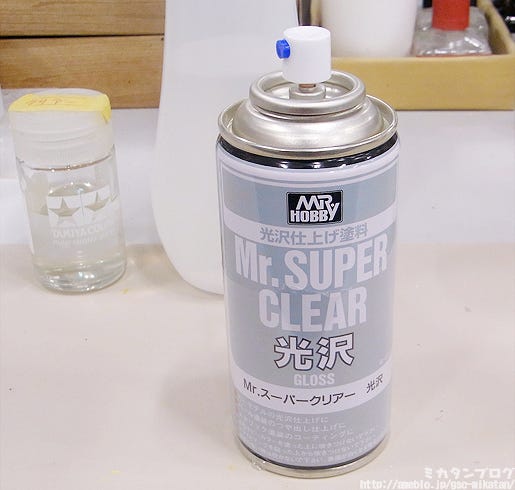
In fact, I am as well, so I’ll be using this instead!
A spray can that does the same job!
You can use this just as it is, so you don’t need to go through the effort of getting the airbrush ready! As a newcomer to all this, I think it’ll be much better for me to use the easier option…
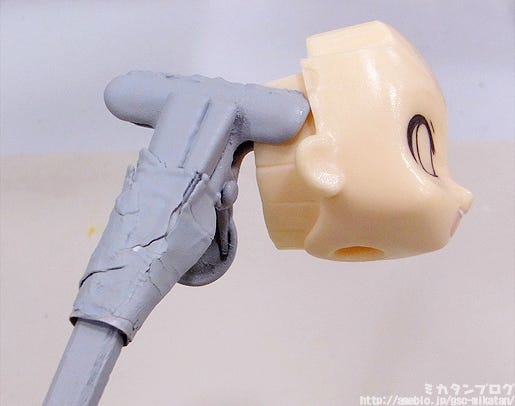
Secure the expression with a clip!
Make sure the clip is securely in place with some elastic bands or tape. I’m borrowing a clip normally used to apply surfacer, that’s the only reason it looks all gray – so don’t worry about that.
Right, let’s get started!!!
I’ve spent about 20 hours painting these lines on, so I’m really nervous now… I don’t want to mess the whole thing up now!
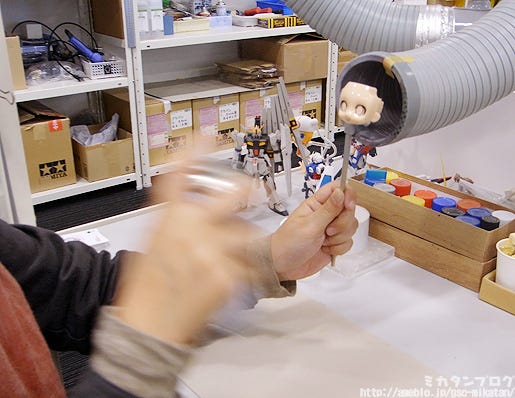
There is a technique to the spraying!
・ Don’t press the sprayer down too hard! Just half way is fine!
・ Hold it about 20cm away and spray, moving left and right 2~3 times!
・ Make sure to cover it completely, and also try to ensure it is evenly distributed!
If you spray too close you’ll end up applying too much, so make sure you are far enough away from the expression when spraying! (Although, if you’re too far it won’t coat properly at all, so you really need to try and find the perfect place.)
You can’t just spray it all quickly at once, or else the enamel paint will dissolve! Σ(゚Д゚;)
If you remember from before, the eye borders are made with enamel paint, and lacquer will cause it to dissolve. But to help avoid this…
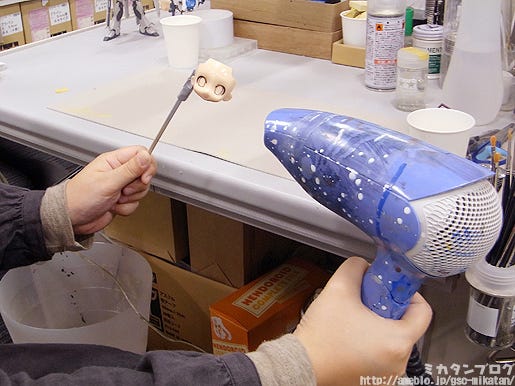
Dry with a hair drier after each layer!
Repeat this process about three times!
You don’t finish the coating all at once, but instead repeat this spray/dry process a number of times. By doing this, you can avoid having the eye borders dissolve from the strength of the lacquer!
This is an example of a failure!
I was scared to try on Miku first so I tested the distance I should be spraying at on this expression first. This example only used a single coat of of lacquer clear, but because of that the coating was too thin and the enamel thinner caused the eye borders to dissolve…
You can’t spray on too much, and you can’t spray on too little… it’s a very fine balance that requires a great amount of care!
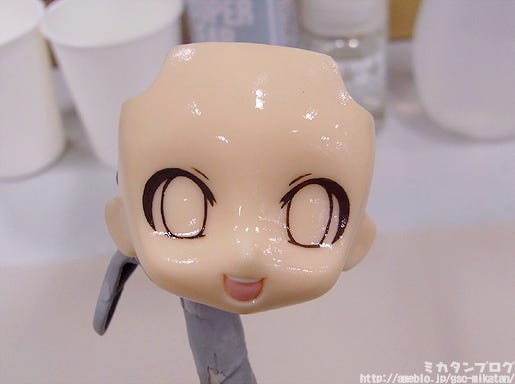
The expression should appear glossy at this point!
Ooh! I think I’ve managed to get it right!! Yay!! Now I’ve got my layer of lacquer on top of the eye borders!
Of course that means I can no longer change the borders! (((゚Д゚)))
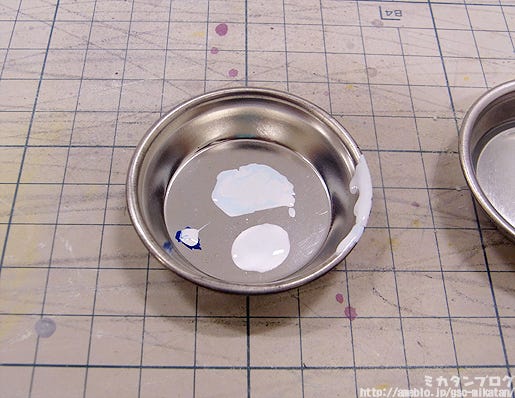
Mixing the color for the white of the eyes!
Oda-P said I could just use white, but I decided I wanted to mix a little bit of blue in anyway! (I guess we’ll find out if it was a good idea later…)
The tools I’m using were all introduced in the first post of this series, which you can find here: Painting a Nendoroid Expression Part 1: Basic Knowledge & Tools of the Trade
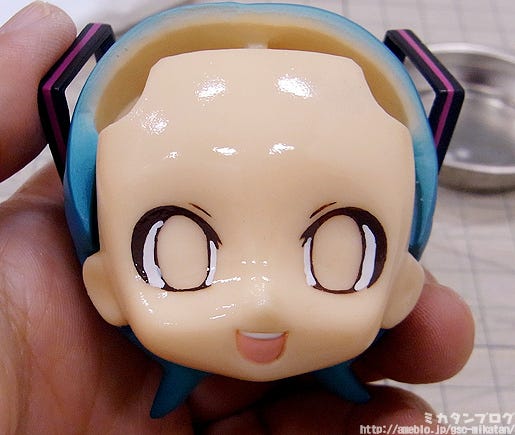
Painting the white of the eyes!
Of course with my amateur skills I didn’t manage to paint them neatly within the borders…
The white here is clearly going over the borders – but this is exactly why we sprayed the lacquer clear on top of them! Now we can simply use enamel thinner to clean up the areas where the white is crossing the borders, and it won’t affect the eye borders at all thanks to the layer of lacquer.
Complete!!!
I’m finally getting somewhere with my expression!! It’s so much fun to slowly but surely make progress like this!!
Although as I paint the color inside, the differences between the two sides becomes more and more clear… (‘A`)
In fact it already looks completely unsymmetrical…
But this is the best I can do right now, and I’ll be sure to see it all the way through!
I’ve really had a lot of support from all the sculptors here at GSC, and I’m very grateful for all their advice and help! If there was anything I didn’t understand they would quickly come to my rescue and give me some directions when I was worried about something.
I hope that everyone reading through these posts is enjoying them as much as I’ve been enjoying trying to do this myself, and I’ll be continuing this special corner the next time I have some free time!
Anyway, that’s all for today!
I hope to see you all again tomorrow!! (・∀・)ノ゛
(C)Crypton Future Media, Inc. www.crypton.net