The project I started on a whim…
Nendoroid Painting, Day 3!

It’s been quite tight on my schedule to keep this up, but the right eye has come out looking really nice so I’m really exited to get back to work on it now!! (…at least, I thought it looked nice :P)
I’m a little bit clumsy with my fingers, but I really like making things like this so I don’t really mind if it doesn’t come out perfectly! Although I definitely did have some frustrating times while working on it, it has all been worth it!
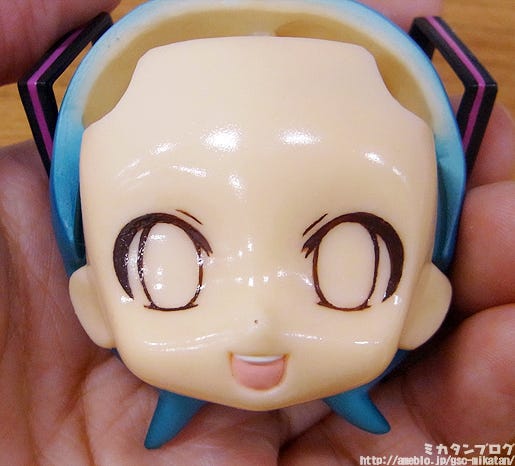
Today I’ll be continuing to work on the eye borders!
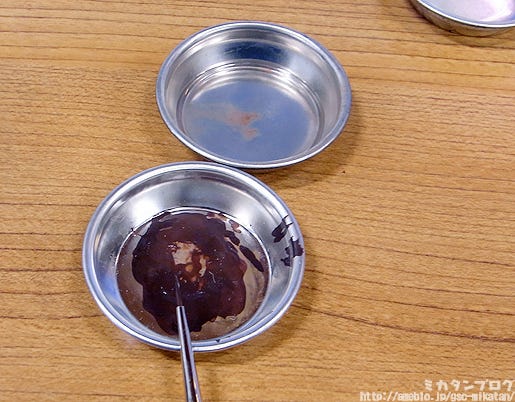
I’m using the exact same setup as I did yesterday. If you leave the paint in the tray for a day it’ll harden up, but you can use thinner to return the hardened paint back into a liquid form.
As a side note, when you mix colors together, always consider using a little more than you think you’ll need… it’s better than having to try and mix up the exact same color again!

Time to work on the left eye!
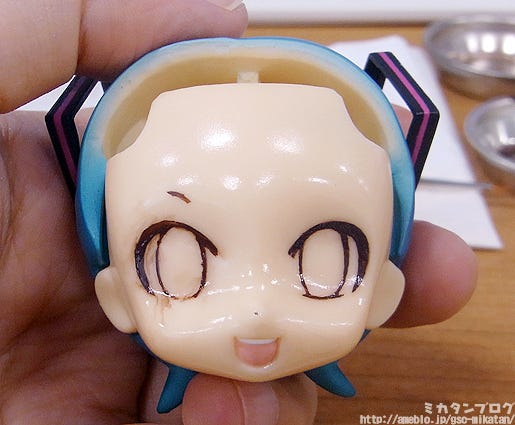
Now that I’m looking at this photo myself I can see the lines I made were definitely much too thick here. It’s better to have the paint more fluid and not as thick as I have it here – it’ll help in painting finer lines.
Cleaning up the lines with thinner!
I painted the right eye border on relatively easily, but for some reason the left eye just isn’t working out! I’m told there are two reasons for this!
・ It’s harder for right-handed people to draw the left eye!
・ You’re trying to create symmetry with the right eye!
Now that I think about it, it’s also harder to draw the left eye for me on illustrations – it’s the same concept just in figure form! Plus I need to worry about making the left eye look symmetrical to the right eye… this isn’t going to be easy…
I’m definitely making some progress!
But… something definitely doesn’t feel right…
Something I only managed to notice now…

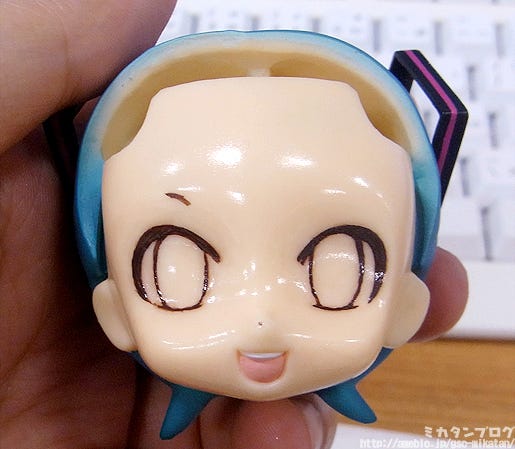
The eyes are too high!
I didn’t notice this at all when I had only completed the one eye! Apparently it’s actually a mistake that lots of newcomers to Good Smile end up making.
After all my hard work I didn’t want to believe that I was going to have to do it all again…
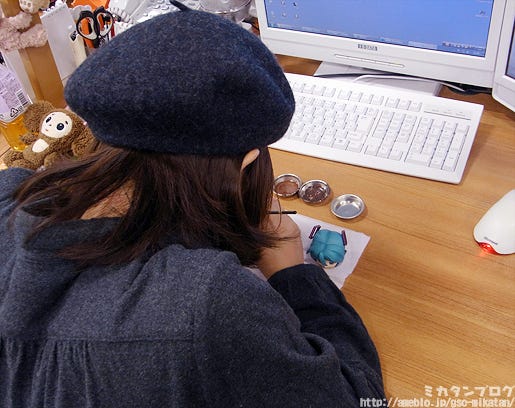
In my depressed state, Hiro-san and Mesuka gave me some interesting tools to work with!
Hiro-san is the sculptor responsible for the BRS and Dead Master Nendoroids, and Mesuka sculpted the Nendoroid Petite Madoka Magica figures! They came to my rescue in my time of need!!
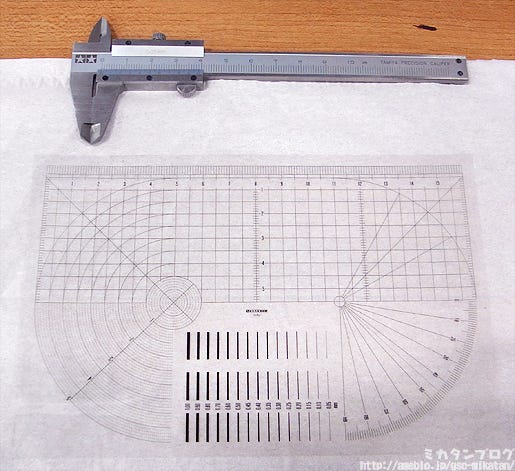
The tool at the top of this photo is called a Vernier scale, which measures the width of things (in this case, the size of eye). The tool at the bottom is to ensure that different parts are level.
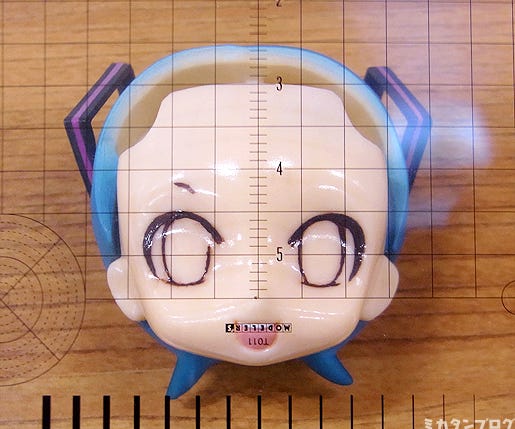
Let’s try using it!
Using the Vernier scale seemed a bit too far past my level, so I decided to make use of this transparent ruler-like tool. As you can see, the upper eyelashes and outer eye lines aren’t actually matching up at all…
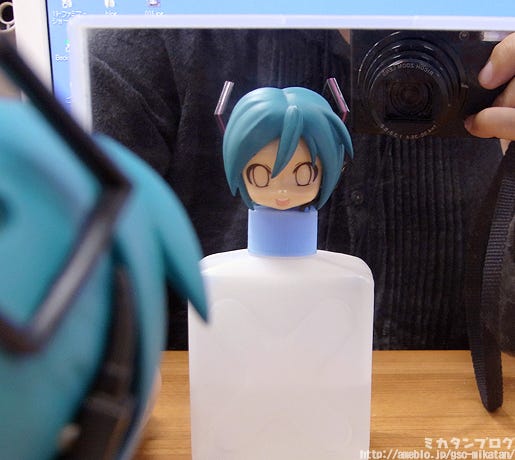
The fact that I’m doing this has now spread across the offices, so a lot of the sculptors stop by to see how I’m doing… when Kawara-san came by he told me I should take a look at my paintwork in a mirror…
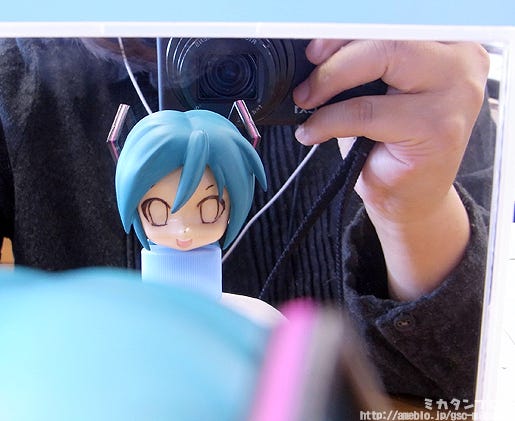
━━(||゚д゚)━━━ !!!!!
It looks terrible!!
Not only are the eyes at different heights, they’re not even remotely symmetrical! They look completely distorted!
It’s hopeless! I’ll have to do it again!
This time I’ll pay attention to height and symmetry!
I’ve fixed up the eyebrow and I’ve been moving the eyes downward… but…
Every time I fix something, the balance breaks somewhere else and that needs fixing! It’s an endless spiral of corrections!
At one point I just became completely lost as to what I was trying to do anymore. I couldn’t tell which lines were the right ones and which ones I wanted to erase…
I will get this looking right!
I want to go back in time and hit myself for ever thinking this would be easy.
Anyway… I kept at it while looking at it upside-down, from the sides, from the top and in the mirror from earlier, slowly but surely painting and then erasing lines until I felt it the lines were starting to look better. The thinner has quite strong fumes, so you also need some willpower to overcome those and continue to work… :P
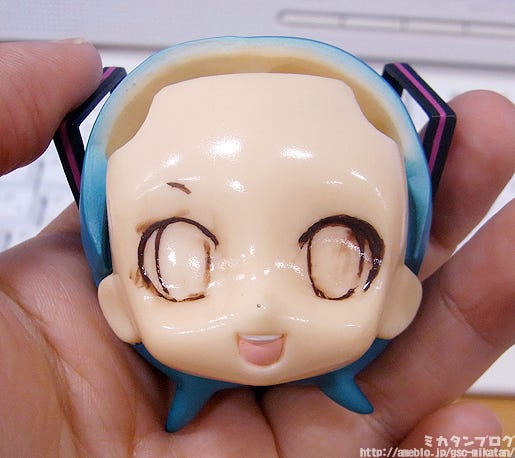
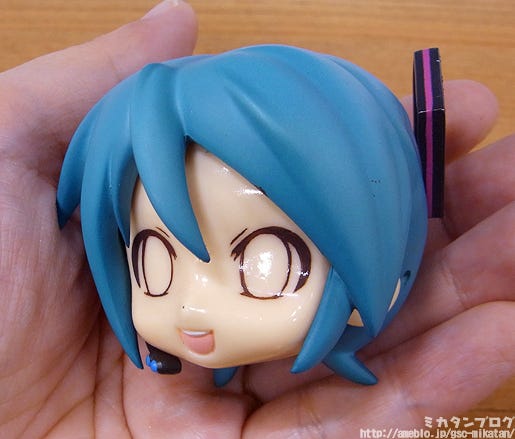
It’s been a total of ten hours now…
Complete━━(゚∀゚)━━!!!!
This post is obviously cutting out quite a lot… I actually ended up completely erasing and redoing the right eye again. It really wasn’t going how I wanted it to, so I erased the whole thing and once I started from scratch again it actually came out looking much better – determination is the key to success!
Plus, if I ever do this again I’ll know not to just work on one eye at a time, but to work on both and keep a good balance between them!
There is however personal differences on how exactly you prefer to do it, for example Hiro-san says he does 70% of the one eye and then 30% of the other, and then goes back and finishes them up. I guess it’s just up to you to find the way that works the best for you – practice makes perfect!
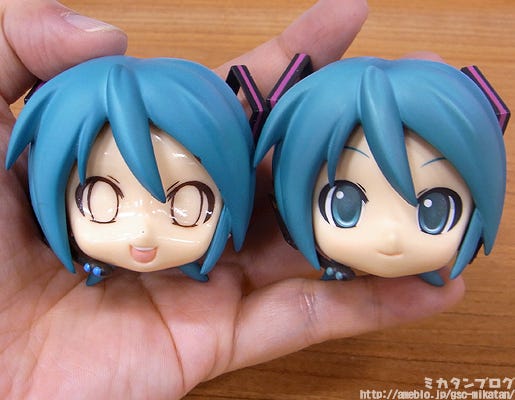
Comparison Shot!
A look from a different angle!
This is how it looks in the mirror!
I guess the symmetry looks okay… although that one eye looks a little off… is it?
Arrgg!! I think it is!!
But if I change something now it’s just going to end up throwing the balance off somewhere else, so I’m going to have to move on like this for now.
…to be honest, I meant to complete the painting in three posts.
But now I can say with confidence that this is just like playing some kind of impossible game… it’s fun, but it’s certainly not easy! To think that Oda-P can complete this neatly in a day and a half… I have a new found respect for him!
But anyway, with the borders out of the way we can move onto using some color! I can save my game here and continue another day!
But unfortunately I can only load that save once…
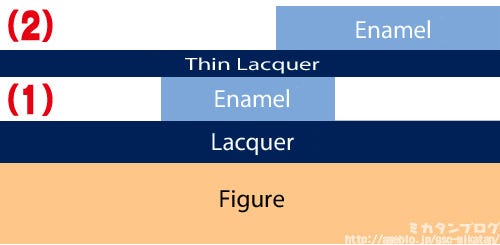
Now I’ll be using an airbrush to paint a think lacquer layer over the eye border – a very thin layer. But wait… shouldn’t the weak enamel paint be dissolved if lacquer paint is painted over it?
Normally that would be the case, and all my hard work drawing the eye borders would go to waste… but that’s exactly why you need to make a very thin layer!
I’ve never used an airbrush before… I wonder how this is going to turn out…
Oda-P (Currently Overseas):
“In the worst case scenario the paint will get smudged. It’s something that every newcomer had to go through, so don’t worry.”
(((( ;゚Д゚))) I’m worrying!!
Anyway, I only managed to finish the borders of the eyes for now… but this special corner will have to go on hold for awhile! As soon as I have a bit of spare time again, I’ll continue with my painting attempt! (To be honest, I really want to continue right now, so hopefully it won’t be long!)
Next week we’ll be taking a look at a couple of new prototype figures, so look forward to them!
Anyway, that’s all for today!
I hope to see you all again next week!! (・∀・)ノ゛
(C)Crypton Future Media, Inc. www.crypton.net