Once again an interesting mail has arrived!
| Hello Mikatan! I look forward to your blog all the time!The other day I bought a Nendoroid. It was a load of fun to swap all the cute parts around and I was very satisfied with my purchase, but there was one thing I’ve been a little stuck with. The Nendoroid came with a blank face and stickers to make a new expression, but I’m too afraid that I’ll mess it up when sticking the expression on! Is there some special way to make sure the stickers are in the right place and look cute? |
That’s a very good question!! Σ(゚Д゚ )
I’m not sure if it’s a boy or a girl who sent the question through this time, but I’ll certainly try and help out either way!
Today’s blog will be a little article on how to stick expression stickers onto a blank Nendoroid face! I was actually wondering myself of there were any tricks to putting these stickers on! (`・ω・´)

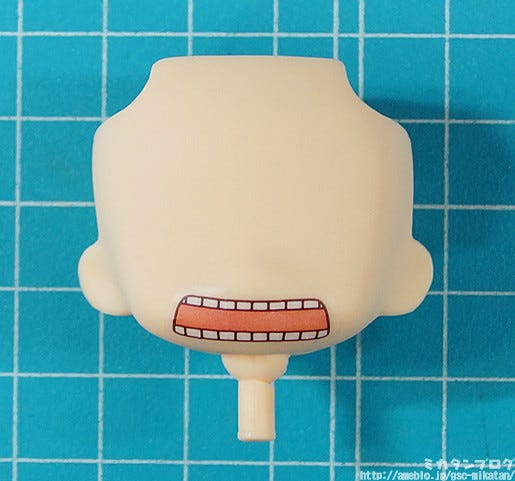
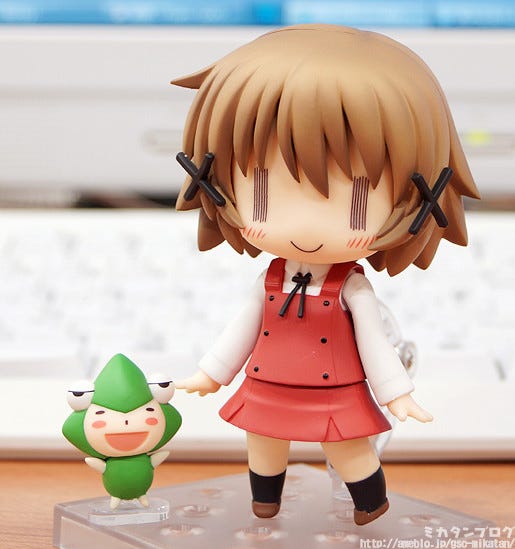
Today’s Nendoroid guest is Nendoroid Yunocchi!
Ume Aoki’s characters are amazing! They make for such cute Nendoroids! I have this huge urge to just play with Yunocchi now… but I can’t! This is work time! :P
This was one of the Nendoroids that came with a blank face as well as this lovely set of expression stickers inside the box!
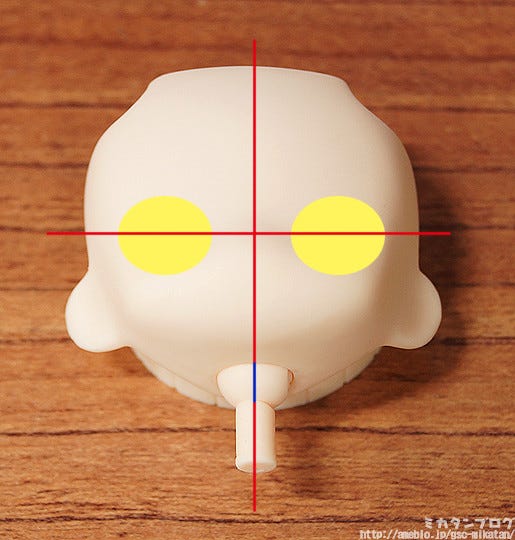
First you need to determine the position!
Unlike when you’re drawing an expression for yourself, the size of the eyes and mouth are already figured out and printed for you – but this also means that there is a single ideal place for each sticker!
First determine where the horizontal center line is!
The very top of the nose is generally the overall center, but there are some easy tips to find the exact center part! If you twist the Nendoroid neck joint around till you see the parting line (the blue line above), that parting line will show you the vertical center!
Next, try to determine the vertical center line!
There is no easy way to determine the horizontal center like there is with the vertical, but Nendoroids (just like real people), have a little depression on their faces where the eyes should be. The idea is to stick the eyes on so they match up with these depressions. I’m going a little off the point here, but without these depressions on the face, the quality would seem much lower!
You need to picture these lines within your head while sticking the expression on in order to try get symmetry and good positioning. I really think this picturing the lines in your mind can help out a lot!

I want to start sticking on the expression… but first let’s ask Tori Bird about the more technical aspects of placing stickers!
Mikatan: “I want to stick some expressions on Yunocchi, got any advice?!”
Tori Bird: “As long as you decide on the position it’s really quite easy…”
Ehhh!! Don’t say that! I still have a blog to write!!
We need your advice as a experienced expert of the figure community! There must be some secrets! (`・ω・´)
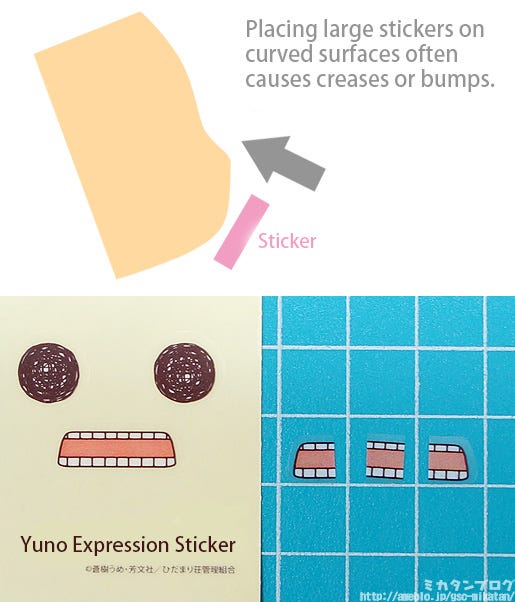
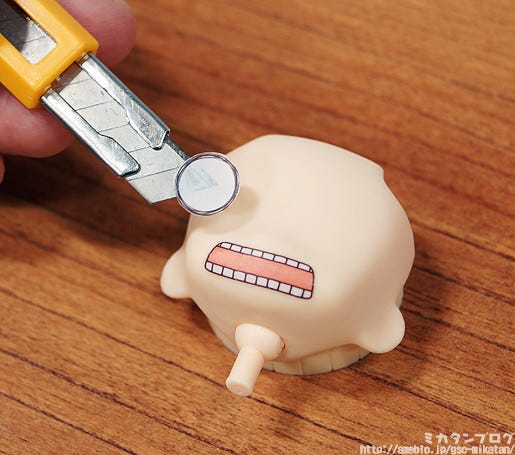
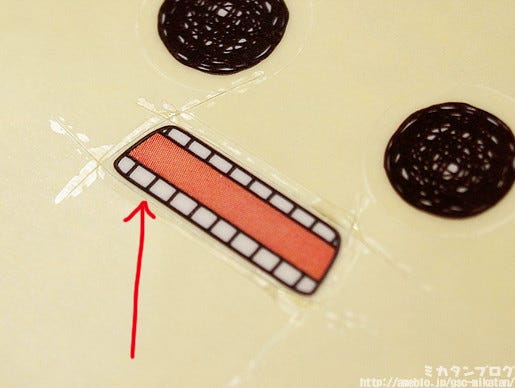
How to place large stickers on a curved surface!
There’s no problem with smaller stickers, but big stickers tend to leave creases or bumps when stuck onto curved surfaces… I’m told this is a fairly high-level technique, but let’s take a look!
In Yunochi’s case, we’re going to cut the mouth into three parts!
The reason the stickers are on a cutting board here is just to make them easier to see in the photos, when you actually try this, you can stick them onto the face as you cut them apart.
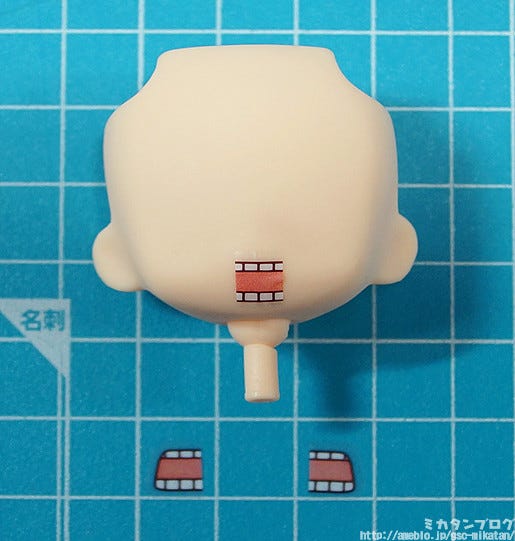
It’s best to stick the middle piece first!
If you start from the edges then it’s much harder to work out the overall positioning. The photo above has the sticker just lightly placed on the face part in order to get the positioning right.
Somehow this shot reminds me of Plastic Nee-san… :P
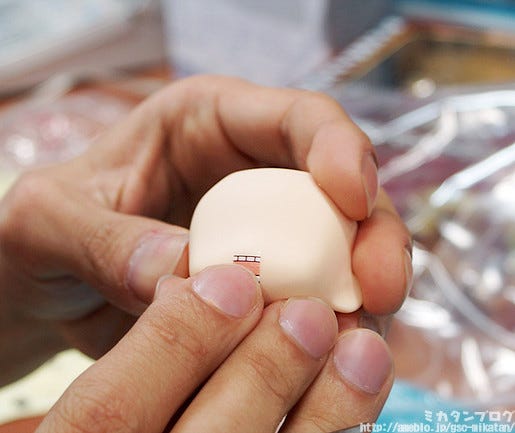
Use your finger to stick it firmly in place!
I asked Tori Bird if it was alright to use a cotton swab or something and he said there’s no problem, but you need to be careful not to get any of the cotton stuck on the stickers. Of course! Σ(゜Д゜;)
If the sticker still seems bumpy or wrinkled, then you can try correct it by making a small but with a craft knife and pushing down again on the sticker again. Just be very careful not to damage any other parts of the figure!
Stick the left and right parts on… and you’re done!
This is a rather complex method, isn’t it? ^^;
You also need to be careful to not leave any skin space between the stickers, while still also making sure they don’t overlap. But if you manage to get it done neatly it looks really nice!
Let me try put the eyes on now!
Bird was kind enough to do the mouth for me, but I’ll do the eyes myself! I’m always worried I’ll leave fingerprints if I put the sticker on with my hand, so I decided to position the eye with a craft knife.
If you’re right-handed, start with the right eye first!
The most difficult thing about the eyes is getting them symmetrical! By starting with the right eye, the left eye will be a guide for you, making it easier to align!
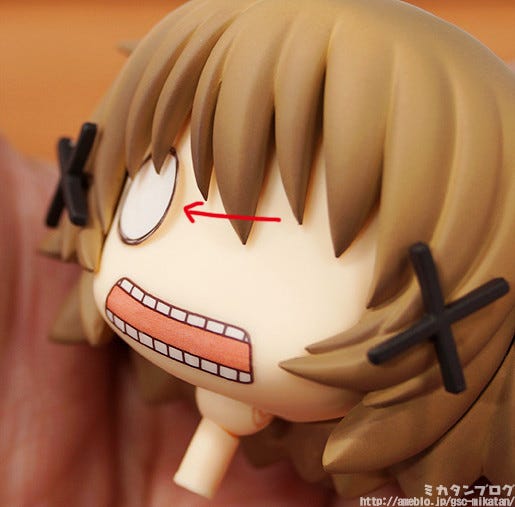
Be sure to check how it looks with the hair attached!
Before you stick the eye on completely, be sure to check how it looks with the hair attached. When sculptors are working on the expressions, they constantly have to check things like this!
You can see from where the arrow is pointing that the sticker isn’t stuck on properly just yet. This is just for me to check! Now that I’ve seen it looks alright, I’ll stick it down properly.
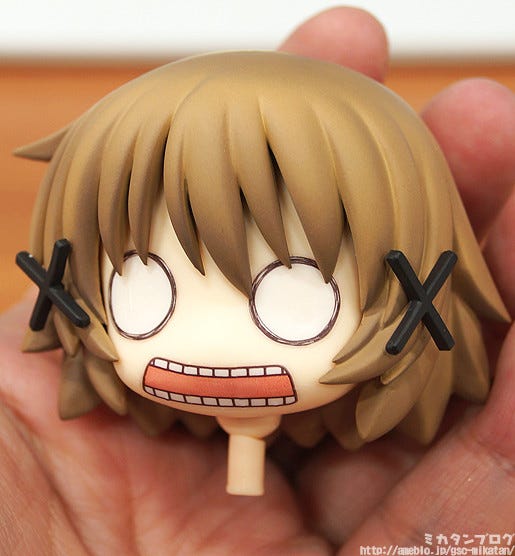
Complete ━━(゚∀゚)━━!!!!!
There we go! I think it came out looking rather nice! The curve on the expression for these eyes wasn’t bad at all, which is why I simply stuck them on as they were – there was no need to cut them.
But if you want even more quality…
If you cut off the extra, transparent area of the stickers before you stick them down, it’ll look even better! In Yunocchi’s case the stickers are very thin so I recommend a very fine craft knife if you want to try!
for those who are interested, the reason the stickers are so thin is so that once they’re stuck down they don’t protrude outward which would look a little strange. If they were any thicker it would be obvious that they were stickers.
I tried with another expression!
What do you think? I think she’s come out looking adorable! (That might just be because I stuck the expression on myself through :P)
As a final piece of advice, place stickers lower rather than higher!
Just like when I was painting my Nendoroid expression, when you first start sticking expressions on they tend to end up too high for some reason. Both Oda-P and Bird have told me this now and I still can’t figure out what it happens, but it does!
I know many people are too afraid they’ll mess up and tend to not try these things too often (I’m one of those people…), but I also think that doing things like this with your own two hands is one of the things that makes the hobby industry so fun! There are three of the same expressions included on each sheet with Nendoroids, so just keep trying and you’ll get it looking perfect!
It’s certainly easier to put stickers on than it is to paint the expression, but even just by placing the stickers, it still feels like you’ve put it all together yourself which is a lovely feeling! I really recommend everyone gives it a try!
But that’s all for today!
I hope to see you all again tomorrow!! (・∀・)ノ゛
© 蒼樹うめ・芳文社/ひだまり荘管理組合