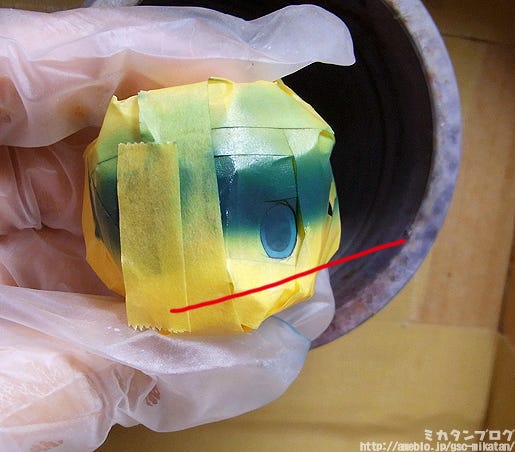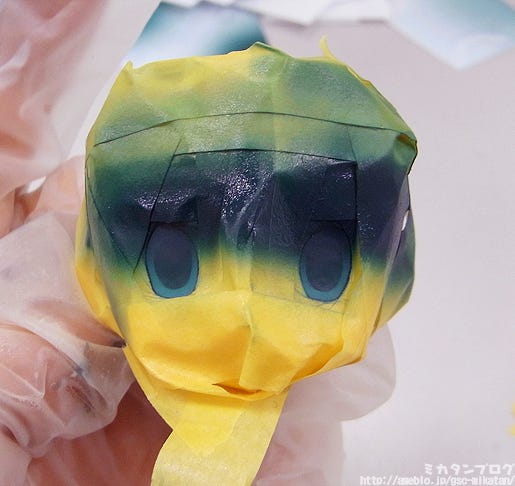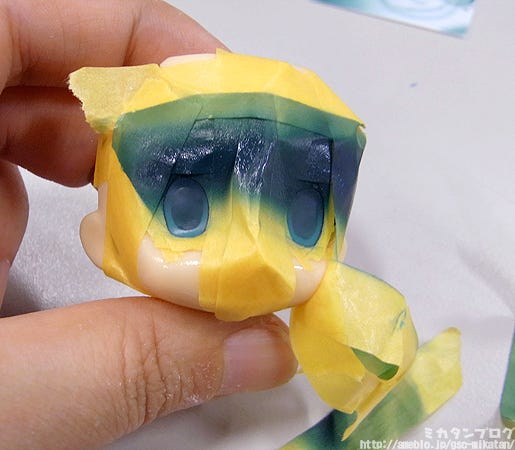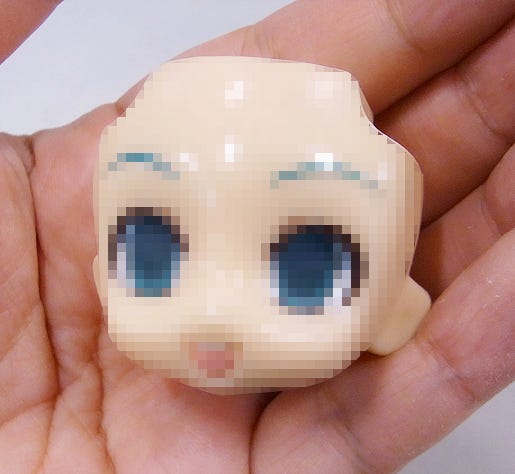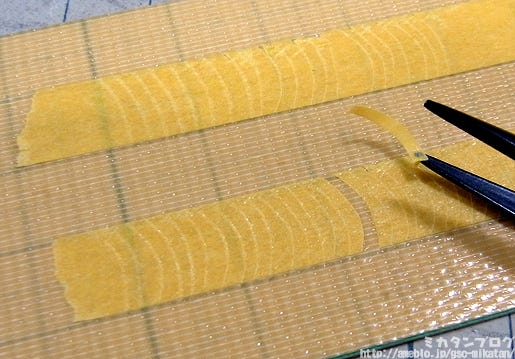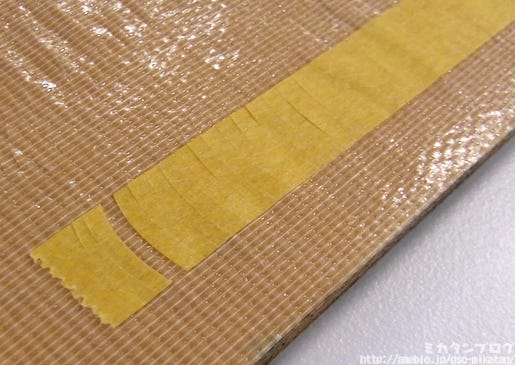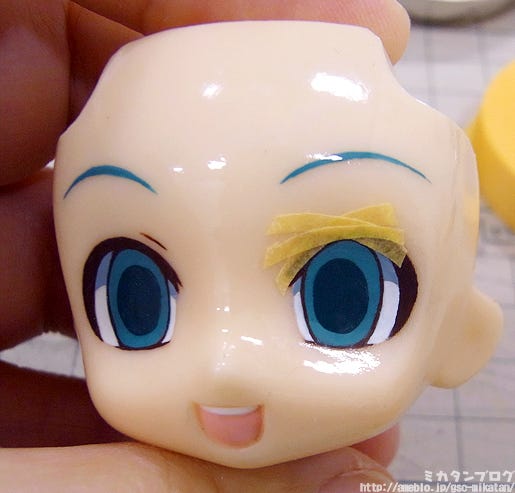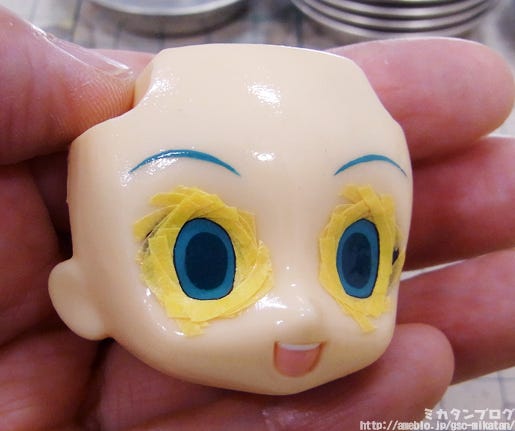
Painting a Nendoroid Expression Part 9: Adding in Highlights

The day before WonFes!
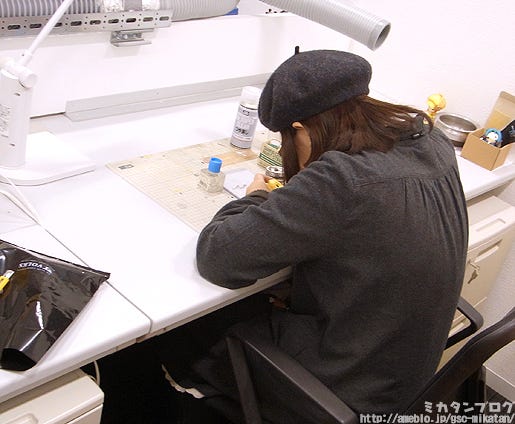
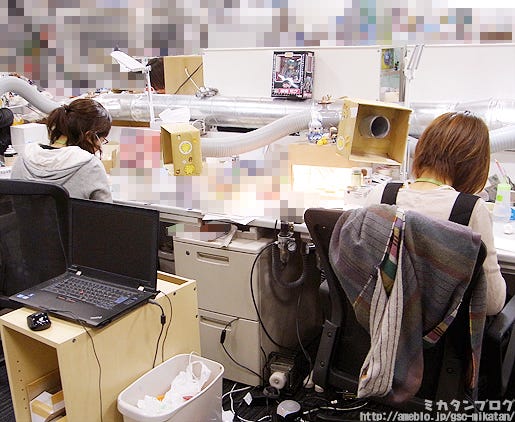
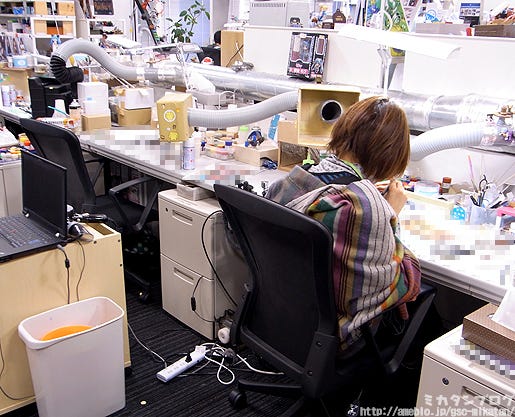
It’s 9PM on February 8th, in the production studios!!

001
Everyone is hard at work while I prepare my expression!

If you’re unsure as to why I’m working on the expression the day before WonFes, it turns out that I’m being forced to complete it at WonFes!

If you missed out on anything, you can catch up on my expression painting escapades with these posts:
Painting a Nendoroid Expression Part 8: Applying the Gradient
Painting a Nendoroid Expression Part 7: Preparing to Apply the Gradient
Painting a Nendoroid Expression Part 6: Pupils and Shadows
Painting a Nendoroid Expression Part 5: Mixing Colors and Eyebrows
Painting a Nendoroid Expression Part 4: Preparing to Apply Color
Painting a Nendoroid Expression Part 3: Continuing to Paint the Eye Borders
Painting a Nendoroid Expression Part 2: Painting the Eye Border
Painting a Nendoroid Expression Part 1: Basic Knowledge & Tools

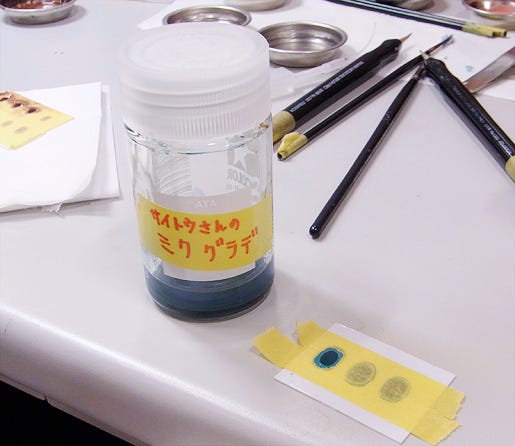
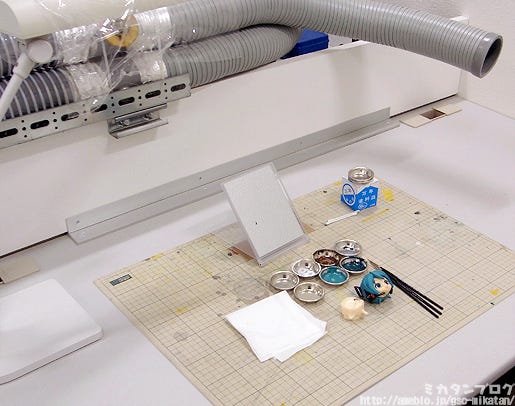
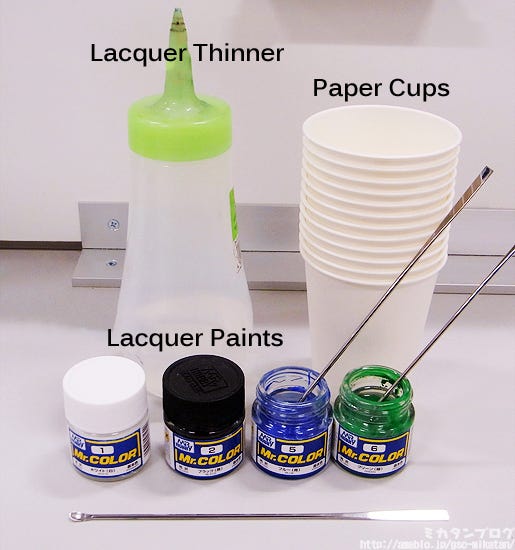
The paints you can see in the photo above are the different paints that I’ll need to use at WonFes, I quickly had to secure them before the event!

They are completely different to the paints I’ve been using up until now, so I needed to get a little practice in before the big day!
goodsmile company Mikatan's Blog English Version
Preparing to practice with the paints!

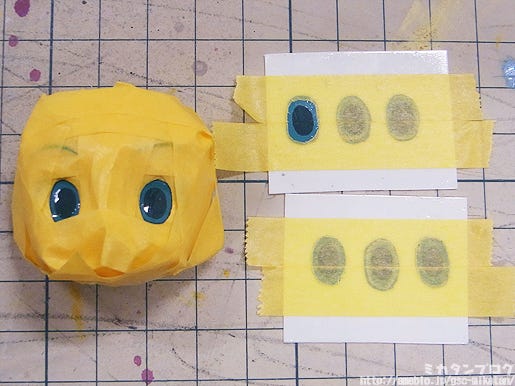
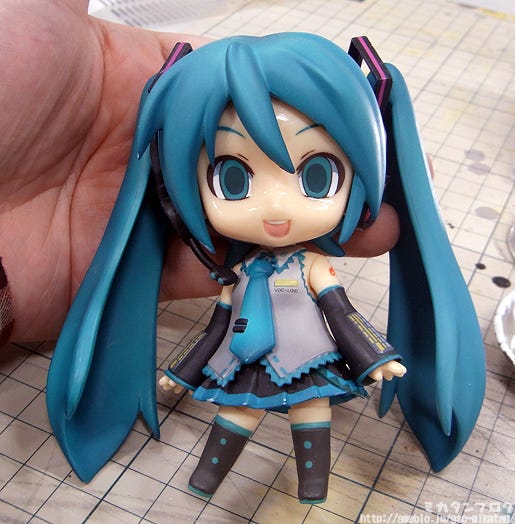
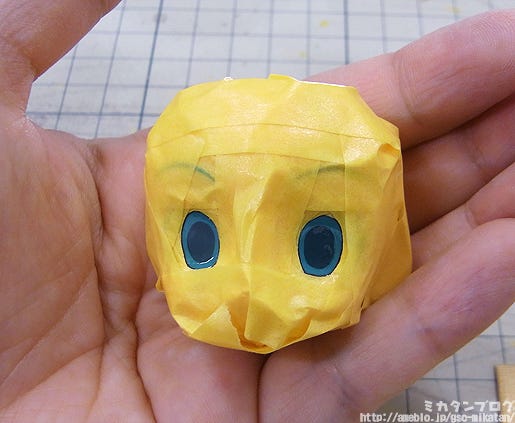
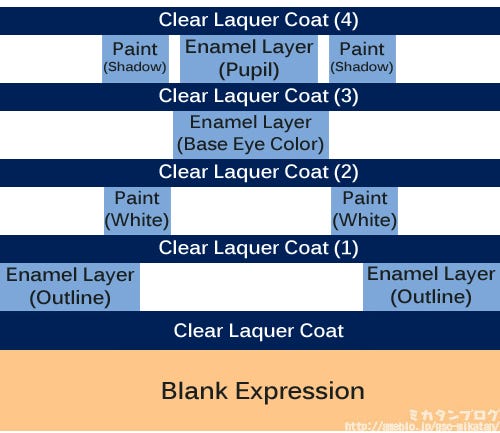
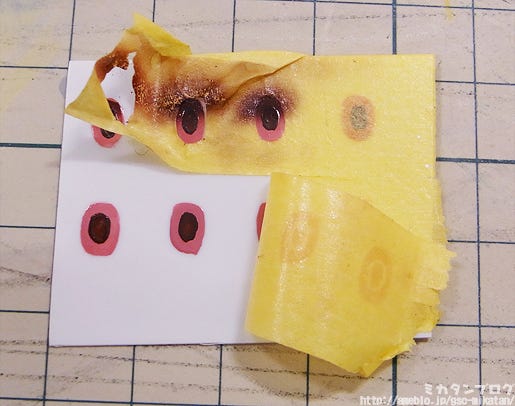
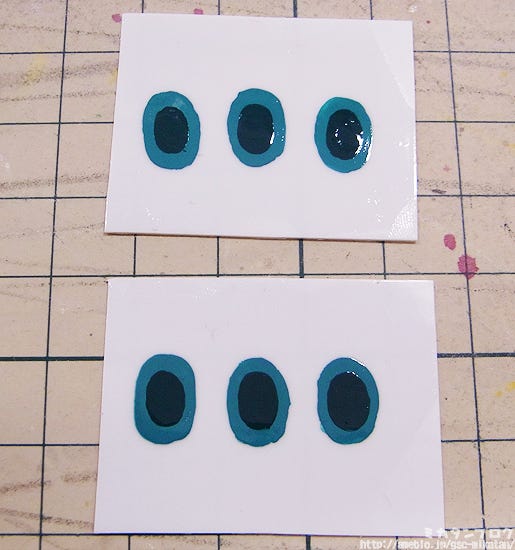
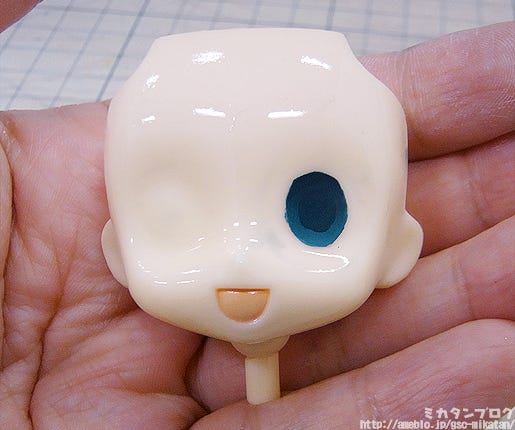
I was worried that this paint would dissolve all my hard work so far, so I quickly made a mock up version of what I currently have completed – the base color, pupil and gradient.

Somehow I think I’ve managed to get the gradient looking nicer on my quick mock-up compared to the actual version, but let’s just ignore that little fact for now and move on…
goodsmile company Mikatan's Blog English Version
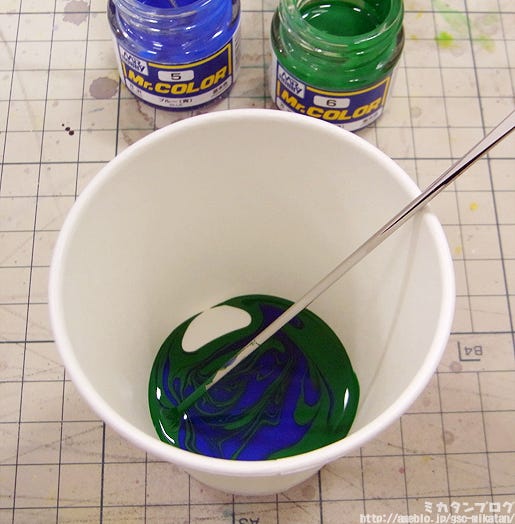
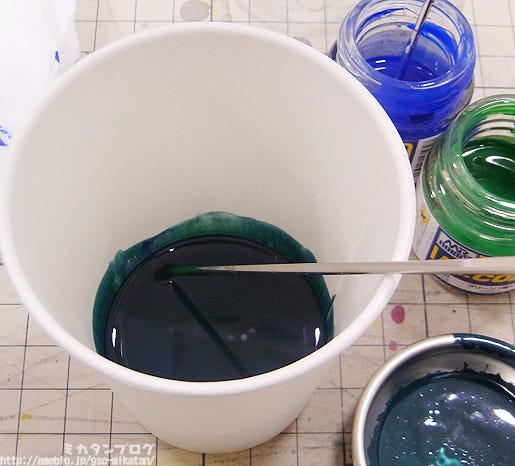
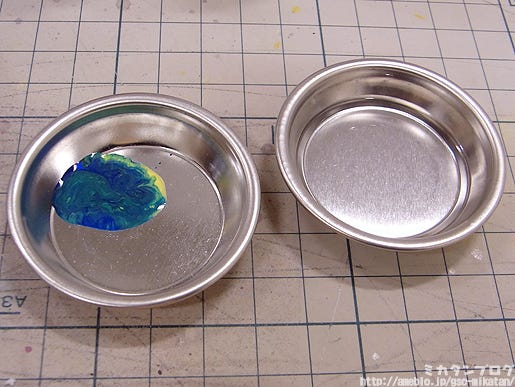
Mixing up the paint to test!

I’ve been using enamel paints up until now and these definitely have a different feeling to them, but I’m sure it’ll work out! I’m told that these paints dry very quickly, and once they dry they do become a bit powdery.

They are however very safe paints, which is why we are using them at the event. They might not be ideal for expressions, but I’m sure they must have their own specific uses elsewhere.
goodsmile company Mikatan's Blog English Version
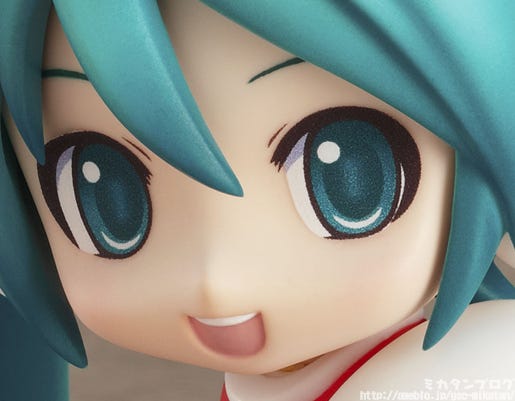
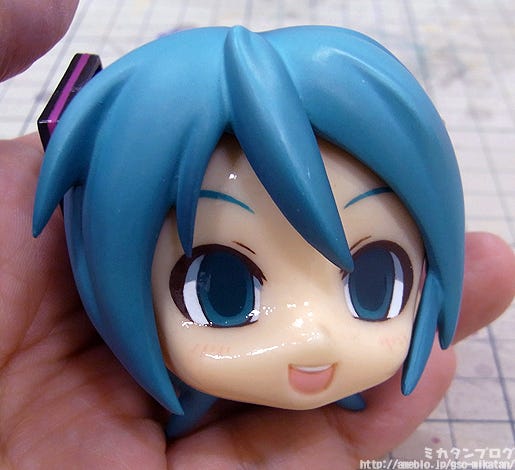
I’ll be adding highlights to this at the event!

The stare looks just as impressive as ever! I’ve worked really hard on this, so I’ve actually become quite attached to her now!! 😛

I tried to add a little blush to her expression to make her look a little bit cuter, but it was much harder than I expected to get the balance right on both sides! I thought it would just be a few quick lines, but they actually ended up taking quite a long time… I was working on it until the last train!

Everything about this expression ends up taking so much longer than I expect!
goodsmile company Mikatan's Blog English Version
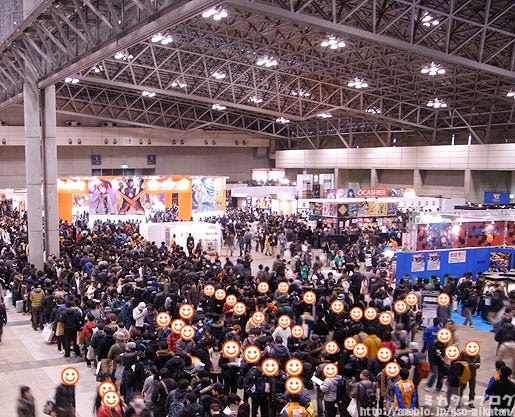
February 10th: WonFes!!

Now that I think about it, WonFes was already 2 weeks ago!
Time has been flying past far too quickly!
goodsmile company Mikatan's Blog English Version
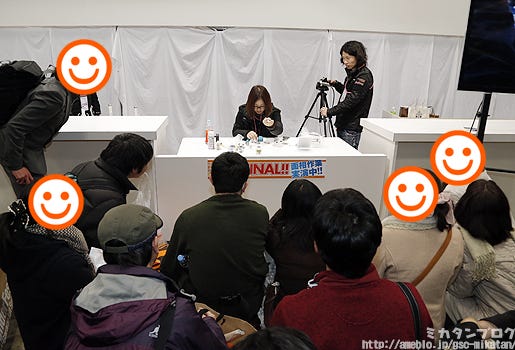
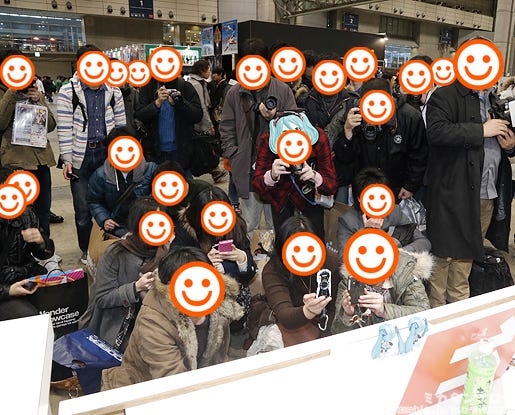
My expression painting started at 2PM!

I really didn’t expect so many people to come by, a big thank you to everyone who came to watch!! I don’t know why you’d want to spend your time watching me, but it was an honor anyway!! ^^
goodsmile company Mikatan's Blog English Version
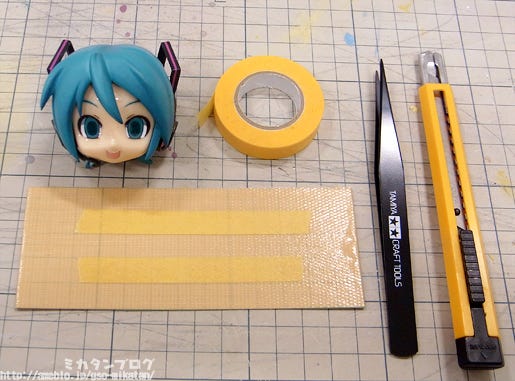
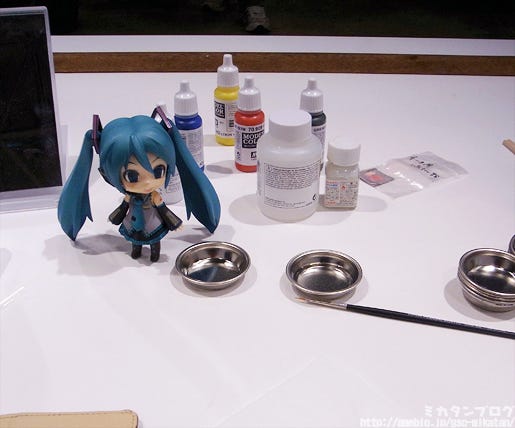
These were the tools for the day!

All I needed were paints, paint dishes and a a paint brush!
I also had a mirror with me to check symmetry!
goodsmile company Mikatan's Blog English Version
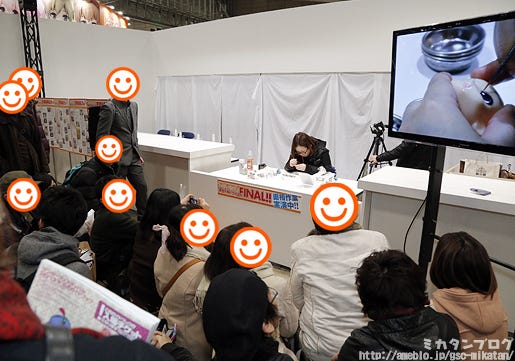
I had 2 and a half hours to work on it!

The monitor on the right has a close up on my hands so everyone could see exactly what was going on – it definitely helped to show off my incompetence, but at the same time it gave everyone a good close up on exactly what needed to be done, which was nice!

Before I started I was so nervous that I was drenched in sweat, but I slowly managed to calm down once I got started and realized everyone was there to watch over me, not judge me! Thanks again to everyone who was watching!!
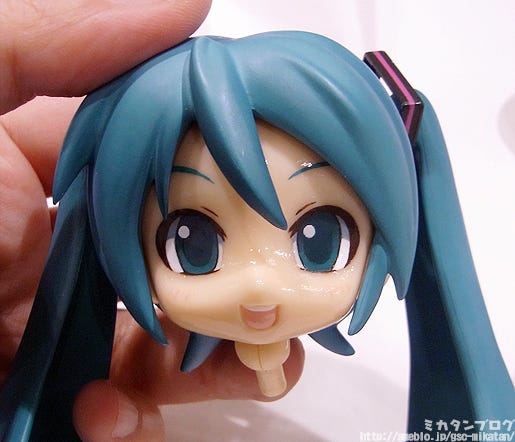
goodsmile company Mikatan's Blog English Version
Completed the upper highlights!

Hmm, I might have made them a little bit too big…

But anyway, nothing I can do about it now, I don’t have time to adjust it any further for now, so I’ll just move into the lower highlights now.
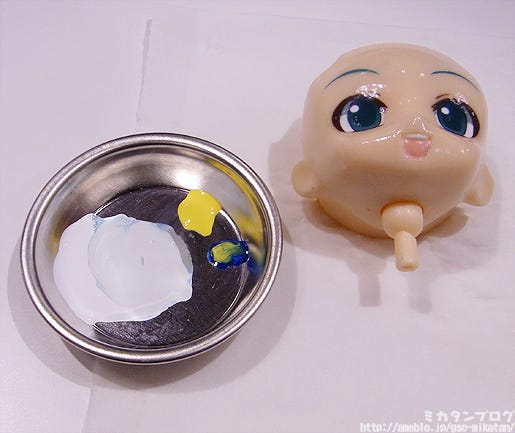
goodsmile company Mikatan's Blog English Version
Mixing colors for the lower highlights!

The upper highlights were simply done with white, but the lower highlights (known as “crescent moons”) need to be a color similar to the base color.

Normally this would go in a cycle of mixing the color and testing the color until it was perfect, but because I don’t have that much time I’m just going to try this out and hope for the best!!
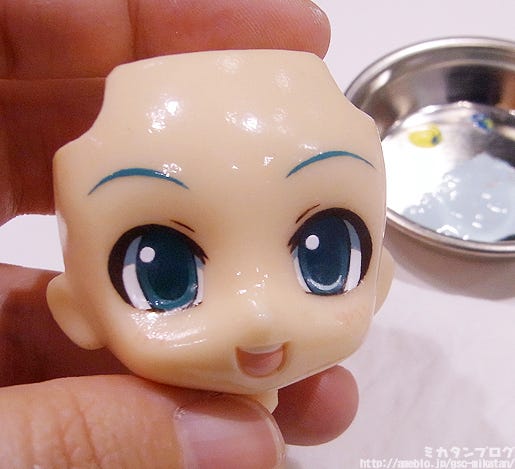
goodsmile company Mikatan's Blog English Version
Added in one of the crescent moons!

It’s come out far too white!! The color should definitely have been closer to the base color…

There is no time to rework it though, so I’m going to move on ahead once again! (This blog is a very abridged version of the work I actually went though… I needed to erase and redo the highlights a few times!)
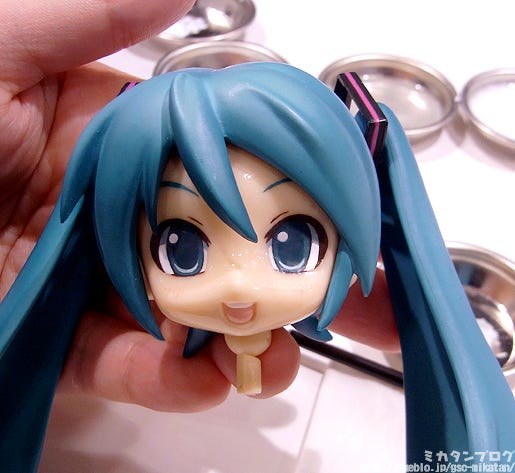
goodsmile company Mikatan's Blog English Version
Highlights complete!!

At this point it was already around 4:30PM!! At this point I still wanted to add matte and more of a blush to the expression.

I actually went all the way out of the event hall to get the matte layer done, but WonFes seemed like it about to end, so I had to end my expression work for the day!
goodsmile company Mikatan's Blog English Version
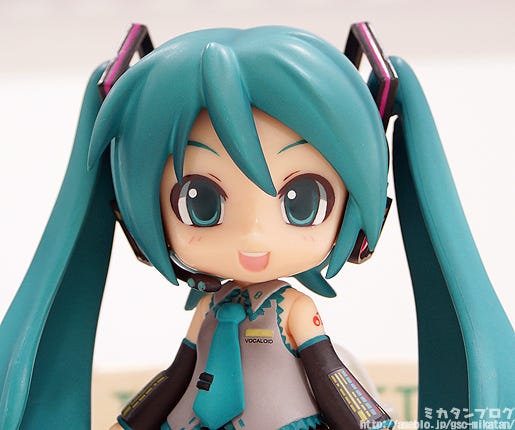
On display for everyone to see!

The title of the painting at the event was “Painting a Nendoroid Expression: Final Part”, but it ended up not really being completed to the very end!

But everyone still gave me a round of applause, which really meant a lot to me! I was so happy I actually teared up a little bit! I’ll don’t think I’ll ever forget the way I felt having everyone applaud my work. Thanks so much everyone!!
goodsmile company Mikatan's Blog English Version

I made a few more adjustments after WonFes!

While I was working on it at WonFes the size of the upper highlights and the color of the ‘crescent moons’ were annoying me, so I decided to fix them up! I know she’s not perfect, but I think I’ve done the very best I can to make this Miku-san!!

While I was working on the expression I accidentally erased the blush a bit too, so I’ll need to rework that as well. I’m getting used to dealing with these silly mistakes now. 😛

Tomorrow I’ll create the very last post in the series!

I’ll add a matte and complete the cheeks to finish up the expression!

It’s been a long journey!! I originally wanted to finish this in three days, and I simply can’t believe how long ago that was!!

I don’t think I’ve ever had such a long series of posts on the blog either! But I hope you’ll all read through tomorrow to the very end of the series!!
But anyway, that’s all for today!
I hope to see you all again tomorrow!! (・∀・)ノ゛


Nendoroid Monokuma

001
Monokuma has many fans here at GSC!!

This Monokuma hoodie belongs to Oonoshi from the web team! It was so cute that I had to make an animated .gif out of the photos! 😛

So anyway, today we’ll be playing with the Nendoroid version oh him, which you can see sitting on the desk here!
002
From Super Danganronpa 2 – Sayonara Zetsubou Gakuen:
Nendoroid Monokuma!

From the high-speed detective action game ‘Super Danganronpa 2: Sayonara Zetsubou Gakuen’ comes a Nendoroid of Kibogamine Academy’s self-proclaimed headmaster, Monokuma! He comes with both his standard expression and a laughing expression!

He also comes with a number of extra parts to recreate the famous punishment scene, including sitting parts and a punishment button! Enjoy posing him in your favorite scenes from the game!

The fact that he was voiced by Nobuyo Ooyama is amazing enough!!

I haven’t actually played the game myself, but I hear that Monokuma is a rather cruel character… that says all sorts of evil things in Nobuyo’s voice! I really want to hear that!! (((゜Д゜)))

The game in the photo isn’t actually ‘Super Danganronpa 2: Sayonara Zetsubou Gakuen’, but in fact the prequel ‘Danganronpa Kibou no Gakuen to Zetsubou no Koukousei’ – I decided to buy it yesterday! I knew it was popular, but I never really knew much of what it was about… now that I’ve heard about Monokuma I can’t wait to try the game! 😛
003
“Upupupupupupu!”

This is Monokuma’s own unique way of laughing! Isn’t it lovely! He also comes with a bent arm to fully recreate the insidious laughing pose! You can also choose to use just one of the bent arms instead of both of them if you prefer!

I can’t wait to hear Nobuno-san laughing like this!!
004
This is how he looks from the back!

His neck and legs are loaded with Nendoroid joints to move around! The neck can only be moved left and right and not vertically, but even that actually allows for some very different looking poses!

Take a look at the next photo as an example!
010
Embarrassed Monokuma!

He comes with another bent arm for the roar of laughter expression you’ll see in just a second – but here I’ve placed that arm behind his head to create an embarrassed looking pose instead!

I have to say that even without playing the game I’m already a Monokuma fan… I think I’ll grab two and make a team out of them – it’ll look so cute!!
009
Monokuma roaring with laughter!

He comes with an alternate expression for a burst of laughter!

Monokuma comes with just the two expressions – the standard one and this laughing one with his mouth open much wider. At the same time though, he will be cheaper than the standard Nendoroids at ¥3000!

This pose also makes use of both bent arms placed on his stomach, which just shows how hard he is laughing!
007
Punishment Time!

The button & hammer used in the class trial executions are included!

What? Ex-Executions?! (((( ;゜Д゜)))

So if you press this button, some character is going to be executed…

008
He pressed it!!

The spring part of the button can be removed so that you can pose him having pressed the button for punishment time!! I trust fans will believe this is a very important pose to have!

Plus he comes with alternate legs for a sitting pose!

He is very stable while sitting down, plus the way he is just plonked down looks so adorable!!! 。・゜・(ノД`)・゜・。
006
From Super Danganronpa 2 – Sayonara Zetsubou Gakuen:
Nendoroid Monokuma!

 
He’ll be up for preorder from tomorrow!! (`・ω・´)
Get in contact with our partner shops if you have any preorder or sales queries!

 
Anyway, that’s all for today!
I hope to see you all again tomorrow!! (・∀・)ノ゛


(C) Spike Chunsoft Co., Ltd. All Rights Reserved.

A Look at Where 3D Sculpting is Used on Figures!

The 3D corner during the WonFes Live Broadcast!
002

On the stream we had YOSHI-san sculpt something using 3D data during the broadcast, which would be printed out before the end!

We also had a couple of guests such as Bre Prettis who is the president of MakerBot (a company that makes 3D printers), Kazuhiro Kimura who is the president of Knead as well as Masaki Asai.

We had some really interesting talks going on, I really wish we had more time for that section as I wanted to ask so many more things!! Not to mention YOSHI-san was a very interesting person to have on the broadcast! 😛

There is no doubt that 3D data and figures are very closely related to one and other!!

Today I’ll be showing where 3D data is used on some figures! (σ゚∀゚)σ

001
This is Fuumin from the 3D team!

Fuumin has been a member of the staff since the offices were back in the Tsuchiya Building in Matsudo… one of the sculptors who has supported GSC for many, many years!

Let’s take a look at a few of the things Fuumin has worked on in the past…

003
Kino’s gun from Kino to Tabi!

Oooh! This is a product that brings back a lot of memories!! Kino uses a gun known as a 51 Navy 3rd Std. (Colt M1851 Navy)… as you can see even the screws are carefully included on the 3D model!
004

This is how the final product looked!

The gun itself is so tiny! But small things like this are always important aspects of a figure! This product was actually released all the way back in January 2008!

It’s over 5 years old now!! I can’t believe it!! (((゚Д゚)))

000
At that time, this needed to be printed first!

Back in 2008 we didn’t have the laser based 3D printers, but instead used a wax 3D printer known as a Thermojet. This caused the back to end up feeling very rough, which meant that instead of printing out the gun as is, a kind of mould needed to be made instead, which would then be filled with silicon to create the final product.

Nowadays, we can simply print out the data exactly as it is made, although obviously it still needs to be fixed up a little afterwards. It’s incredible to see how far 3D sculpting and printing has progressed in just a few short years!
005
The scale Miku, Rin and Len!

The bottom left is Miku’s base, the rest are parts from Rin and Len. Things like bases, small items and symmetrical things are often made using 3D data!
006
Here are the finished products!

The pattern on the base is actually on the reverse side, but the semi-transparent material lets the pattern come through onto the top! Things like that pattern would have taken ages to create by hand – 3D work makes repetitive sculpting like that so much faster!

While we’re talking about them, don’t forget that the 1/8th scale Rin and Len are currently up for preorder!

– Kagamine Rin & Len Review –
http://mikatan.goodsmile.info/en/2013/02/19/18th-scale-kagamine-rin-kagamine-len-rerelease/

007
Nendo Petite K-ON!’s instruments!

The instruments held by the girls were all made using 3D data! Of course they had to be a rather strange looking size to suit the Nendoroid Petite design!
019
This is how tiny they come out!!

One of the amazing things about sculpting with 3D data is that you can keep amazing detail even when creating super tiny things like these! The instruments are only a few centimeters in size each, but the amount of detail on them is unbelieveable…

That said though, there is a limit to how much detail things can have… if it is too intricate then mass production becomes a problem, so the production team and the sculptor need to keep careful balance between detail and viability.

aNendoroid Kamui Kobayashi’s Helmet!

009
Nendoroid Fully Posable Saber’s Sword!

Small accessories like these are also made with 3D data! I actually always thought that Kamui-san’s helmet was made by hand!

If I remember correctly, Saber-san’s armor was also made using 3D data!
012
Nendoroid Kokoro’s Segway!

013
1/8th Scale Akane Isshiki’s Bike!

Even big vehicles like this can be made using 3D data now! The thing about something like Akane’s bike is that it doesn’t actually exist, so the 3D sculptor needs to carefully build the model using the anime designs. The method is different to sculpting by hand, but it really is quite a similar job in the end!
010
The soft vinyl Kyubey-san!

Accessories and mechanical things are not the only things made with 3D data… complete figures can also be made! You might remember that some time ago I showed how the 1/8th scale Millhi figure was made using 3D sculpting – and I’m sure many more upcoming figures will also be!

– A Look at How Millhiore F. Biscotti was Made Using 3DCG Sculpting! –

http://mikatan.goodsmile.info/en/2011/11/04/a-look-at-how-millhiore-f-biscotti-was-made-using-3dcg-sculpting/
014
Hanekawa-san’s chair and table!

011
Nendo Petite: New Japan Wrestling Ring

015
Miku: Love is War’s Pedestal!

The pedestals and bases that figures stand upon often bring something really special to the figure itself! These three products I’ve shown above are good examples which create a small little diorama for the figure to be displayed on.
I always love it when the bases have this much detail!!

The Love is War pedestal really was quite amazing… I bet it must have taken ages to create the data for it!!
018
The Miku-san ice tray!

This was also made from 3D data. The ice tray was included together with the fully posable Snow Miku!

I remember the first time I tried to get the ice out from the tray and I ended up ruining Miku’s arms and skirt, or causing the edges of the blouse to become all rounded… sorry Miku!! ;_;
016
Time for a Quiz!!

What part is this?!

[Time Limit: 30sec]
017
Hint:
It’s a part of someone’s sword!

020
Answer:
The Guard on Shiki Ryogi’s Sword!!

How can such a tiny piece be so intricate?! The pattern you see on the guard comes directly from the publisher’s data!

Because figures are made to a scale, certain details to sometimes need to be omitted… but there are often intricate details like this that are kept, which I believe are the key to a high quality figure!!

That brings this blog on 3D sculpting to an end, I hope you enjoyed it!

It’s quite interesting to see all the different ways in which 3D sculpting is used! If this post is popular, I’ll happily make a part two and show some more interesting parts of figures made using 3D data!!
But anyway, that’s all for today!
I hope to see you all again tomorrow!! (・∀・)ノ゛


The WonHobby 17 Exclusive Products are Available for Order Online until 21:00JST on the 18th February!

Wonder Festival 2013 (Winter)!

o0515031512416435404

A big thanks to everyone involved!!

Plus a big thank you to everyone who came by the WonHobby booth or the Max Factory 25th anniversary booth… as well as to everyone who watched the live broadcast! I hope you were all able to enjoy yourselves at this year’s first WonFes!!

Now I’d like to calm things down and just relax a bit… but that isn’t going to happen! There are so many new products that I can’t wait to take a closer look at, not to mention there are still many more events to come!
000
Today’s blog is mostly just a big notice!

A summary of all the products available online now!

I know a lot of people put this off thinking there is a load of time, but then often end up forgetting to order… (me included…) If you see something you like in this blog post, I recommend ordering it before it’s too late!!

Orders close at 21:00JST on the 18th February!
(Excluding Glenfire)

GOOD SMILE ONLINE SHOP (WONDERFUL HOBBY LIFE FOR YOU!!)
http://goodsmile-wf-global.ecq.sc/
001
Homura Akemi: you are not alone.

Price: ¥9000
Number Available: Made to Order. Max 3 per person.
Est. Delivery: Late June 2013

From the anime series ‘Puella Magi Madoka Magica’ comes a 1/8th scale figure of Akemi Homura, the time traveler who fought in endless parallel worlds. She comes with a number of replaceable parts which allow you to display her in all sorts of different poses.

You can choose to display her holding her bow with Madoka’s red ribbon in her hair, just as she looked in episode 12, or instead you can display her with braids and glasses while holding a bomb or golf club, as she was in episode 10. Enjoy both the confident and the shy Homura, all with just one figure!

– Good Smile Online Shop –
http://goodsmile-wf-global.ecq.sc/top/wf17gscscawd00001.html
002
Nendoroid Snow Miku:
Strawberry White Kimono Ver.

Price: ¥4000
Number Available: Made to Order. Max 3 per person.
Est. Delivery: Late June 2013

Designs for the 2013 Snow Miku were submitted by fans to the piapro website and then a winner was chosen by viewers during a NicoNico Live Broadcast. The winning entry was an illustration of Snow Miku with a slightly more mature air, wearing a beautiful white kimono – which has now been transformed into a Nendoroid!

Her cotton veil can be removed, and she comes with two different hair styles to choose from when it is removed – you can display her with either her trademark twintails, or instead with her hair tied up. Sitting parts are also included for a more relaxed pose, and she also comes a number of items for a snowy day, including an umbrella, a toothpick and a snow bunny.

– Good Smile Online Shop –
http://goodsmile-wf-global.ecq.sc/top/wf17gscnenwd00001.html
005
Nendoroid Petite: IDOLM@STER Cinderella Girls –
Anzu, Kaede and Rika + Live Stage Set

Price: ¥4000
Number Available: Made to Order. Max 3 per person.
Est. Delivery: Late June 2013

From the popular social game ‘IDOLM@STER Cinderella Girls’ comes a set of Nendoroid Petites featuring Anzu Futaba, Kaede Takagaki and Rika Jougasaki all wearing their S Rare+ outfits!

The set also includes a huge stage pedestal which can be put together in a number of different ways to recreate the LIVE Battles from the game! Not only can you change the positions of the stage objects, you can also place up to five different idols on stage!

– Good Smile Online Shop –
http://goodsmile-wf-global.ecq.sc/top/wf17gscnepwd00001.html
003
figma Rin Shibuya

Price: ¥3500
Number Available: Made to Order. Max 3 per person.
Est. Delivery: Late June 2013

From the hugely popular social game ‘IDOLM@STER Cinderella Girls’ comes a figma of Rin Shibuya in her school uniform.

· Using the smooth yet posable joints of figma, you can act out a variety of different scenes.
· A flexible plastic is used for important areas, allowing proportions to be kept without compromising posability.
· She comes with a standard expression, a smiling expression as well as bashful smile with closed eyes.
· Special parts to display her with one hand in her pocket are also included.
· Her pet dog ‘Hanako’ is included, together with a leash to take him out for walks.
· An articulated figma stand is included, which allows various poses to be taken.

– Good Smile Online Shop –
http://goodsmile-wf-global.ecq.sc/top/wf17maxfigwd00001.html

004
figma Anzu Futaba

Price: ¥3500
Number Available: Made to Order. Max 3 per person.
Est. Delivery: Late June 2013

From the hugely popular social game ‘IDOLM@STER Cinderella Girls’ comes a figma of Anzu Futaba wearing casual clothes.

· Using the smooth yet posable joints of figma, you can act out a variety of different scenes.
· A flexible plastic is used for important areas, allowing proportions to be kept without compromising posability.
· She comes with a yawning expression, a forced smile as well as a dead tired expression with closed eyes.
· A number of extra parts are included, such as her favorite plushie bunny, a game console and some candy.
· Tear-shaped stickers are included which can be used as tears on the yawning expression, or sweat on the tired expression.
· An articulated figma stand is included, which allows various poses to be taken.

– Good Smile Online Shop –
http://goodsmile-wf-global.ecq.sc/top/wf17maxfigwd00002.html
007
Tomokazu Seki: Glenfire

Price: ¥4000
Number Available: 100 available. Max 3 per person.
Est. Delivery: Late March 2013

The 12th figure to join the Tomokazu Seki series comes from the Ultraman Zero Movie – the pirate bodyguard of flame, Glenfire! The sculpting of the impressive flames burning atop his head together with the confident pose create a figure that fans are sure to love!

– Good Smile Online Shop – (Japan Only)
http://goodsmile-wf.ecq.sc/wf17maxsfbjp00001.html
006
Dekacchu Kirari Moroboshi

Price: ¥4000
Number Available: Made to Order. Max 3 per person.
Est. Delivery: June 2013

From the popular social game ‘IDOLM@STER Cinderella Girls’ comes a special version of one of Phat! Company’s new Minicchu series, a much bigger ‘Dekacchu’ version of Kirari Moroboshi! She is approximately 4 times bigger (220mm) than the Minicchu version, so fans can enjoy even more cute power from the lovely Kirari!

– Good Smile Online Shop –

http://goodsmile-wf-global.ecq.sc/top/wf17phaothwd00001.html
008
figma Egashira 2:50 – White Tights ver.

Price: ¥3800
Number Available: Made to Order. Max 3 per person.
Est. Delivery: Late June 2013

Enjoy the legend of Egashira 2:50 in your very own hands with this special limited edition version of figma Egashira 2:50, wearing his famous white tights – the same white tights that were sold on Yahoo! auctions for about 280000 yen as a charity auction to aid those affected by the Tohoku earthquake. You can also display him together with the standard black version for amazing contrast which you can enjoy forever!

– Good Smile Online Shop –
http://goodsmile-wf-global.ecq.sc/top/wf17frefigwd00001.html
009
WWR Hara Patrol

Price: ¥15000
Number Available: Made to Order. Max 3 per person.
Est. Delivery: Late June 2013

As a part of threeA’s popular ‘World War Robot’ series comes a new addition to the JDF colorway released by GSC. This time its a set of two which includes both the GRUNTS and Square Mk.2.

The GRUNTS figure has long been requested by fans and is now finally available. His outfit is incredibly detailed, featuring packs that can open and close as well as highly realistic paintwork to give him a worn appearance. The Square Mk.2 is different to the original Square as it has multiple joints in his legs, allowing for more active poses. The legs can be extended out for a more intimidating effect, or instead kneeling down for a cuter appearance – pick the style you prefer!

– Good Smile Online Shop –
http://goodsmile-wf-global.ecq.sc/top/wf17maxthrwd00001.html
010
WWR JDF Square SMART PHONE CASE

Price: ¥4000
Number Available: Made to Order. Max 3 per person.
Est. Delivery: Late June 2013

The popular ‘Square’ model from threeA has been transformed into a smart phone case designed for the iPhone5! The case is much more than just a print, as it features the characteristic mouth of the Square as well as the amazing rusted paintwork seen on threeA figures!

The design is by Ashley Wood and the paintwork by threeA’s skilled craftsmen, ensuring the same amazing quality you’ve come to expect from threeA products!

– Good Smile Online Shop –
http://goodsmile-wf-global.ecq.sc/top/wf17throthwd00001.html


10 different exclusive products!!

There are so many different products – more than I think we’ve had at any previous WonFes!! We have cute girls, Ega-chan and even threeA for a very varied line-up! You can find the reviews I did for these products here:

– Winter 2013 WonFes Products –

■ [GSC] Homura Akemi: you are not alone.
■ [GSC] Nendoroid Snow Miku: Strawberry White Kimono Ver.
■ [GSC] Nendoroid Petite: IDOLM@STER Cinderella Girls –
Anzu, Kaede and Rika + Live Stage Set
■ [MAX] figma Rin Shibuya
■ [MAX] figma Anzu Futaba
■ [MAX] Tomokazu Seki: Glenfire
■ [Phat] Dekacchu Kirari Moroboshi

Orders close at 21:00JST on the 18th February!

GOOD SMILE ONLINE SHOP (WONDERFUL HOBBY LIFE FOR YOU!!)
http://goodsmile-wf-global.ecq.sc/

If you’re planning to buy something, make sure you don’t forget to put your order in before the deadline!
Anyway, that’s all for today!
I hope to see you all again tomorrow!! (・∀・)ノ゛

Painting a Nendoroid Expression Part 8: Applying the Gradient

Just a few days ago…

Oda P: “You should finish up your expression at WonFes!!”
Aki: “Ooh, that’s a great idea! Let’s do it!”

Nendoroid Painting, Day 8!

goodsmile company Mikatan's Blog English Version
I was hoping to finish this up before WonFes!!

But now apparently I’m going to be finishing my expression at the event instead… I’m not entirely certain how things managed to end up like this. :/

But… I can’t take an airbrush to the event, so I’ll need to finish up with that section now, and then finish everything else at WonFes…!

You can find the previous posts in this series here:
Painting a Nendoroid Expression Part 7: Preparing to Apply the Gradient
Painting a Nendoroid Expression Part 6: Pupils and Shadows
Painting a Nendoroid Expression Part 5: Mixing Colors and Eyebrows
Painting a Nendoroid Expression Part 4: Preparing to Apply Color
Painting a Nendoroid Expression Part 3: Continuing to Paint the Eye Borders
Painting a Nendoroid Expression Part 2: Painting the Eye Border
Painting a Nendoroid Expression Part 1: Basic Knowledge & Tools
goodsmile company Mikatan's Blog English Version
The ‘chip’ to test expressions on!

In the last post I managed to get as far as painting the base colored pupils onto this white plastic board called a ‘chip’!

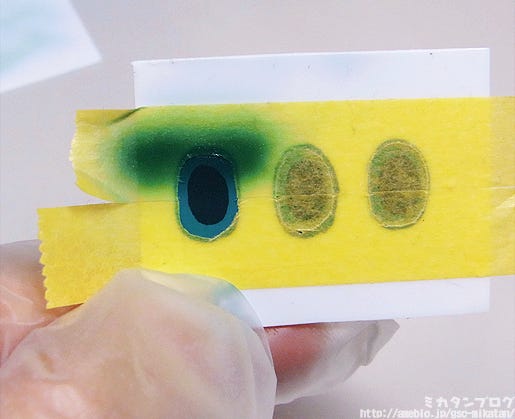
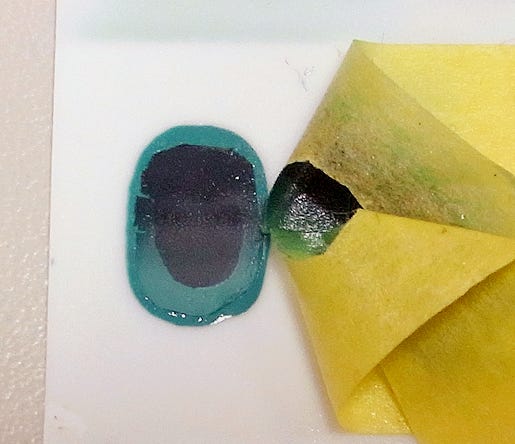
Now I’ve placed masking tape over the test eyes and cut open holes in that tape to mimic the effect that I created on the actual expression – once I’ve tested the color, I’ll peel off the tape to see how the gradient looks!!
goodsmile company Mikatan's Blog English Version
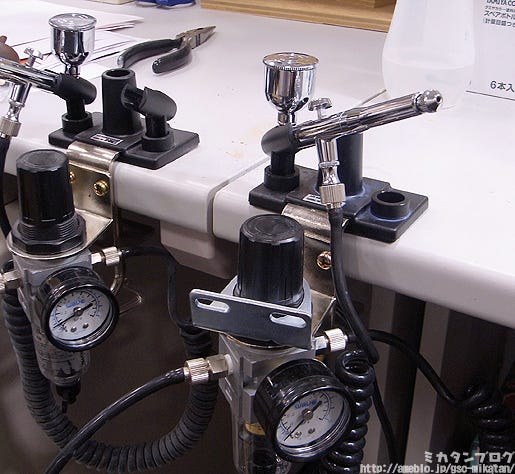
These are the girls working on expressions!

They featured briefly in my previous post as well – Nendoroid expressions are primarily done by these two! I really feel bad stealing away the airbrush during this busy time before WonFes… I hope it isn’t needed too urgently for anything!
goodsmile company Mikatan's Blog English Version
This is the lacquer paint I mixed up last time!

I was using enamel paints while working with the brush, but the airbrush uses lacquer paint. This is the color I mixed up with lacquer paints last time, which was kindly put into a little bottle for me which reads ‘Mikatan’s Miku Gradient’. Somehow that makes me feel all happy inside!
goodsmile company Mikatan's Blog English Version
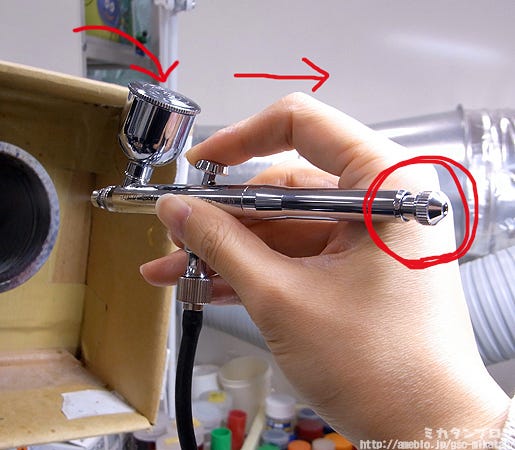
The airbrush!

Back during the NicoNico Super Kaigi I played around with one for about 5 seconds, but this will be my first time actually using one. I’m quite nervous…
goodsmile company Mikatan's Blog English Version
Here’s how to use the airbrush!

(1) Add the paint into the cylinder part.
(2) Spin the knob at the back to change how the brush sprays.
(Either over a wide area, or in a specific area)
(3) Press the switch while pulling back.

That’s the absolute basics! It doesn’t sound very difficult, but much easier said than done!
goodsmile company Mikatan's Blog English Version
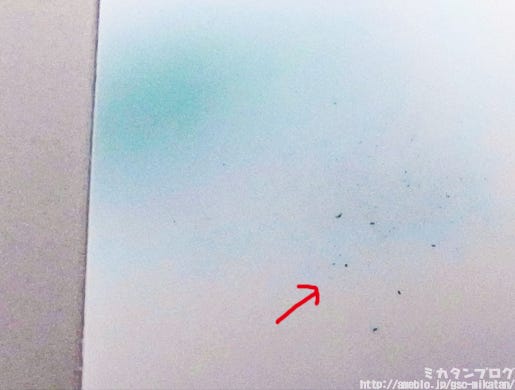
The consistency of the paint is very important!

In the previous post you saw me mixing the paint with lacquer thinner to get the right consistency, but if you use too much paint it creates paint spots like these! I’m glad I didn’t end up leaving these spots all over my actual expression…

If this happens, you simply need to add more lacquer thinner to thin out the paint… but if you add to much, then paint will become too thin which will instead cause the coat to become uneven. You need to have the perfect ratio!
goodsmile company Mikatan's Blog English Version
Painting over one of the test eyes!

This will let me check exactly how it’ll look on the final product!

I’d love to have had more practice with the airbrush, but I really don’t have the time… so I just jumped straight into it! 😛
goodsmile company Mikatan's Blog English Version
W-Well… (‘A`)

I drew the pupils so big that I can’t really tell how the gradient looks at all. In retrospect, I guess I should have made the pupils relatively small, so you can see the gradient clearly in comparison.

Also, it’s not that easy to see in this photo, but the color isn’t matching up as well as it should – you can actually see it better in the previous photo. It seems like the green is a little too strong, so I’ll need to mix the colors a little bit more.
goodsmile company Mikatan's Blog English Version
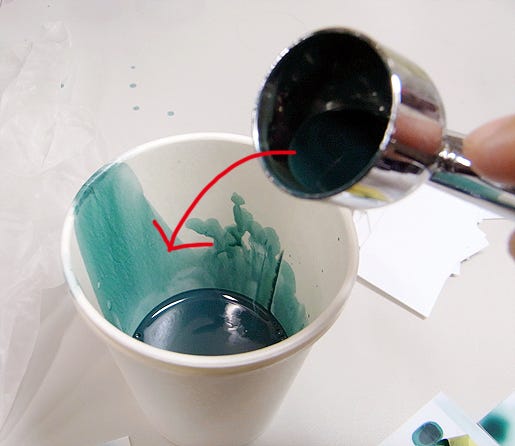
Transferring the remaining paint into a paper cup…

goodsmile company Mikatan's Blog English Version
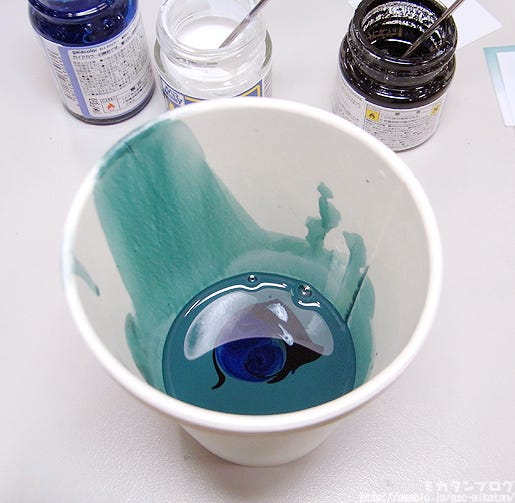
Mixing colors once again!

The green was too strong, so I’ll be adding a little more blue and black.
I also randomly added a dab of white! 😛

Just one drop of paint can change the color a lot! (`・ω・´)

It might look like I’ve poured in quite a lot here, but that’s just the paint spreading out. I really just put in a few drops. Just by looking at it, you can’t really even see that the color has changed at all once it’s mixed up.

But once you spray it on with the airbrush, you can tell it has changed a bit! (maybe if you’re a pro you can tell without spraying it out…) It seems much harder to mix the right color compared to the enamel paint.

But it’s actually a lot of fun!! (*゚∀゚)=3
goodsmile company Mikatan's Blog English Version
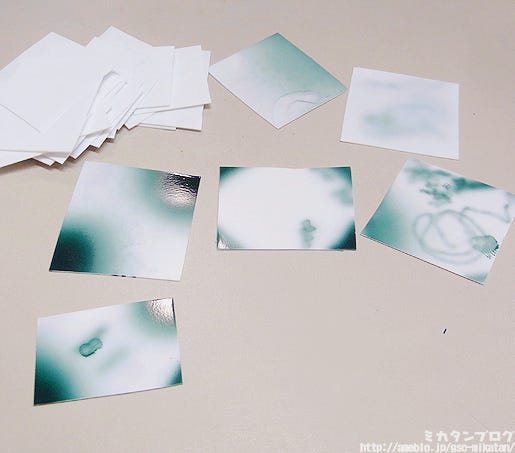
The test chips!

After practising with the airbrush and mixing different colors a bit, I really can’t help but want to play with it some more! There were quite a few times that I almost forgot to add lacquer thinner or added too much by a mistake. It’s taken me a whole two hours to get up to this point today… it’s quite a time consuming exercise – particularly trying to mix up the perfect color!

Apparently the pros like Kawapon-sensei need to get the color perfect in less than an hour…
goodsmile company Mikatan's Blog English Version
Now it’s time for the real thing!!

Most people think that you need to move quickly with an airbrush, but in this case it’s apparently best to not rush, and rather apply the color slowly. If I remember correctly, Oda-P colors both the eyes at the same time, but I think I’ll do them one at a time just in case I mess something up.

After stopping to take a look, it looked a bit like the gradient line was slightly tilted. It’s important to stop and check every so often to make sure it still looks alright, using the masking tape as a guide is quite useful.
goodsmile company Mikatan's Blog English Version
Gradient, complete!!

I did it! I can see there are a few areas where the paint is still a little light (particularly the inner area of the left eye), but if I try to fix this I’ll end up destroying the gradient I’ve worked so hard to create… so I’m going to leave it as is for now.

I’m too much of a chicken to risk all my hard work. 😛
goodsmile company Mikatan's Blog English Version
Peeling off the masking tape…

This was a really nerve-wracking part for me!

It felt like I’d end up ripping off the paint if I wasn’t gentle… so I made use of some tweezers and slowly pulled it off…
goodsmile company Mikatan's Blog English Version
It’s done!!!

B-But… there is a strange looking line along where the masking tape was!

It seems I stuck the masking tape on before the clear lacquer had dried, causing some of it to be pulled off with the tape…

Arrg!! I thought I had done so well too!! xD

But it was my own fault, so I guess the only person I have to blame is myself.

I’ll be continuing this… at WonFes!

At the WonFes booth I’ll be working on the highlights and the ‘crescent moon’ shape underneath the eye! I also won’t be able to use thinner, so I’ll be playing around with all new paints too! 😛

I know there are many people who want to meet with me, but it’ll be difficult to see everyone. Either way, I’m going to put my schedule here, so that everyone can see it…

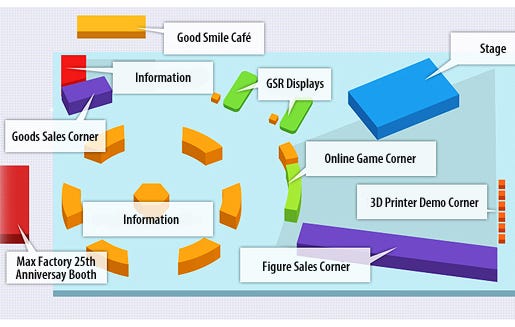
10:00: My expression will be on display close to the sales corner. Those lining up to purchase things can take a look while they wait! I’ll first be at the WonHobby Stage for the opening greeting, then I’ll be wandering around the event hall myself. I’ll have some chocolates for everyone who finds me and says hi! (Until I run out of chocolates.)12:30: Lunchtime!

13:30: Preparing to paint.

14:00: I’ll be working on the highlights and ‘crescent moon’ paintwork at the figure sales corner. I’ll be using inflammable paints to make sure everything is safe! I might pop out here and there to appear on the live broadcast.

17:00: Hopefully the event is coming to an end…?

Just three days left!!

I better get all the tools ready, so I don’t end up forgetting anything! I think I’d best get some practice with the new kind of paint as well… eek!
But anyway that’s all for today!
I hope to see you all again tomorrow!! (・∀・)ノ゛

Tomokazu Seki: Glenfire, WonFes Goods and Handouts!

Only 4 days left until WonFes!!

001
Laugh or cry, there are only 4 days left! (`・ω・´)

But at the same time, there are still a whole 4 days to get through! Here we have a line-up of all the figures I’ve taken a look at so far!

– Winter 2013 WonFes Products –

■ [GSC] Homura Akemi: you are not alone.
■ [GSC] Nendoroid Snow Miku: Strawberry White Kimono Ver.
■ [GSC] Nendoroid Petite: IDOLM@STER Cinderella Girls –
    Anzu, Kaede and Rika + Live Stage Set
■ [MAX] figma Rin Shibuya
■ [MAX] figma Anzu Futaba
■ [MAX] Tomokazu Seki: Glenfire
■ [Phat] Dekacchu Kirari Moroboshi

You can find all the previous reviews linked in the list above!
002
This is a bag filled with one of each product!

It’s quite a lot to carry around, so we are providing the big bag you see here for those who buy many products! An order sheet will be used at the event, where you will need to circle the items you want. You can see an example of the sheet on the event sales page – simply circle “1” or “2” on the sheet. Everyone is limited to 2 of any figure!

– Event Sales –
http://www.whl4u.jp/buy_kaijou.html
005
Alright, let’s move onto the very last WonFes product review!
From Ultraman Zero: The Revenge of Belial:
Tomokazu Seki: Glenfire!

The 12th figure to join the Tomokazu Seki series comes from the Ultraman Zero Movie – the pirate bodyguard of flame, Glenfire! The sculpting of the impressive flames burning atop his head together with the confident pose create a figure that fans are sure to love!

The ‘Tomokazu Seki’ series has now reached it’s 12th release!!

Even with all the other work he does, Seki-sama still manages to find the time to sculpt these figures… it’s amazing!! Glenfire looks absolutely divine!!
006
This is how he looks from the back!

Take a close look around his hips and thighs! The creases in his outfit have been sculpted so perfectly!!

Plus from 13:10, Seki-sama himself will be selling the figure!!

This has also become a standard every year at WonFes, but this time around it will be done at the ‘Max Factory 25th Anniversary Booth’! If you’re just interested in picking up the product, you can just get hold of it at the sales corner. But if you’re a Glenfire fan or a fan of Tomokazu Seki, I definitely recommend coming to the Max Factory booth by at around 13:10!

– Event Outline –
http://www.whl4u.jp/event.html
003
Now let’s take a look at some of the other goods that will on sale!

IDOLM@STER Cinderella Girls: Energy Drink!
It’s a real energy drink!!

All the Cinderella Girl’s players can get a boost of energy for just ¥200, with up to five available per person.

If you don’t think that will be enough energy for you, there will also be cases of 30 on sale. I’m confident these energy drinks will get me through the day!!
004
Sampling the energy drink!

The Cinderella Girls players here in the offices all tested the Energy Drink!

Apparently it tastes like… an energy drink! (`・ω・´)

It also provides all the energy needed to keep someone like me running till the early hours of the morning! 😛
007
The WWR JDF Square SMART PHONE CASE

The JDF Square-chan has been transformed into a smartphone case… it’s so cute! This will be on sale at the Goods Corner at WonFes!
008
This is how it looks on an iPhone5!

3A’s unique rusted paintwork looks just as great as usual! The little beak-like mouth of Square-chan also pokes out just a little just like the model! It’s a little figure in itself!

As a side note, this cover unfortunately doesn’t fit the iPhone 4 or 4S, but even so I think it’s worth grabbing if you’re a Square-chan fan! I have a 4S, but I’m still going to get one! (=゜ω゜)ノ
009
Nendoroid More: Clip and Suction Stands – Orange!

These special versions of the Nendoroid Clips and Stands are going to be sold at various events, so WonFes is just their first debut! They are colored orange, Good Smile Company color!

The clear versions you can see to the lower left are trial products that are currently in development. They’re still quite far off being officially announced, but the are planned for release, so look forward to them!
010
WonFes free handouts!

The latest Nendoroid & figma catalog as well as a Nendoroid calender starting from April this year! There are also some awesomely designed 3A stickers, and some cute Puella Magi Madoka Magica stickers!

The mosaic is covering up the Good Smile Racing Newspaper, which will also be available at the event. The latest Racing Miku-san will be announced on the 10th February… I wonder how she’ll look!
012
Original ‘Umybo’ Sticks!

There are two different Umybo treats to choose from, both with illustrations by MAX Watanabe-san! The two flavors are ‘Chicken Curry’ and ‘Corn Potage’! Just look at the little pliers and file the Umybo is holding in his hands – it’s so cute!

These will be given out at the Max Factory 25th Anniversary Booth!

But stock is limited, so stop by early if you don’t want to miss out!
011
Note that different things are found at different areas!

  • Figures are at the Figure Sales Corner.
  • Seki-sama’s Figure is at the Goods Sales Corner.
  • Seki-sama’s event is at Max Factory’s 25th Anniversary Booth.
  • Energy Drinks, Square-chan and Nendo Stands are at the Goods Corner.
  • Umybo Sticks are at Max Factory’s 25th Anniversary Booth.
  • Handouts are all over the WonHobby Booth.

That sums up where you can find everything. The following page will give a little more information such as prices and how many of each item is available.

– Event Sales Page –
http://www.whl4u.jp/buy_kaijou.html (Japanese)

 
That brings the WonFes product reviews to an end!

Phew! There was so much to get through… definitely more than any previous WonFes event! But that just means all the more fun for everyone at the event!!

We’ll all be waiting for your arrival, so be sure to stop by if you can!

 
But anyway that’s all for today!
I hope to see you all again tomorrow!! (・∀・)ノ゛


© Magica Quartet/Aniplex・Madoka Partners・MBS
© Crypton Future Media,Inc. www.piapro.net 衣装原案:虹汰
© NBGI
© 円谷プロ
© GOOD SMILE COMPANY
© threeA Holdings 2013. All rights reserved.

Nendoroid Snow Miku: Strawberry White Kimono Ver.

Only 5 days left until WonFes!!

001
The 2013 Snow Miku boxes are ready to ship off to events!

The very first place she will be on sale is the Sapporo Snow Festival on the 9th February, and then she’ll be available at WonFes on the 10th!

With today’s review, I’m also slowly but surely running out of WonFes products to review… the event is so close now!

– Winter 2013 WonFes Products –

■ [GSC] Homura Akemi: you are not alone.
■ [GSC] Nendoroid Snow Miku: Strawberry White Kimono Ver.
■ [GSC] Nendoroid Petite: IDOLM@STER Cinderella Girls –
    Anzu, Kaede and Rika + Live Stage Set
■ [MAX] figma Rin Shibuya
■ [MAX] figma Anzu Futaba
■ [MAX] Tomokazu Seki: Glenfire
■ [Phat] Dekacchu Kirari Moroboshi

You can click above if you missed out on any of my previous reviews! If you’re still unsure whether or not to pick up a certain figure, I’m sure the reviews will help you make a decision! (=゚ω゚)ノ
a
Nendoroid Snow Miku: Strawberry White Kimono Ver.!

Designs for the 2013 Snow Miku were submitted by fans to the piapro website and then a winner was chosen by viewers during a NicoNico Live Broadcast. The winning entry was an illustration of Snow Miku with a slightly more mature air, wearing a beautiful white kimono – which has now been transformed into a Nendoroid!

Her cotton veil can be removed, and she comes with two different hair styles to choose from when it is removed – you can display her with either her trademark twintails, or instead with her hair tied up. Sitting parts are also included for a more relaxed pose, and she also comes a number of items for a snowy day, including an umbrella, a toothpick and a snow bunny.

The first white kimono in the Nendoroid series!!

I’m so glad that Snow Miku was able to be the first to wear such a beautiful outfit! She comes with so many optional parts from big, to small – today I’ll take a quick look at all of them!
003
This is how the packaging looks!

The ‘double-layer’ blister pack has become a Snow Miku standard now! ^^

You can see just how many different parts she comes with here! The kimono and the headdress did limit the posability of Snow Miku a little, so a number of parts such as the sitting parts and twin-tail hair part were included to allow for more poses! She easily comes with 70% more than standard Nendoroids!
004
This is how she looks from the back!

She can actually stand without a stand just fine, but a clear stand that fixes her down securely is also included – it’s your choice if you want to use it!

The shape and color of the headdress looks just like a smooth ‘daifuku’, which is the dessert that the illustration was based on!
012
Be careful when attaching or removing the headdress!

With the cold of Winter, the plastic tends to shrink and harden, which can cause some parts to get stuck and become difficult to remove.

Be sure to heat up the parts with something like a hair dryer, before trying to detach and remove them!

The same goes for the expression and hair parts – but at the same time, make sure you don’t burn yourself in the process!

Also, because she is such a lovely bright white, it also means that other colors will rub off onto her quite easily, so be careful of that too! This year’s Snow Miku is a very delicate flower, so be sure to take good care of her!
005
Holding her umbrella!

This umbrella was also illustrated by Nijita, the illustrator of this year’s Snow Miku! It’s such a lovely color and the top has little snowflake prints on the top!

This expression is so elegant! She has a little bit of make-up on for a more mature look compared to the standard Miku – isn’t it beautiful?! 。・゚・(ノД`)・゚・。
006
Twintails and an an expression with tears of joy!

After seeing this expression, I knew I’d have to keep good care of my Snow Miku forever more!! Looking at this adorable expression makes me want to shed some tears of happiness too!!

You can also see that you can swap our her standard hairstyle for the classic twintails! I love the way they fade from green down to a pale yellow!
007
A sideways glance, sitting body and New Year’s sake!

An entire sitting body is included to help make up for the fact that the kimono doesn’t allow for all that many poses. She isn’t sitting on her knees, but actually with her legs out slightly to the side in a very cute pose!!

She also has a small dish for some sake and a special arm to hold it up. The arm is actually made for the standing pose, but I managed to get it to fit with the sitting parts as well! The sideways glancing expression was also a part of the original illustration – so many lovely ideas came from Nijita’s illustration!!
008
Displayed on the included tray!

The whole theme behind this Snow Miku were the keywords ‘white kimono’ and ‘daifuku’, which are normally served on a tray like this – which led to these parts being included as well! Nijita’s illustration also included the toothpick, so that’s why that was included!! It certainly does make her look tasty…!!

But please don’t try to eat her, no matter how tasty she looks!! 😛
009
Mirai-chan decided to try the kimono too!

Being able to switch head parts between Nendoroids is definitely one of my best things about them! Unfortunately Miku’s headdress was made specially for her, so placing it on other characters might be difficult, but you can still have them all try on the beautiful white kimono!! (*´∀`)
010
Nendoroid Snow Miku: Strawberry White Kimono Ver.!

She will be available at the WonHobby booth at the 2013 Wonder Festival (Winter)!

There will also be one week of online orders, so if you can’t make to the event, you can also order them online. (But they’ll be made to order, so they’ll only be delivered in June.)

You can find more info on the WonHobby 17 website!

– WONDERFUL HOBBY LIFE FOR YOU!! 17 –
http://www.whl4u.jp/ (Japanese)

The packaging this time around is also very special!! (`・ω・´)

Nagoya-san from the design team put together a fantastic design for the box! There is a special wrapping around the box that features some beautiful gold text – it makes it look so extravagant!! I’m sure everyone who decides to grab her will enjoy opening up this box!
011
The final review… is still being prepared!

For the last review related to WonFes, I’ll be taking a look at Seki-sama’s Glenfire figure, as well as the goods that will be handed out at the event!

This photo shows Matsuda-san from the design team hard at work trying to put the last few details together so I can do my review… I wish him luck, as there really isn’t much time left!!

 
But anyway that’s all for today!
I hope to see you all again tomorrow!! (・∀・)ノ゛


Painting a Nendoroid Expression Part 7: Preparing to Apply the Gradient

Nendoroid Painting, Day 7!

goodsmile company Mikatan's Blog English Version
It’s been awhile since I was last here… (´ー`)

This has become a much longer series than I expected, but I know a lot of people have been asking me to continue! I’ve really done my best to get up to this point, and I feel nervous every time I think about continuing. ^^;

But I’m definitely going to see this through to the end, so I do hope you’ll enjoy this blog series through to the end! (`・ω・´)

You can find the previous posts in the series here:
Painting a Nendoroid Expression Part 6: Pupils and Shadows
Painting a Nendoroid Expression Part 5: Mixing Colors and Eyebrows
Painting a Nendoroid Expression Part 4: Preparing to Apply Color
Painting a Nendoroid Expression Part 3: Continuing to Paint the Eye Borders
Painting a Nendoroid Expression Part 2: Painting the Eye Border
Painting a Nendoroid Expression Part 1: Basic Knowledge & Tools
goodsmile company Mikatan's Blog English Version
This is where we ended last time!

I haven’t seen her in awhile, but she still looks as creepy as ever! 😛

The outlines, base color, pupils, white of the eye and it’s shadow have all been complete at this point! The shadows on the white actually came out much darker than I expected, but there is no turning back – I just need to move on!
goodsmile company Mikatan's Blog English Version
Now I’ll be applying a gradient to the eyes!

These are the tools I’ll need for this step – it’s just some cardboard with fabric tape stuck on it, with some masking tape on top of that. (the yellow one).

What I’m preparing to do here is cover up all the areas that I don’t want to airbrush with the tape!

I know it’s a little confusing just to read that, but you’ll get the idea once you see the pictures below! I didn’t actually want to use an airbrush, but there is a reason that I decided to use one in the end, which I’ll explain a little bit later…
goodsmile company Mikatan's Blog English Version
Cutting up pieces free-hand!

Here you can see I’ve cut the masking tape into small strips using a craft knife. It’s best to cut them in slight curves, not perfectly straight. It’s actually easier said than done to cut curves with a craft knife though – sometimes they ended up in rather odd shapes! 😛
goodsmile company Mikatan's Blog English Version
Here is an example from Kawapon-sensei!

Beautifully cut! Each cut looks just like the last… I guess this is from years of practice as a professional! But I’m not going to cheat – I’ll make use of the tape that I cut, and not the perfectly cut Kawapon tape! 😛
goodsmile company Mikatan's Blog English Version
Place the strips along the line of the eye.

You should try to leave the black line slightly visible here!

This is to make sure you don’t miss small parts of the inner eye. If you instead cover up a little bit of the inner eye, there will be areas that aren’t coated by the airbrush, which would be almost impossible to correct neatly. Because it’s a gradient, you can’t just quickly go over it with a brush afterwards!
goodsmile company Mikatan's Blog English Version
Finished covering both eyes!

The line I’ve made with the tape looks a little shaky, I hope that won’t cause too much trouble…

Everyone is so busy with preparations for WonFes at the moment, that I don’t have anyone to check if my taping is alright! 🙁
goodsmile company Mikatan's Blog English Version
Wrapped up the rest of the face!

When I watched Nendoroid Sonico get made during WonFes, I definitely remember she looked something like this at some point! I’m still really nervous as to whether this is actually going to work out, but I’m just going to trust myself and move onward!!
009
A quick summary of the expression so far!

The basics involve painting with enamel paint and saving with clear lacquer paint – I’ve done this four times now!

The image above represents a cross section of the expression as it stands at the moment. Let me also remind everyone that once you’ve saved with the lacquer paint, you can never go back and change anything on that ‘layer’. The reason I’m going to be using an airbrush for the gradient relates to this…
goodsmile company Mikatan's Blog English Version
A close-up on Santa Miku’s eye!

Miku’s pupils have a pale gradient in the center as you can see here. This is pretty much impossible with an airbrush and has to be done by hand. This process by hand would be something like this:

Paint with a color diluted 10x with enamel thinner‘save’ with lacquer thinnerPaint with a color diluted 9x with enamel thinner‘save’ with lacquer thinnerPaint with a color diluted 8x with enamel thinneretc…

In other words you need to paint on pale colors and ‘save’ over 10 times for just the pupil!! (((゚Д゚)))

No way!! That would take way too much skill and time!! This same method would be needed to paint the gradient onto the top of the eye as well, and that’s exactly why I decided on using an airbrush instead!
010
The airbrush paints are lacquer paints!

Up until now we’ve been using enamel paints, but the airbrush has to use these lacquer paints. There are different types of airbrushes, so if you’re trying for yourself don’t get the wrong kind!

Now I need to mix up the right color using these lacquer paints – the lacquer thinner and paints need to mixed in a 1:1 ratio until you have the right color.
goodsmile company Mikatan's Blog English Version
You need a color the same as the pupil color!

Let’s mix up the green and blue and compare it to the pupil color until it looks the same! It might take a little while to get the right color…
goodsmile company Mikatan's Blog English Version
I think this looks alright…

In the bottom right you can see the color I used for the pupil.

It looks close enough for me, so I’m going to head to the production room now and see if I can use the airbrush!
goodsmile company Mikatan's Blog English Version
A fellow girl on the expression team!

Nendoroid expressions are made mainly by two girls on the team! During the mayhem of WonFes I feel really bad to ask if I can borrow the airbrush…

As I did though, I was told I first needed to use a ‘chip’ to make sure the colors were correct!
goodsmile company Mikatan's Blog English Version
A ‘chip’ to test expressions on!

Ah-hah! I see!

You paint on the base color and pupil onto the chip, and then apply the gradient onto the chip first to ensure the colors are matching! If this ends up looking wrong and I hadn’t checked then I would have wasted days of hard work…
I would have been devastated. ^^;
goodsmile company Mikatan's Blog English Version
Let’s add my colors onto the chip!

I also tried to match the size of the test eyes with the Nendoroid expressions – plus they have already been saved with clear lacquer here!

Now I’ll have to place masking tape on these and cut out each circle to begin the gradient testing! The actual final gradient probably only takes a few minutes to paint on, but it takes a lot of skill to make sure you don’t end up messing up over and over again – plus you really can’t mess up when you do the actual expression, or it’s all over!

Seems there is still much more to come!

I honestly thought I’d finish today, but it ended up being impossible! I guess this isn’t the end of the expression series just yet, so I hope you’ll look forward to the next episode! ^^

After WonFes, I shall continue my expression! (=゜ω゜=)

But anyway, that’s all for today!
I hope to see you all again tomorrow!! (・∀・)ノ゛

Nendoroid Miho Nishizumi

001
Shuu-chan in a triumphant pose!

There are a number of things I wish to question about this picture, such as why his pinky finger is sticking up, or what that strange cardboard stick is coming out of Oonoshi’s neck… but I’m most interested in taking a look at what Shuu-chan is holding there!!

Today we’ll be taking a look at a product that I know many have been looking forward to!
002
From Girls und Panzer:
Nendoroid Miho Nishizumi!

From the anime series ‘Girls und Panzer’ comes a Nendoroid of Miho Nishizumi, the shy and gentle girl who becomes much more outspoken when it comes to tanks. A special turret is also included which allows you to display her riding the ‘1/35th Scale Plastic Model Kit: Tank #IV D-type – Ankou Team ver.-‘, which was released by PLATZ last year.

A Nendoroid from the popular Girls und Panzer!

We announced her back in December during the Nendoroid #300 Event, but since then we’ve received numerous comments from fans who want to see the prototype! Today I can finally show everyone exactly how she has come out!
003
This is how she looks from the back!

She is wearing her uniform from Ooarai Girls High School which has a lovely green color to it that has come out great on the Nendoroid. The baggy sleeves also look great!

The tank part you see here is also included!! (`・ω・´)

This is the tank that the Ankou Team uses in the series – the Tank #IV D-type! Tanks have always seemed like excessively complex cars to me… it must be tough to follow the “Way of the Tank”!
004
Let’s move onto the other optional parts now!

First up, headphones!

Miho is the squad leader of her team, and so she needs these headphones to give orders to the rest when in combat! The headphones are not actually separate parts, but are instead attached by a separate fringe part.

The headphones themselves are a simple black and silver design, but the texture on the silver areas looks amazing! Shuu-chan from the planning team said that was in fact his favorite part about the figure!!
005
Next, a tense expression and binoculars!

The squad leader always needs to pay attention to her surroundings! She comes with a pair of binoculars and a special right hand part to hold them!

The bent arm is included at different angles for both left and right, allowing for a number of different poses!
006
The binoculars can hang from her neck!

Just attach the included strap parts and place it around her neck. The retro design of the binoculars is lovely – I want to try putting them on some other characters as well!
007
She can also ride inside the tank! Σ(゚∀゚ )
You simply remove the legs and place her upper body into the cupola of the tank for a tank riding pose! (Shuu-chan just taught me the word ‘cupola’! :P).

The turret can also be moved up and down!
008
This is the 1/35th Scale Plastic Model Kit: Tank #IV D-type – Ankou Team ver.-‘, released by PLATZ!

Ah-hah! This is what Shuu-chan was holding at the start of the blog!! It was actually already released last year, so you should be able to find it at one of your favorite model stores!

The reason I’m showing this product here today is because of a special collaboration with the Nendoroid that I’ll show in just a bit… but first lets open up the box and see what’s inside!
009
E-Eek!!

There are so many different tiny parts!! Just putting together a Mini 4WD was a challenge for me… putting this together must require some inhuman skills! The different sections are all labelled with some masking tape, so I’m guessing someone is already working on putting this together.

I was quite tempted to mix around the labels for a second, but I decided that would just be too mean. 😛
010
This is the complete, painted version!

Obviously I didn’t put this together… this one belongs to Noguchi-kun from the production team!

Such incredible paintwork and matte has made it look just like a real tank!! I guess this is what it means to be really good with plastic models!
011
Swap out for the Nendoroid turret!

Oooh!! This is awesome!! Seeing the complete tank together with the caterpillar tracks and all is so much more epic!!

The school badge and Ankou team mark are included as decals with both the Nendoroids and with PLATZ’s tank, no matter which you buy you can decorate the tank to show it belongs to the Ankou team!
002
From Girls und Panzer:
Nendoroid Miho Nishizumi!

 
She’ll be up for preorder from the 29th January!
Get in contact with our partner shops if you have any order or sales queries!

 
Finally, a quick notice!!
Nendoroid Miho Nishizumi will be on display at the sales booth of the ‘Girls Und Panzer Screening Event ~Everyone Panzer Vor!~’
It was designed as a collaboration product together with PLATZ’s ‘1/35th Scale Plastic Model Kit: Tank #IV D-type – Ankou Team ver.-‘, so you’ll be able to see just how great they look together for yourself at the event! You can find more information about the event here!

GSC Notice Page
http://www.goodsmile.info/post/ja/3617/ (Japanese)
 
Anyway, that’s all for today!
I hope to see you all again tomorrow!! (・∀・)ノ゛


© GIRLS und PANZER Projekt

Nendoroid Tsubasa Kazanari, Shiki Ryougi Garannodou & Nendoroid Hatsune Miku: Yukata Ver.!

001
So many releases in one month!!

January 2013 was definitely the month of releases for Good Smile Company! Today I’ll be taking a look at another three product samples that are shipping out shortly!

January Release Information
http://www.goodsmile.info/post/en/2068/
002
From Senki Zesshou Symphogear:
Nendoroid Tsubasa Kazanari!

From the anime series ‘Senki Zesshou Symphogear’ comes a Nendoroid of Tsubasa Kazanari, the character who uses ‘Ame no Habakiri’, the first Symphogear System! She comes with three different expressions including a smiling expression, an angry expression and a Swansong expression.

Tsubasa also comes with with four different Armed Gears to wield, including her standard sword, large sword, giant sword and leg blades. A Nendoroid-sized Noise figure is also included allowing you to recreate many popular combat scenes from the show!

She poses so easily and looks great!! Σ(゚∀゚ )

Her legs move around so smoothly, it’s so much fun making poses! The blades on the legs are also fitted with a ball joint so they can be rotated into various angles as well! They also are very hard to take off, so you don’t need to worry about them coming off all the time while you’re trying to pose her!
004
This is how the packaging looks!

She has three different weapons and three expressions! Plus the weapons are huge, and as everyone knows. I love girls with huge weapons!!

On the top right, you can also see the ‘threat to humanity’. the Noise which is also included with her. It’s not a little whale!

By the way, the special Nendoroid stands I spoke about on the22nd January are also included with Tsubasa-san! Last time I got the classroom and road stands, so this time I’m hoping to get the grass one!!
003
The much awaitedSwansong Expression!
It certainly has an amazing impact!

The special stand was actually the grass stand! That means I managed to get all the different stands!
005
From Kara no Kyoukai:
Shiki Ryougi Garannodou!

Shiki Ryougi, the main character of Kinoko Nasu’s light novel is coming back again as a part of Good Smile Company’s 10th anniversary rerelease project!

The pose is based on the cover illustration of the second book, and accurately reproduces the wistful atmosphere of the original art. Special care has also been taken in sculpting her understated bearing and intricate kimono pattern, making her distinctly vibrant and life-like.

Apologies for the delay!! (`・ω・´)

This was one of the products that was announced for rerelease as a part of the 10th anniversary rerelease polls! It ended up taking quite a while to actually be ready, but she has come out looking just as fantastic as ever! Fans of Kara no Kyoukai should not miss out on this amazing figure!!
006
The sculpting and paintwork are beautiful!

This is really one of my favorite characters ever, so I might be a bit biased… but she really looks absolutely fantastic! She was originally released in November 2008, so it’s actually a product from over four years ago – but even now the quality looks just as amazing as recent figures!
007
The expression and hair are also perfect!

Her solemn expression and short hair are a faultless rendition of Shiki! It’s figures like this that really make fans experience the character within the figure – it makes me once again realize how much I want to see more of figures like this, make more figures like this and send out more figure like this!!!!
008
This is how she looks from the back!

The curves of her body and the use of space are also such great aspects of her! Not to mention the amazing print on the kimono – the pattern isn’t just printed on directly, but carefully crafted to suit the creases and turns of the fabric with different graidents… it makes it look incredibly realistic!

As a Shiki fan I really think this is the definitive figure of her, and if you’re unsure whether or not you want her, I strongly recommend her!
009
Nendoroid Hatsune Miku: Yukata Ver.!

From the ‘Character Vocal Series 01: Hatsune Miku’ comes a Nendoroid of Hatsune Miku wearing a yukata!

The same cute Miku we’ve all come to love is wearing a dark blue yukata with beautiful flower prints scattered along it, creating a very refreshing version of Miku for the hot summer months! She comes with three expressions including her standard smiling expression, a shy expression with a slight blush and an exited expression with sparkling eyes. She also comes with a fan and a pouch that match her yukata perfectly!

This one won’t be in stores, it was a web sales product!

Those who ordered her should be receiving her shortly, if you ordered from the GSC-Tetsu Cafe you’ll be able to pick your order up from there. We also plan to have any excess stock on sale at the cafe from the 30th, so you might be able to pick one up there if you missed out on ordering.

Good Smile & Karaoke no Tetsujin Cafe
http://www.gstjcafe.jp/
010
This is how the packaging looks!

Quite a simple looking blister pack that almost looks like one of the very first Nendoroids – but it also only cost ¥3000! I love Nendoroids with loads of goodies, but a simple Nendoroid for less is just as nice!
011
Swapping expressions!

The expression with sparkling eyes was the pride of Shuu-chan from the planning team. I’ve decided to but it on Shuukan Hajimete no Miku-san instead! She’s so cute!!

It’s quite a unique looking chibi expression, and I’m sure it’ll suit all the other Miku Nendoroids nicely!

Now for a quick summary of the blog:
Nendoroid Tsubasa Kazanari and Shiki Ryougi Garannodou will be on sale from the 29th, while Nendoroid Hatsune Miku: Yukata Ver. will be reaching those who ordered around the 30th! ヽ(゚∀゚)ノ

Those dates are for Japan though, if you waiting for products overseas or ordered Miku for international delivery, you’ll probably be waiting a little while longer!

Get in contact with our partner shops or the Good Smile Online Shop if you have any order or sales queries!

 
Anyway, that’s all for today!
I hope to see you all again tomorrow!! (・∀・)ノ゛


© Project シンフォギア
© 奈須きのこ/講談社・アニプレックス・ノーツ・ufotable
© Crypton Future Media,Inc.www.crypton.net