May 1st is Good Smile’s Birthday – We Need Your Help!

The 1st of May is Good Smile’s Birthday!

Plus it’s our 10th anniversary!

I wish to thank everyone who has supported us over the last couple of years! We’ve just started preparations for the upcoming Good Smile Company 10th Anniversary Party!
 
006

on the 1st of May at Akihabara’s Bellesalle building we are planning on hosting the party where we were intending to display all the products released over the past 10 years, but…

     / ̄ ̄\
   / ._ノ  ヽ、_\  ← Nagaizu from Management
   | o゚⌒  ⌒゚o |  
   |  (__人__)|    “I can’t find some of the figures…
   |   `i  i´  |     I just searched the entire warehouse!”
   |   . `⌒   }      
   ヽ       } 
    ヽ     ノ 
   /      ヽ 

Wh-What?!

It turns out we are missing some of our older releases – but we really do want to display as many of the figures as possible!

And so…
We are looking for anyone with these figures:

・D.C. ~Summer Vacation~ Kotori Shirakawa: Swimsuit Ver.
・Fate/stay night –
Saber

・Ramune – Hikari Nakazato

・School Rumble – Tenma Tsukamoto
・Nanoha A’s –
Nanoha Takamachi
・Lineage II –
Dark Elf Mage Female
・Fate/stay night – Black Saber Set (WonFes Product)


If you own any of the figures above and you don’t mind letting us borrow them for the event, then please contact us!

         ____
       /      \ 
      /  ─    ─ \   ”I don’t mind if you want to display
    /     (●)  (●) \    it at the GSC 10th Anniversary Party!”
    |       (__人__)  | ________
     \      |r┬-|   ,/ | |           |
    ノ      `ー’´  \  | |           |
  /´                 | |           |
 |    l                | |           |
 ヽ    -一ー_~、⌒)^),-、  | |_________|
  ヽ ____,ノγ⌒ヽ)ニニ- ̄   | |  |
“You can borrow my figures for the event!”
 
Please include the following information:
・The figure you are willing to let us borrow for the event.
・Your name.
・Your address.
・Your telephone number.
– Please only contact us if you’re located within Japan.
– If multiple people mail regarding a single figure we will choose one person at random.

We will of course reward you for your efforts!

007

Everyone who lends us a figure for the event will receive:

– Three GSC Mascot Plushies, and…

– Any Nendoroid above #60 of your choice.
(There may be a couple that are not available, however.)
 
 
It’s rather embarrassing that we have to ask to borrow our own products, but we’d love it if anyone is able to help us out!
 

Spring is finally here and it’s warming up nicely, plus I have also received a ton of cherry blossom photos from everyone – thanks to everyone who sent them in!! I will be displaying some of the photos on the blog next week around Thursday or Friday, and I might have another post with more photos toward the end of April.

But that’s all for today!
I hope to see you all again next week!  (・∀・)ノ゛

(C)huke/B★RS Project

DIY Figure Repairs Part 3: Scuffed Paint

Hi everyone.

This is the third in a series of articles on repairing figures.

The previous two blogs I did on the topic featured repairing joints, and reinforcing joints using glue – you can find them over here:

 DIY Figure Repairs Part 1: Broken Joints
DIY Figure Repairs Part 2: Reinforcing Joints

Today I’m going to be covering dealing with scuffed paint… something that probably happened to loads of figures in the recent earthquake.
As a figure lover, I just had to write a blog on how to try and fix this.
Painting figures is even difficult for professionals, so I asked Oda-P to explain this one in the easiest way he possibly could… you’ll need a couple of tools and if something goes wrong don’t blame us! But even so, if you’re willing to take the challenge, then please do!

– Dealing with Scuffed Paint –


001

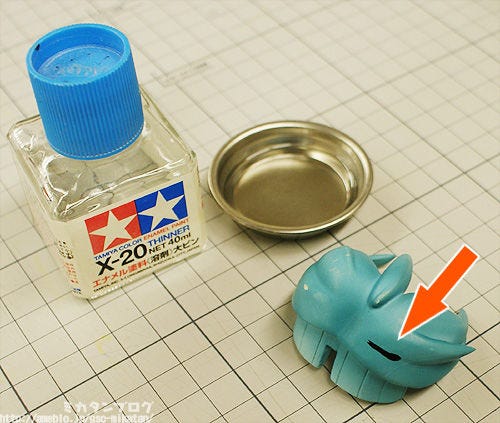
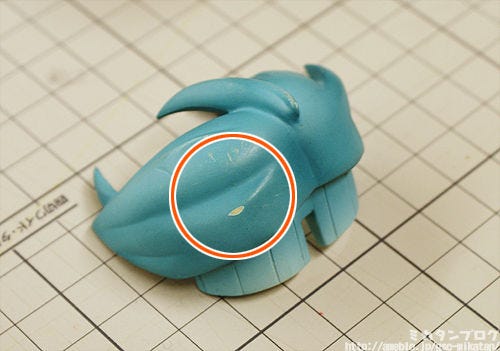
Often when figures fall down they end up like this.
There are a lot of little scratches in the circle, as well as one big one. What we want to do is try and hide these scratches as much as possible!


002

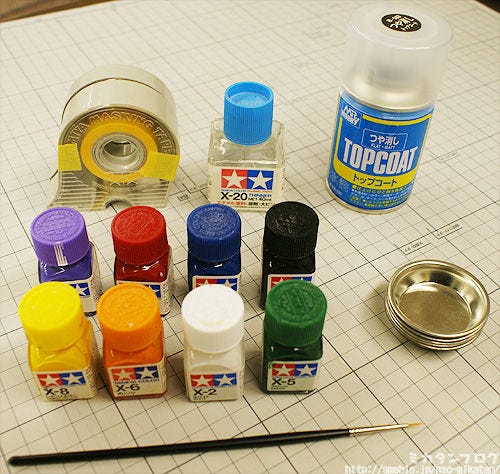
These are the tools for today.
At the top we have masking tape, enamel solvent and a top coat to remove paint shine. At the bottom we gave various enamel paints, a dish and a brush.

There may be some things you’ve never seen of before…. but you should be able to get them all at any model shop! 3000 yen would cover everything quite easily.


003

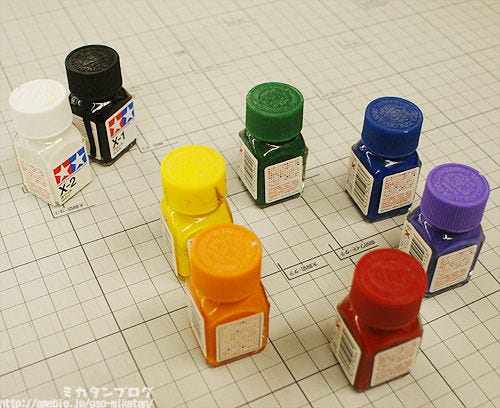
Enamel Paints!

Using these 8 colors you should be able to mix almost any color.
Well, I suppose you really only need the base colors of yellow, red and blue… but this set will make it easier to get the colors you need.

021

Now for a quick explanation about paints.
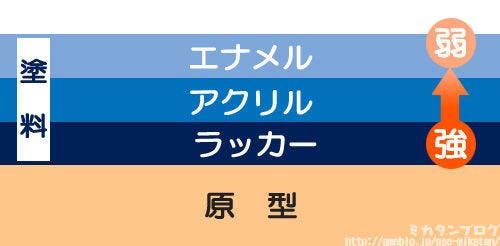
Paint comes in a variety of types, such as lacquer, acrylic and enamel – each of them has a different strength.

Lacquer paint is the strongest, next is acrylic and then comes enamel – the weakest. You can paint acrylic or enamel paint over lacquer paint, but you can’t paint acrylic or lacquer paint on top of enamel – it will melt from the strength of the other paints.

The master figures made here typically use lacquer paint for the hair and body and enamel paint for smaller things like eyes. However the actual products in stores use a special PVC-only paint.

This PVC paint is considerably strong, but there is a reason we are using enamel paint…
… will be explained right here.


004

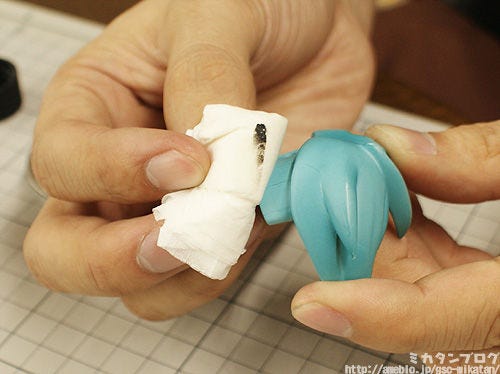
I’ve put some black enamel paint on the hair!
Now if you put some enamel solvent on here and then gently wipe it off…
005

It comes off easily!
Almost all final products use this PVC paint, so painting over with the weakest enamel paint will hardly have any effect.

This means you can restart if you make a mistake!
What I’m about to explain is very prone to errors – chances are you won’t get the color right first time – so it’s always good to be able to retry. Just be careful and make sure that the figure isn’t initially painted with enamel paint, or you’ll end up with a mess. (you can test by putting some enamel solvent somewhere that can’t be seen.)
006

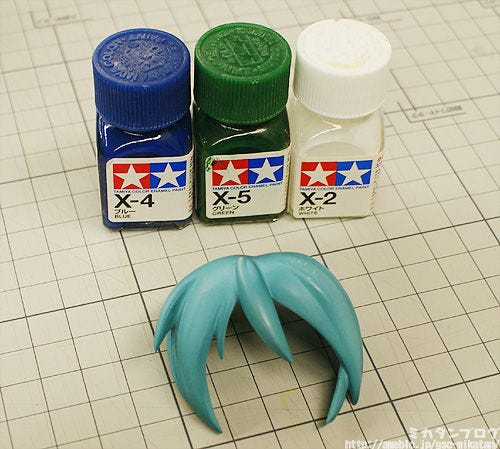
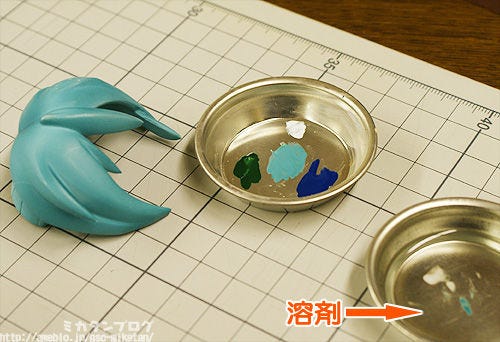
On to the mixing of colors!
I’m going to be mixing blue, green and white to try and make this hair color.  Be sure not to get pain on your clothes or the desk!


007

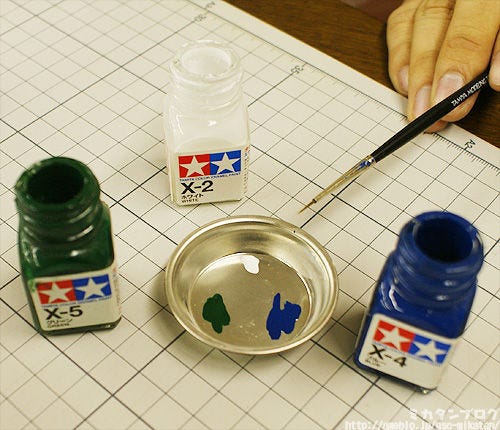
Place some of each paint on a dish.
The area that needs fixing is small, so I’m not using a lot of paint. It’s best to add little dashes of paint and then mix to try and get the right color.


008

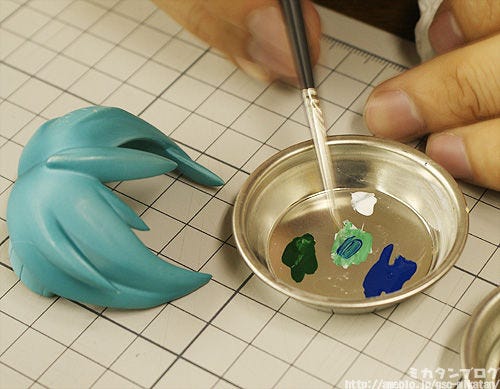
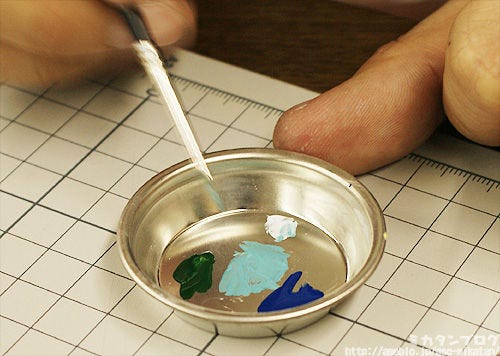
Mix them slowly one by one on the dish.
Without mixing them on the table or on your clothes, if at all possible.

009

That color looks pretty close!
By the way, the longer paint stands the thicker it becomes, you can counter this by adding a little bit of enamel solvent and mixing it in.


010

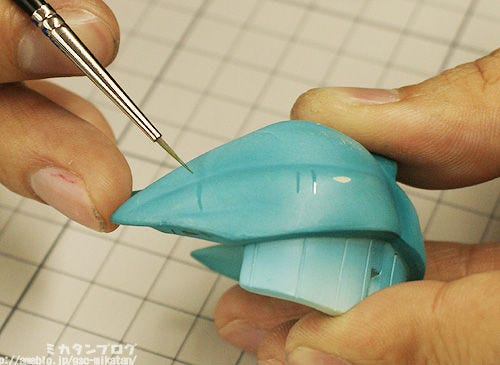
Time for a test paint.
It seems like my color is still a little bit too dark. So once again I use some enamel solvent and wipe it off for a retry.


011

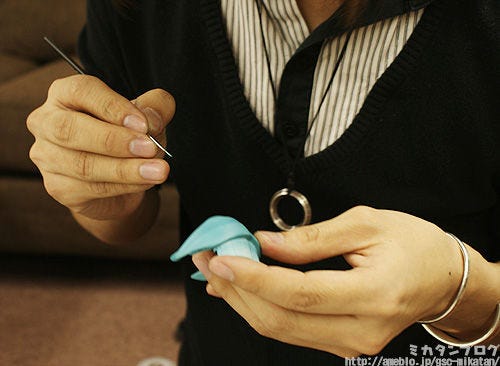
Play around with the paints a little more.
Mix in some more white in order to make the color slightly lighter.


012

As a side note – sculptors use a very similar process themselves when trying to get the original colors right.
But they are incredibly quick about it… it truly is a work of a professional…


013

Color mixing complete!
If you compare it to the original image you’ll see it has covered up the scratches quite nicely. The problem is the paint kind of shines where you painted on.
014
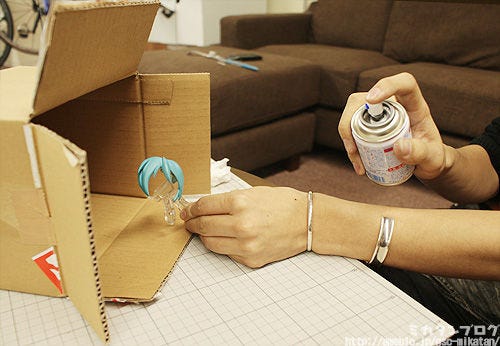
This is when you apply the top coat.
Please note the following though:

■  Be careful!
■  Use something like a cardboard box to stop it the spray from getting all over.
■  Try to constantly keep moving the spray to not put too much in one place.
■  Holding the part still with your hands or a clothes peg can help a lot.

Also note that once you’ve put this top coat on, you can’t remove the enamel anymore!

Make sure you’re happy with your work before you reach this step!
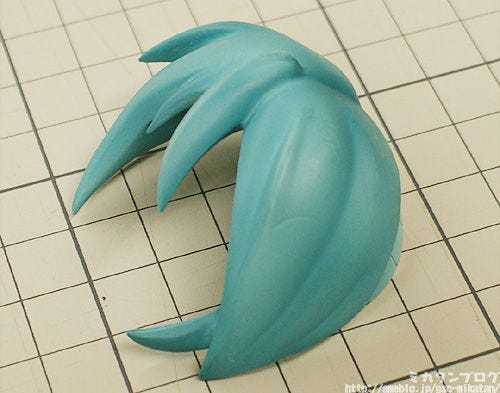
015

Complete!

You almost can’t even tell that there was once some horrible scratches on it… it may take awhile to do, but it’s worth the effort!


017

Finally, an introduction to the masking tape method!
Whilst my example didn’t need this, there are sometimes parts on figures that keep the shiny look – and if you put a top coat over it you’ll end up losing the shiny effect.


018

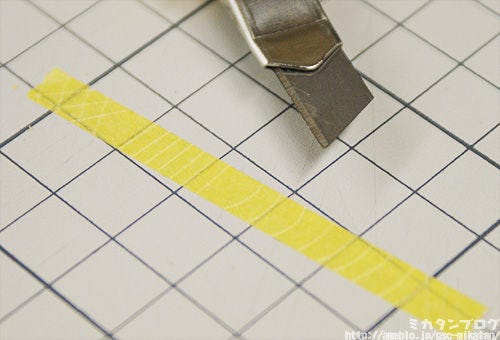
Spread out some masking tape and cut it out in various shapes.
If you use a craft knife be careful not to cut anything important… like your hands!


019

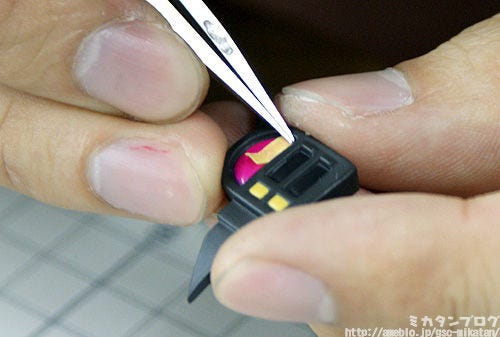
Place the pieces of tape over any parts that need the shine!

A pin set works great for applying the tape, but if you don’t have, the point of a pen will work fine too.
020

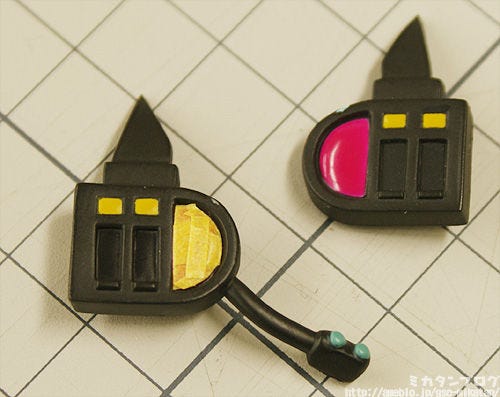
The tape is in place!
There is also tape on the two yellow squares…. it’s just hard to see. Now you can spray a top coat over the top without destroying the shine!
016

Extra!

I decided to try mixing colors myself!
Each time I tried I got closer and closer to the original color… but it is quite hard to get it perfect – although it’s a load of fun at the same time! It’s like you’re making the figure yourself! ^^;

    ____
   /      \
  /  ─    ─ \
/     (●)  (●)  \  ”Can’t I use Mackies or Gundam Markers?”
|       (__人__)   |
/     ∩ノ ⊃   /
(  \ / _ノ  |  |

Simply put, as long as the color matches, then yes.
The problem is that a lot of hair and clothes have odd colors or gradients that will be hard to match up with those. As a side note, don’t use manicure paints as they are made using lacquer paint and will often melt off the base painting.

This was the very last in my series of DIY figure repairs. I hope you can find the time to try them out and fix up any figures hurt in the earthquake!

That’s all for today!
I hope to see you all again tomorrow! (・∀・)ノ゛

DIY Figure Repairs Part 2: Reinforcing Joints

Hi again everyone!

The previous blog in this series featured a quick tutorial on fixing joints, but it doesn’t end there – today we’re going to be looking at reinforcing joints by making use of glue.

 You can find part 1 over here: DIY Figure Repairs Part 1: Broken Joints


– Reinforcing Joints –

027

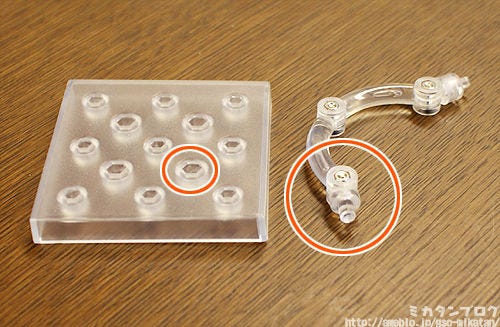
If you play around with your figures often, you’ll find that over time the joining area becomes looser.
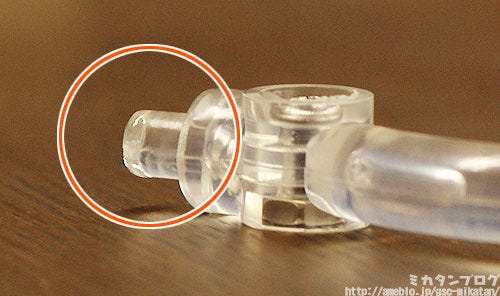
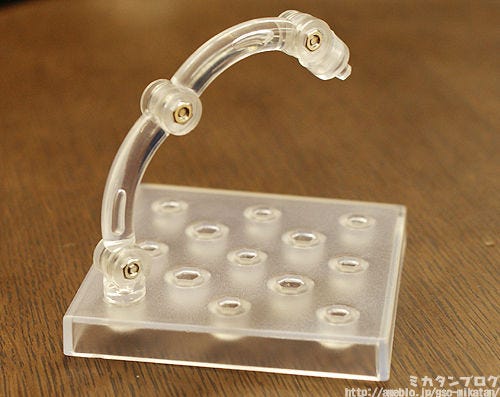
Today’s tutorial will show you how to reinforce the joining area like the one circled on this stand, so that they connect firmly again!

026
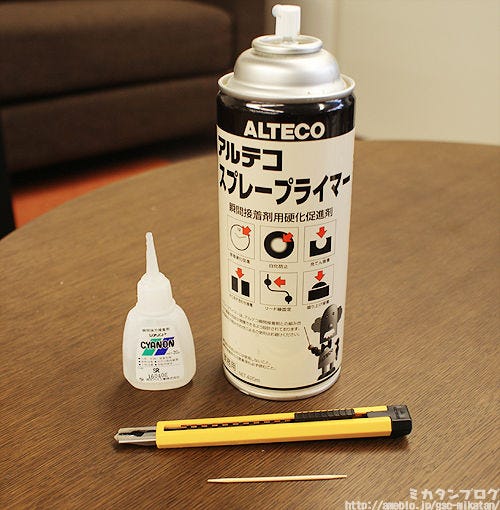
Today’s project will be using the following items!

In the back we have some glue and some adhesive accelerator spray, and in front is a craft knife and a toothpick. In most cases the adhesive accelerator won’t be needed, but it will make things easier.

As long as you have glue, a craft knife and a toothpick, you’re set!

017

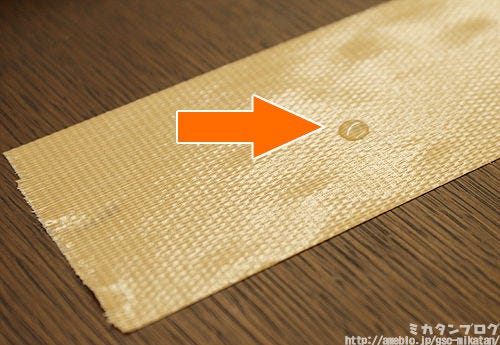
Place a drop of glue on a secure surface that won’t melt.
Just like last time, I’ve simply used some tape, but you can use whatever you can find. Just try to make sure you don’t get any glue on the desk or your hands.

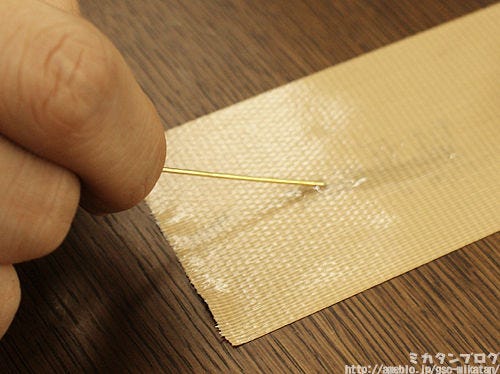
018

Take something long and thin and spread the glue out.
The image above is actually using a brass wire, but a toothpick will work just fine.

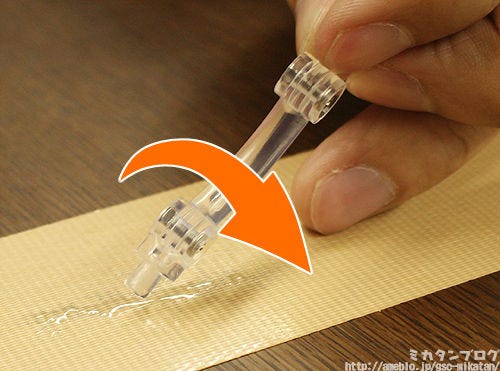
021
Place the joining area into the glue and spin it around.

Be careful though – you need to get glue only on the sides of the shaft and NOT on the base. It’s quite hard to explain in words, so let me give you a picture:

フィギュアメーカー・グッドスマイルカンパニー勤務 『ミカタンブログ -松戸駅から10マス進む-』
You want the glue to be on the pink area,
but NOT on the blue area!

If you get the glue on the base it’ll result in the shaft sticking out too far. Basically you’re just trying to make the diameter of the joining area ‘thicker’ with glue.

This series of blogs is actually being written with the help of Oda-P-sensei, but while doing watching him do this, I could only think to myself…

____
/      \
/  ─    ─ \     “Hmmm…
/   (=・=)  (=・=)\    If that was me…
|       (__人__)   |       I’d be getting glue on all the wrong places!”
\      ` ⌒´   /
ノ            \

If you’re worried like me, then you can do the more secure method below:

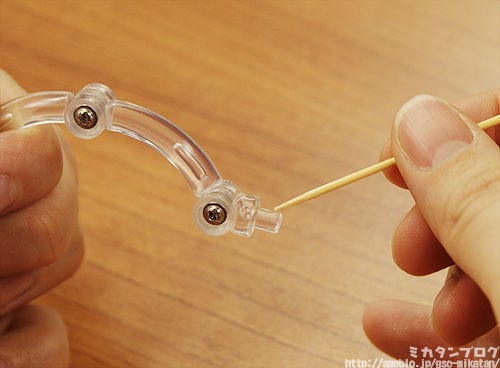
022

‘Paint’ the glue on by using the tip of a toothpick!
You still need to be careful not to get the glue on the base or too high up.

This method should also be used for smaller parts.
It’s considerably easier to apply the glue using this method instead of just applying it to the joint directly. (Although it’s also slower.)

022

Complete!

You can see the area around the bottom is slightly thicker now.


023

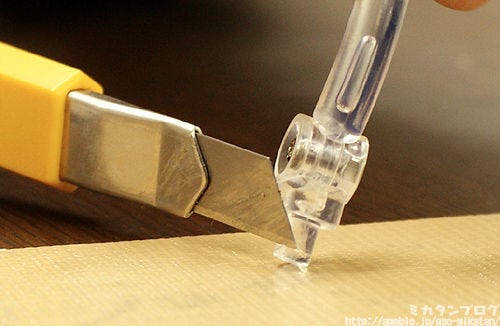
If you put too much glue on, you simply need to shave some off with the craft knife.
Just make sure the glue has dried completely before doing so. Whilst it does depend on the type of glue, normally the craft knife will easily slice through the glue, so be careful not to cut yourself in the process.

024

Finished!

By making the shaft slightly thicker it fits into place just like new!

I made use of a stand in this example, but you can use the same method for any kind of connecting joint. As always, just be careful not to get glue on the figure itself.

Next time we’ll be looking at dealing with scuffed paint! (・∀・)ノ

It’s a little more complex then the previous two… but even so, it’ll be up on the blog if you want to give it a try!

That’s all for today!
I hope to see you all again tomorrow! (・∀・)ノ゛

Tomorrow’s blog will be a figure review!


DIY Figure Repairs Part 1: Broken Joints

Hi everyone!

I’ve received a multitude of messages from people showing the destruction caused to their figures, as well as a couple of people asking if there are any good ways to repair them, so today I’m going to start a new series of blogs discussing the repair of your figures in the case they break! If you’re a figure lover then it’s sure to helpful to you at some stage.

-Broken Joints-

001

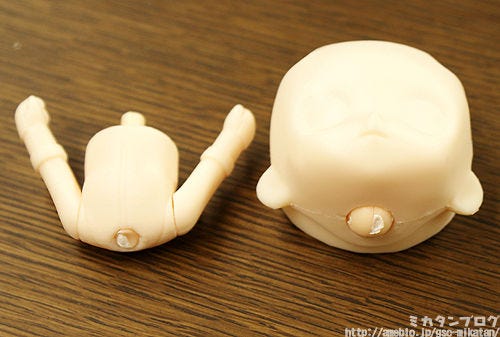
When Nendoroid joints break, it’ll often be like this…

First you need to remove the two broken pieces. Follow the instructions below.


002

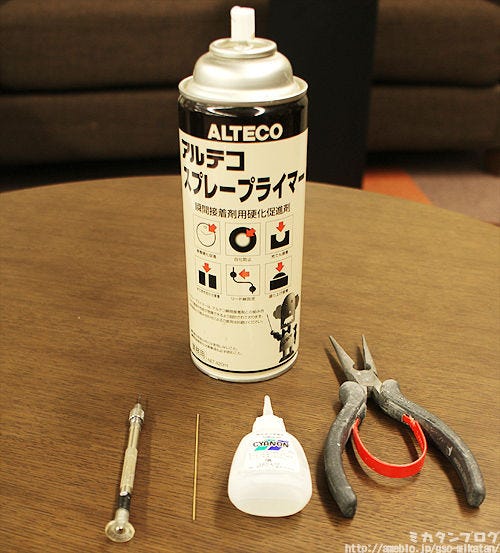
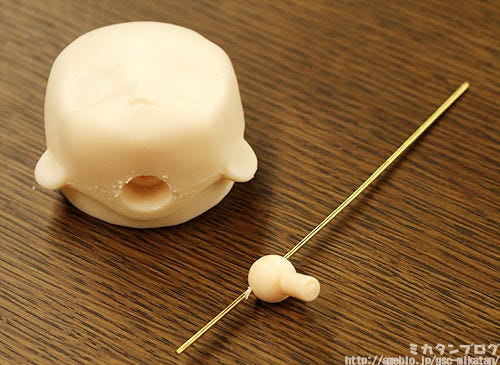
These are the items you will need.

The large can is a can of adhesive acceleration spray. The bottom items from the left are: a 1mm pin vice, a 1mm brass wire, glue and a pair of pliers. There might be some items you’ve never used before, but…

at the very least you will need the pin vice, the glue and something similar to the wire.

You can find a pin vice in almost any 100 yen shop, they are not that hard to find.


003

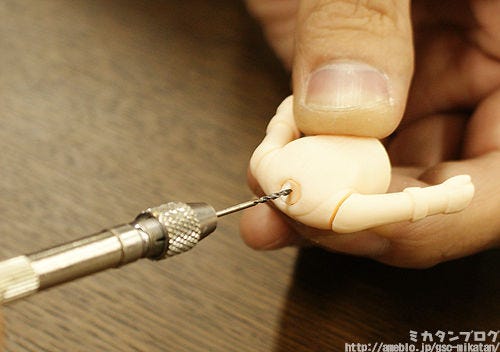
Start by removing the bottom part of the broken joint.

Use the pin vice to create a hole in the very center of the joint. Be careful not to hurt yourself!


004

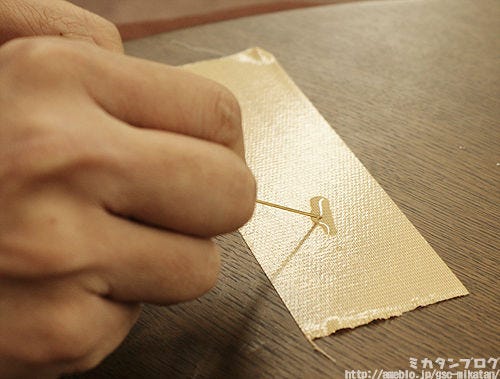
Place some glue out on something and dip the wire in it.

I’ve just put some glue on some tape, but you can use whatever you have around so long as it doesn’t melt from the glue.  Try not to get any of the glue on your hands!


005

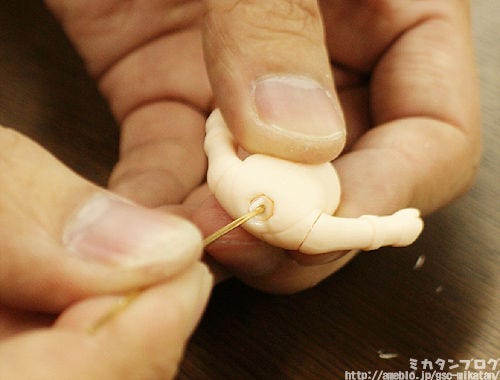
Push the wire into the hole you made.

Try not to put too much glue on the wire otherwise it might leak out onto the figure itself. Watch as you push it in to make sure the glue does not overflow.


006

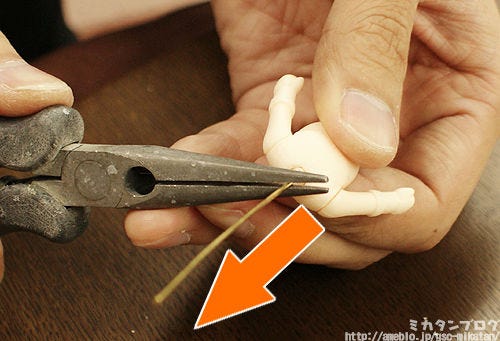
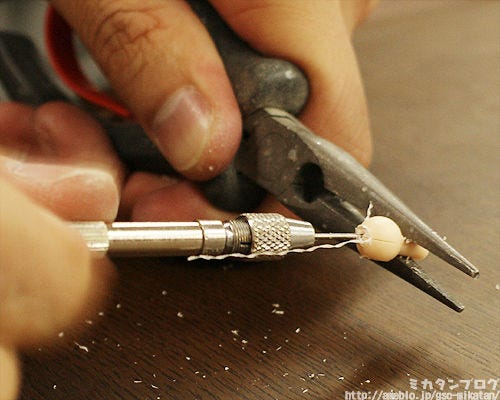
Once the glue has hardened, simply pull on the wire to remove the joint.

I’m using pliers in the image, but you can use your bare hands as well. Just be careful not to hurt yourself!

Now you’ve removed the bottom half of the joint from the figure!


007

Now we move onto the top part of the joint.

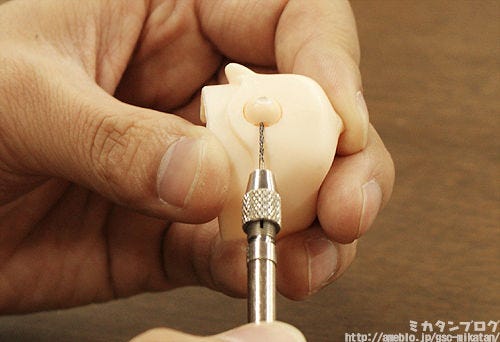
This joint has a circular bit, and you need to pierce a hole in the joint horizontally using the pin vice. Go straight through the joint, but be careful not to damage the actual figure.


008

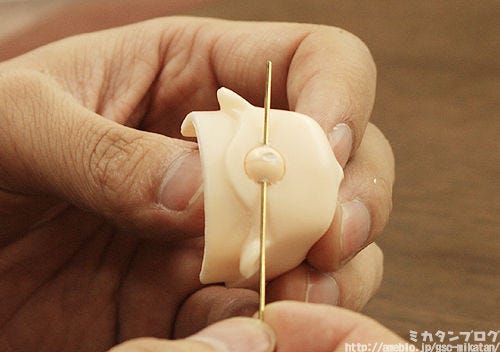
Place the wire straight through the hole you made.

Now you simply just need to pull the brass wire up using to the two ends that are sticking out… and the joint will come out with it!


009

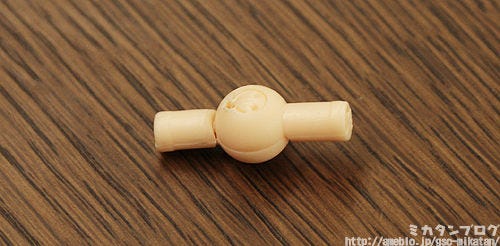
Broken joint removed!

In a case like this where it’s the neck joint that’s broken, you can simply replace the joint with one from another expression. Most characters all use the same colored joints, so you can even use one from another character quite easily.

But, there are cases where another joint that isn’t replaceable breaks!

For example, if a joint on a characters twin tailed hair breaks… you can’t easily replace it as the colors will mismatch if you use a joint from another figure.

In these cases you can repair the joint into a non-posable joint:


010

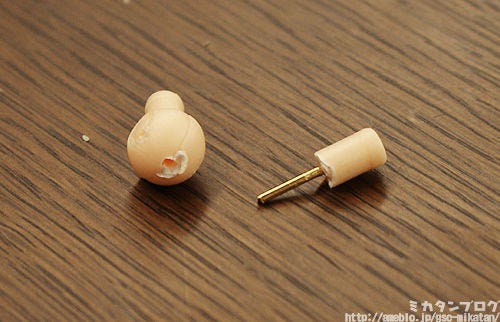
These are the two pieces that were just removed.

You do not need to remove the wire from the bottom part of the joint, (left in this picture) you will need it in the repair process.


011

Create a hole through the upper joint using the pin vice.

Be careful! This hole will establish what angle the joint will be at!

If you want the joint to be completely straight, then create the hole straight through the middle. If you want the joint to be at an angle you need to place the hole to the left or right, depending on how you wish to angle it. For this example I’m simply making a straight joint – so I’ll be making the hole straight down the middle.

Joints are also very small and hard to work with using just your hands, so I recommend holding them still using pliers or something of the like. If you just just your bare hands you are more likely to injure yourself, so please be careful!


012

Cut the brass wire so that it will fit into the hole you just made…


013

And connect them together once again!


014

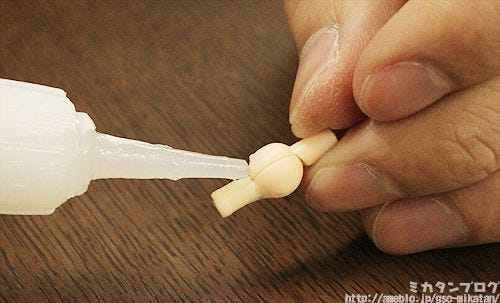
Place some glue around the area where the break was to secure it and prevent it from falling out.

Don’t get any glue on the desk or your hands!

015
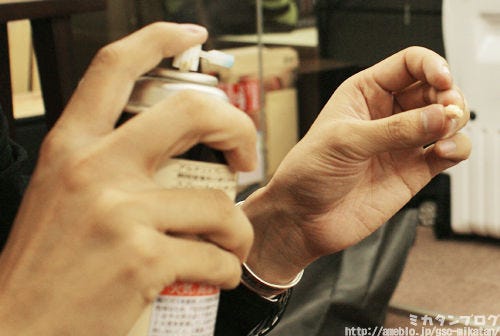
Then finish off with some adhesive acceleration spray.

This is an optional step – if you don’t have any then don’t worry about it. Just wait for the glue to dry well instead.

016

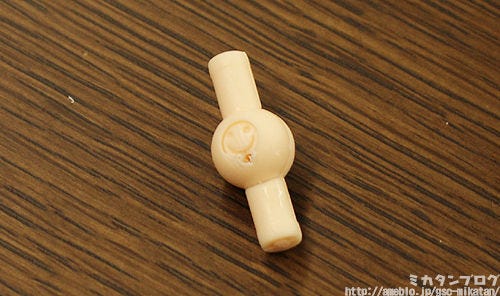
Success!

Seen you have a brass wire through the middle, it is also a very durable repair job. This will obviously prevent it from being posable, but it is a reliable repair method if there is no way to replace the joint with another one.

Next time will be a blog focusing on reinforcing joints using glue!  (・∀・)ノ


– Notice –

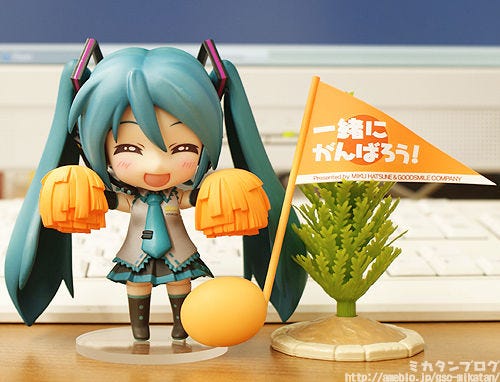
I introduced her on my blog yesterday, but she is now up on the Good Smile website – don’t miss out on Nendoroid Miku: Support ver.!

018

Each sale will contribute 1000 yen to the Japan Red Cross to support relief efforts in Eastern Japan. We will also be shipping her overseas, you can order from anywhere!

Overseas orders will be taken at the GSC Online Shop from the 8th April.

The figures will be made-to-order, so be sure to order if you wish to show your support. Further details about payment methods and shipping will be put up on the Good Smile Online shop in the near future.

Good Smile Online Shop:http://goodsmile.ecq.sc/

If you are ordering from overseas, please note the following:

Overseas Sales■ Orders start on the 8th April. More details will be revealed later.
■ Delivery will be in late July, and may incur an additional fee. 

That’s all for today!
I hope to see you all again next week! (・∀・)ノ゛

(C)Crypton Future Media, Inc. ALL RIGHTS RESERVED

Mikatan’s Factory Field Trip! – Part 4

The 4th report of my trip to the GSC factory in China!

My previous reports havecovered both the molding and painting of figures!
 

        ____
      /     \ 
     /   ⌒  ⌒ \   “I don’t remember that at all…. when was this…?”
   /   ( ―)  (―) \  
   |   、” ゙)(__人__)” .)|    ___________
   \      。` ||||==(⌒)ー、| |             |
__/         ||||    \  〉| |             |
| | /    ,  | ̄ ̄ ̄ ̄ ̄| ̄ ̄ .| |             |
| | /   /   ヽ回回回回レ    | |             |
| | | ⌒ ーnnn.ヽ___/     |_|___________|
 ̄ \__、(“二) └─┘ ̄l二二l二二  _|_|__|_

Yes, well… it was quite awhile ago, wasn’t it….
Here are the links to the previous articles!


Mikatan’s Factory Field Trip! – Part 1
Mikatan’s Factory Field Trip! – Part 2
Mikatan’s Factory Field Trip! – Part 3
1/8th Scale Hitagi Senjougahara (Part 3) – (Stationary Painting)
1/8th Scale Hitagi Senjougahara (Part 4) – (Stationary Painting #2)


If you’ve already read them and just want a quick recap, then here we go…

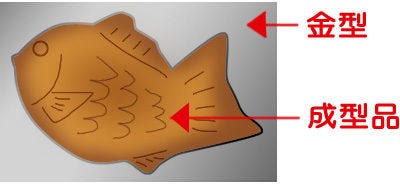
▼ The two types of molds!

001

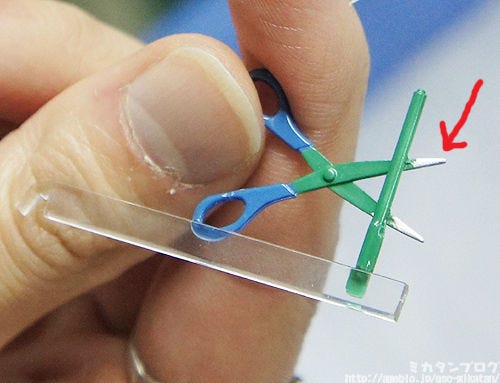
▼ Mask Painting!

002

▼ Painted Product

003

That about covers it all in a nutshell, so let’s move onto today’s topic!

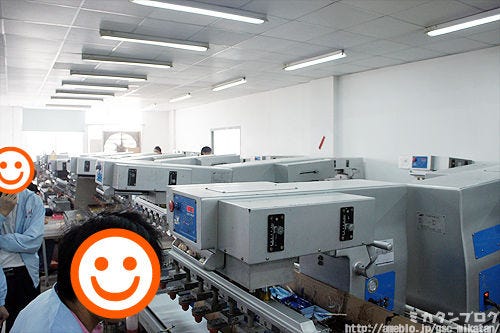
004

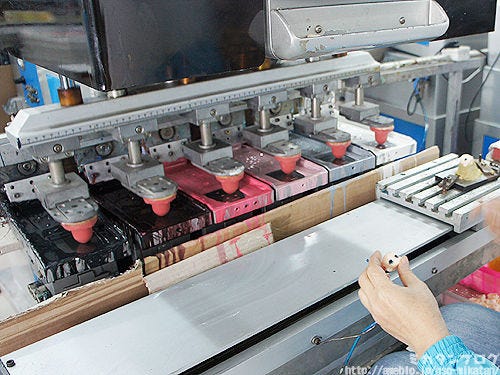
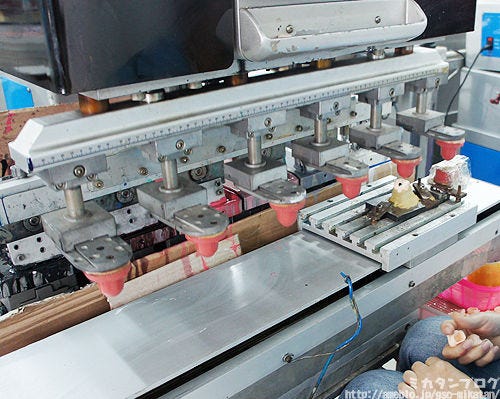
Stamp Printing!

Creating things like eyes and other patterns on figures would obviously take too long by hand, so these stamping machines are used!


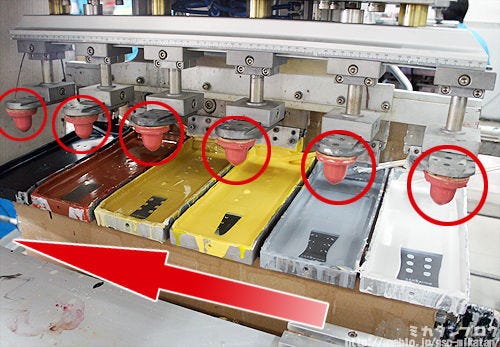
005

First a different color is set in each part!

The product needing the stamping will start on the right and move through to the left…

It normally goes from the lightest color to the darkest!

If you went from dark to light, then the lighter colors would not come out as clearly. There are some figures where the color process varies, however.

006

This is basically the order an eye would be stamped!

If you’ve used layers in Illustrator or Photoshop I’m sure you can get a good feeling for how the colors layer on top of one and other. It’s the same concept!


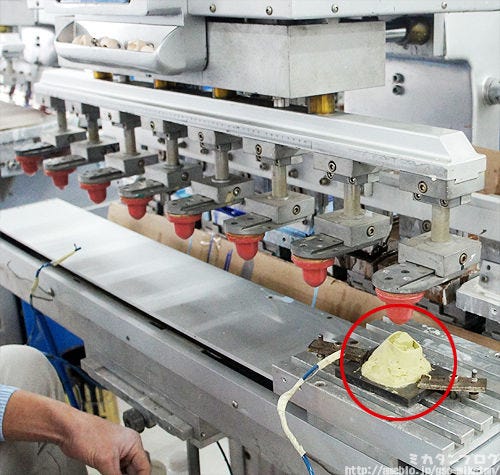
014

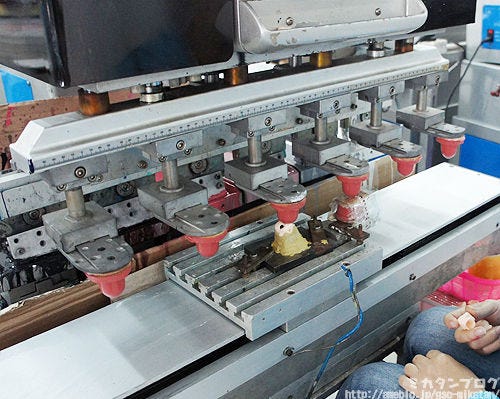
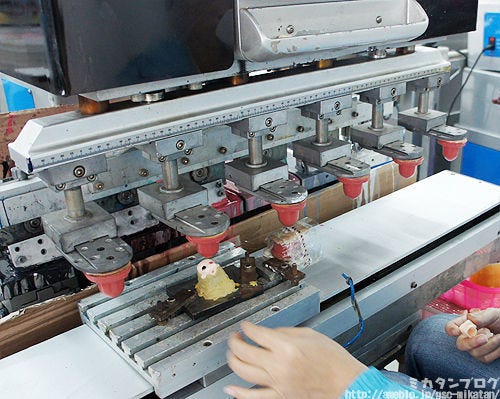
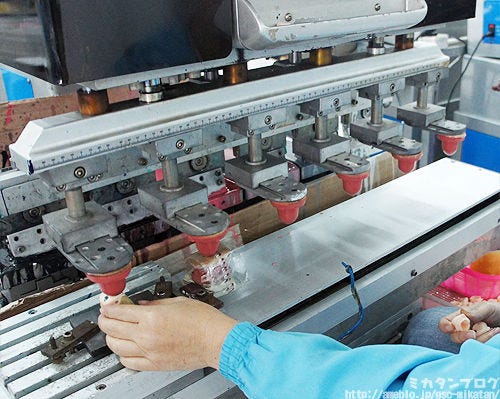
The parts to be stamped are placed on a stand!

I know it kind of just looks like a lump of putty from the photo, but it’s actually a lot more important than that! The stand has to be made to make sure that every single figure ends up identical – imagine if the eye on one of your Nendoroids was even 1mm off from where it should be! The stand is created to make sure that every position and angle stays the same on each figure.

012

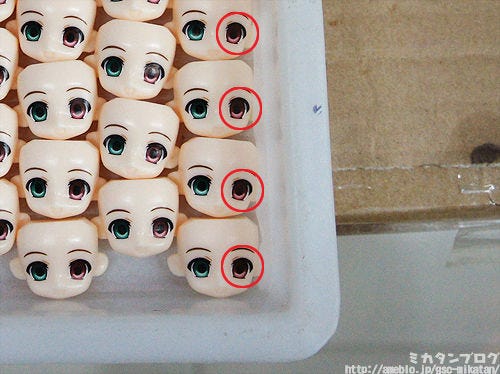
Okay, let’s take a closer look at the actual process!

The next set of photos show the process of stamping the left eye above.

016

(1) First the paint is placed on the stamp…

007

(2&3) The white and gray are applied…

I missed taking a photo of the white part! The machine is really fast! …orz

008

(4) The light pink is stamped….

009

(5) The darker pink is stamped…

010

(6) The brown is stamped…


011

(7) The black is stamped…

015

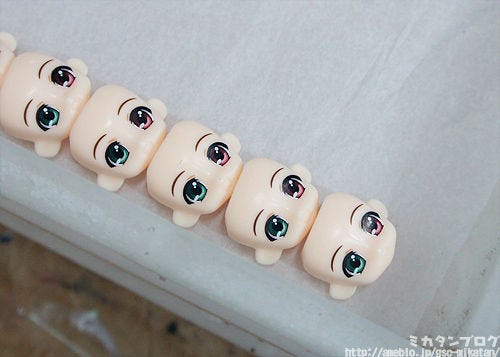
(8) Complete!!
        ____
       /      \   
      /  ─    ─\ ”Huh? The white of the pupil is missing…? “
    /    (●)  (●) \   
    |       (__人__)    | ___________
    \      ` ⌒´   ,/ | |             |
___/           \ | |             |
| | /    ,                | |             |
| | /   ./             | |             |
| | | ⌒ ーnnn          |_|___________|
 ̄ \__、(“二) ̄ ̄ ̄ ̄ ̄ ̄     _|_|__|_

013
Correct! The white is stamped using a different machine!

Well, the same type of machine, but just in a different production line after the one above. The reason for this is quite simple…

The white needs to be stamped on twice seen it is being placed on darker colors!

The white bit on Nendo Petite eyes have a diameter of just 1mm, but even so the machine manages to stamp them on twice at the perfect location every time!!

It’s just like getting your name on a grain of rice… that’s how fine the work needs to be.

By the way…

http://vision.ameba.jp/watch.do?movie=3547155

It’s probably a lot easier to see what is going on from the video, so if you’re interested do take a look.

That’s all for today!
I hope to see you all again next week!  (・∀・)ノ゛

Good Smile Company Celebrates Miku Day!

Today is the 9th of March!

aaa

It’s Miku Day!


bbb
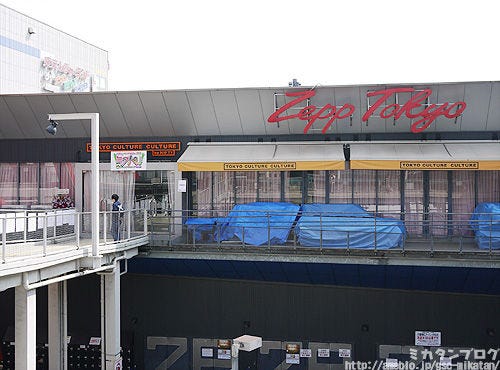
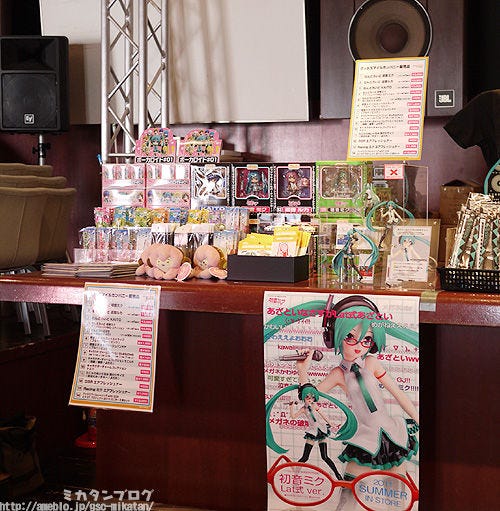
Today at ZeppTokyo is the ‘Hatsune Miku 2011 -38’s LIVE IN TOKYO’ event and GSC will be there to exhibit some figures!

The picture above is how it looked yesterday. There will also be a sales booth up today, so if you’re joining the event be sure to take a look at the GSC booth!

And during the live event…

ddd

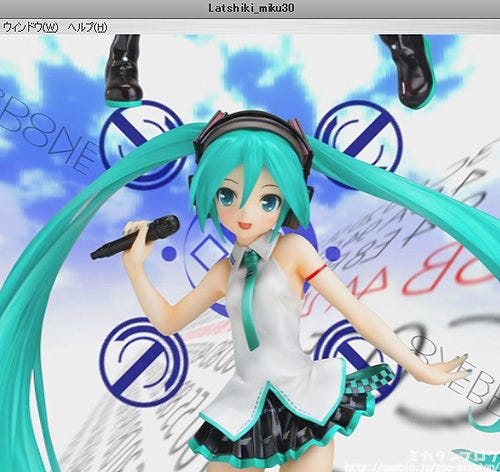
This commercial will be showing!

       ___
     / ⌒  ⌒\
    /  (○)  (○) \     “Oooh!
  / ///(__人__)/// \     This style looks familiar!”
  |       `Y⌒y’´    |
   \      ゛ー ′  ,/
    /      ー‐  ィ

If you’ve seen the ‘Hatsune Miku (Θ) Dou iu Koto na no!?‘ video I featured on the blog before, then you’ll realize that this commercial for Lat-type Miku is in fact based off that video! We even worked with the original author of the video P-san so that we could get it to look as similar as possible! Thank you P-san!

The commercial will also feature on the GSC site today from 21:00!

If you can’t make it to Miku event then be sure to check it out here:

Good Smile Official Site: http://www.goodsmile.info/

Plus there is another bonus for those at the event…


003

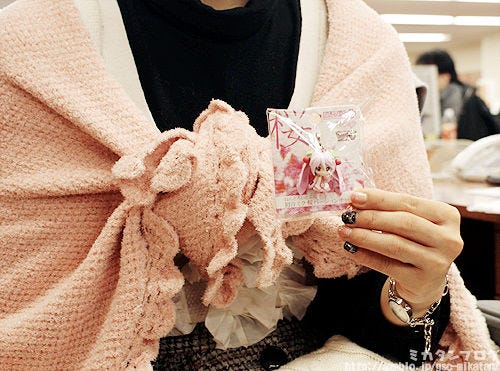
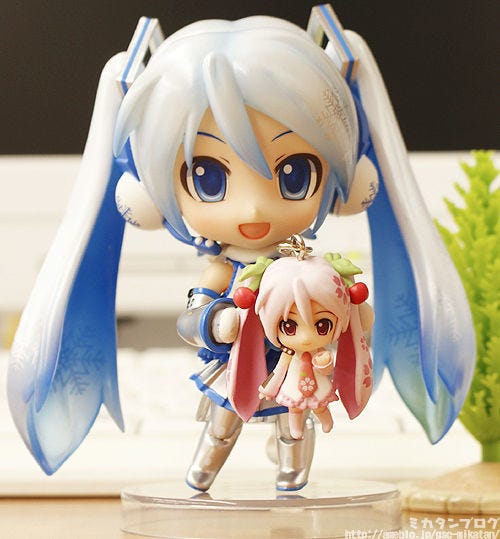
If you’re at the live then you’ll get this Miku: Sakura Version Charm!

They were made especially for this event by Good Smile!

004

It’s small, but still excellent quality!

Even though we didn’t make that many the same GSC quality is still there!! Both Gakkun who was in charge of production and myself are proud to be giving them out at the event! We’re not quite in spring yet so the cherry blossoms are not blooming yet, but you can keep this Miku by your side in the meantime! ^^

Anyway, that’s all for today!

I hope today turns out to be a great day for both you and Miku!

Hope to see you all again tomorrow!  (・∀・)ノ゛


(C)Lat/Crypton Future Media Inc.
(C)Crypton Future Media, Inc. ALL RIGHTS RESERVED

Experimenting with Nendoroid Snow Miku’s Ice-tray!

4 days until the Wonder Festival!
001

A few days back I introduced the lovely…

Nendoroid Snow Miku:

Snow Playtime Edition!

But today we’ll be looking at one of the extras that comes along with her!

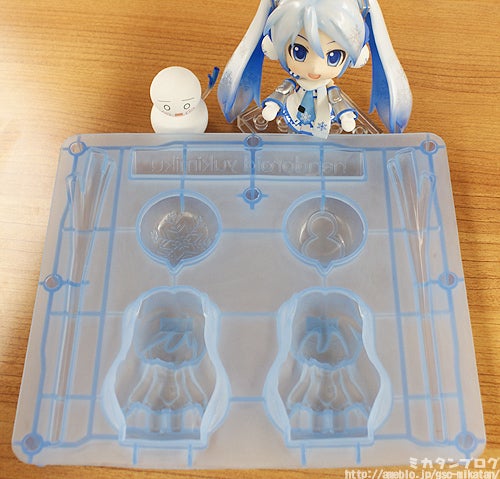
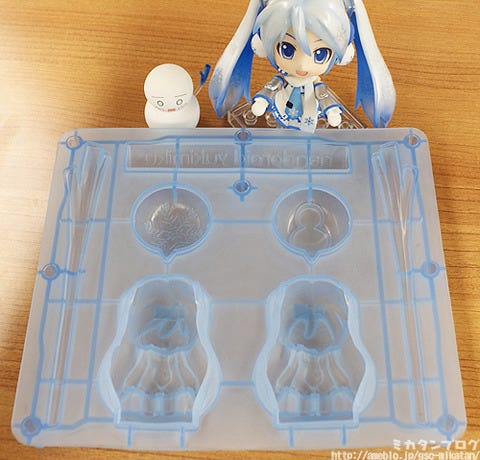
The Miku ice-tray!

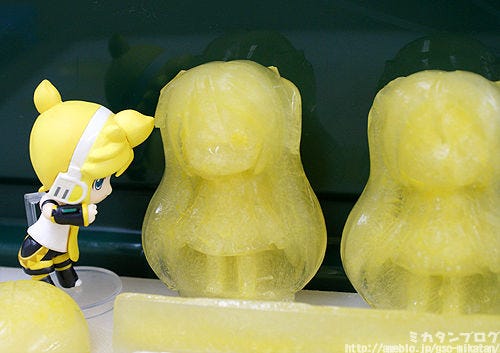
This is the first ice-tray ever made by Good Smile, so it’s time to experiment!
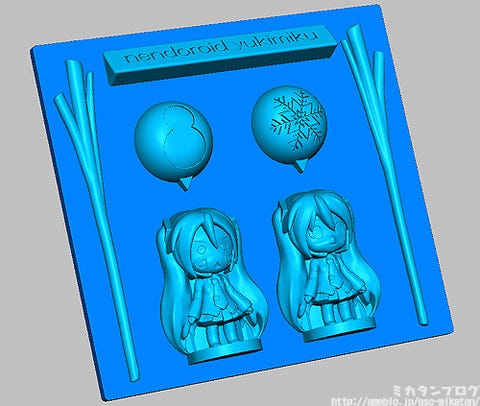
017

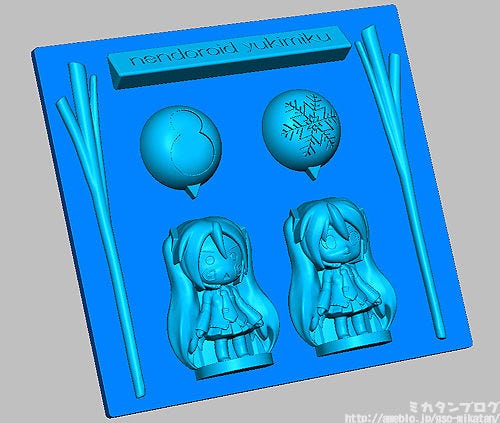
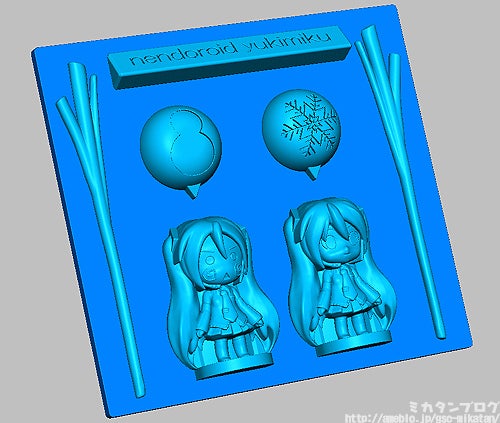
The 3D data for the tray was made by Fuumin from the 3D Team!
 
The tray is made from EVA, the same material used for the umbrellas sold at convience stores. It feels a lot like silicone.

This Snow Miku comes with a load of extras that really make it worth your money… the only reason it’s so cheap is that we really pushed to make it as cheap as possible for the event. (Even if the ice tray wasn’t included, it would have been the same price :P)
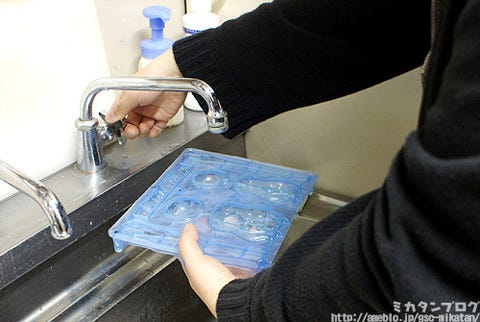

011

Anyway, let’s give it a go!

Let’s top it up with water and take a look how the ice comes out.

Yamada is going to be helping me with the experiments!
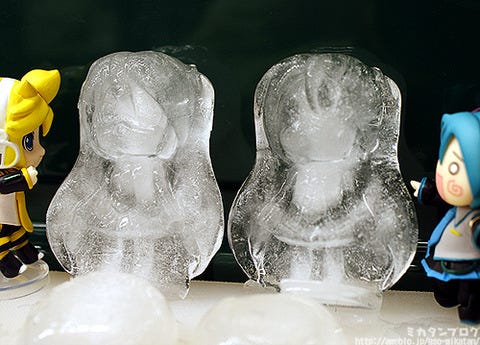

003

Well… um…

 
       / ̄ ̄ ̄\
     / ─    ─  \
    /  <○>  <○>  \.  ”That doesn’t really look like Miku…”
    |   (__人__) し |  
    \    ` ⌒´    / 
    /  し          \

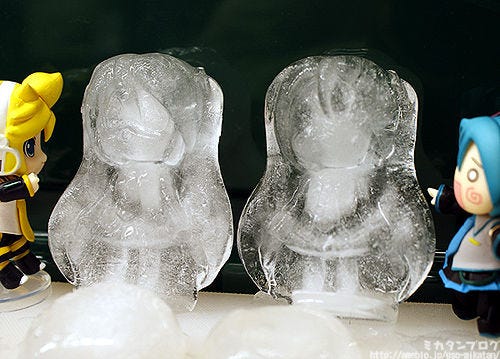
The center of the ice turns white which makes the shape quite hard to make out…

To help keep it more clear you can follow these steps:

– Before it freezes completely replace the water.
– Give it time to freeze completely.

I tried a lot of other things, but these two made the resulting ice much clearer. If you display the product with Nendoroid Petites it looks like they were making their very own ice sculptures!
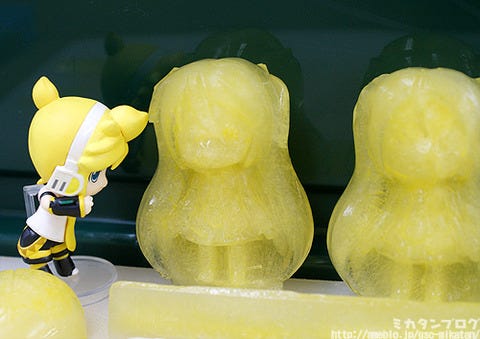

013

This time I tried using tea!

 
     ____  
   /      \
  /   ─    ─\      ”Ooh…
/     (●)  (●) \      That looks a bit better than the water!”
|       (__人__) | ))
/     ∩ノ ⊃   /
(  \ / _ノ |  |

It looks a little bit better because of the color.

I also tried some other drinks… here are the results:

Calpis: Turned out very jagged and hard to remove from the tray…
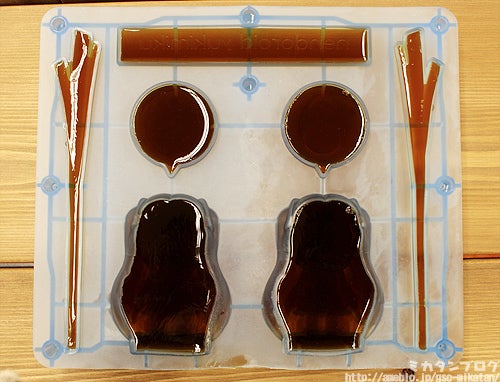
Coffee: Not bad! It looked very cute!
Sports Drink: Also quite jagged, but it worked alright.

It seems like if there are too many impurities in the liquid then it freezes much more jagged and falls apart much more easily… so in the end I recommend using tea and coffee!

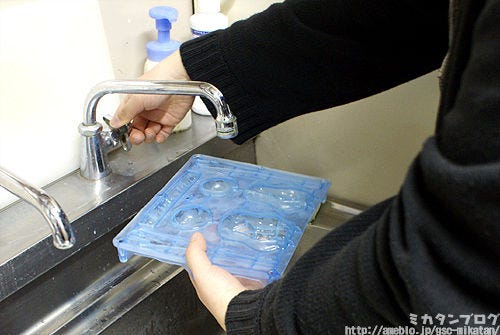
When you want to get the ice out pour some tap water on the reverse side of the ice tray to loosen it!
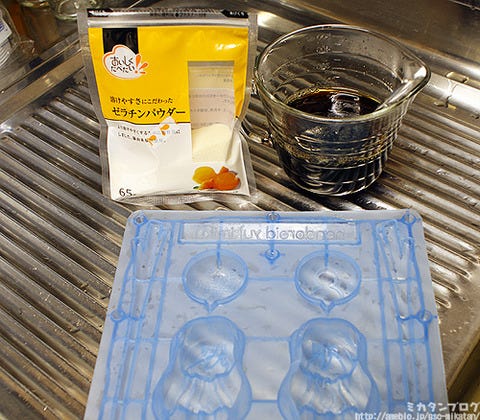

004

Let’s move onto the next experiment! We need to get Miku looking more like Miku!

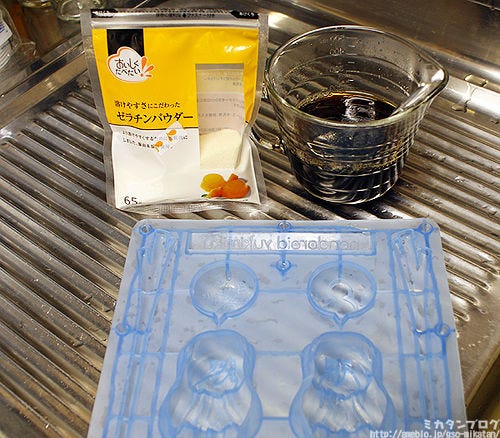
Let’s try making coffee jelly Miku!

All you need is gelatin, coffee and sugar!

You can  find gelatin in the sweets section of most shops! Just be sure to put in quite a lot of gelatin, otherwise it won’t harden!
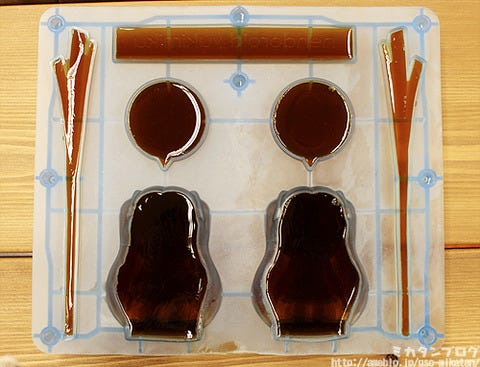
018

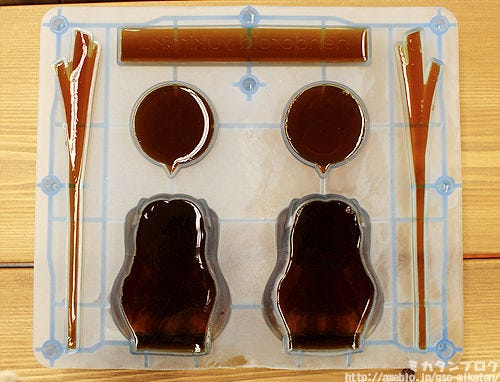
Place it in the fridge for about one hour!

Getting her out now is a little more difficult – but I found that poking the gelatin with a toothpick to let some air in while pushing on the bottom helped to get them out quite easily.
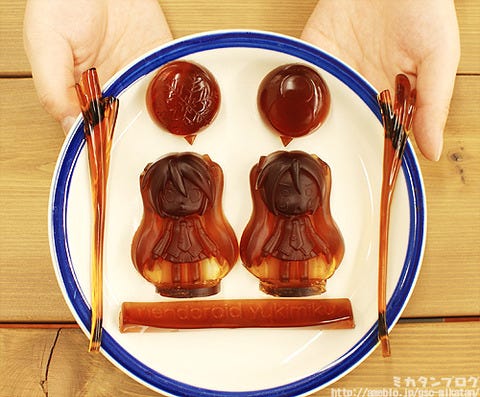

016

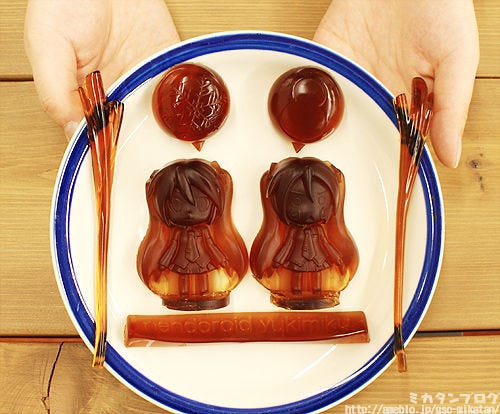
Miku Coffee Jelly Complete!

Oooh!!! This time you can make out both of them really nicely!
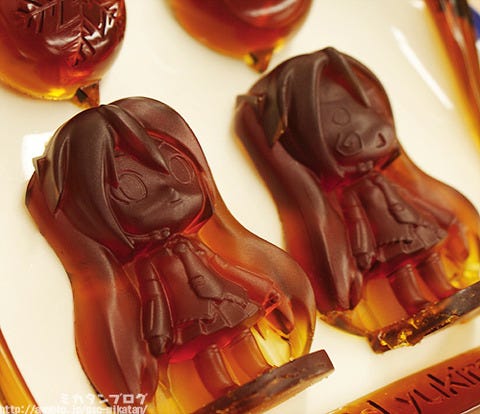

015

They are delicious just like this, but even better with some fresh cream or milk.

 
       ___
     / ⌒  ⌒\
    /  (○)  (○) \     “What else can you make?!”
  /   ///(_人_)/// \  
  |       `Y⌒y’´   |  
   \      ゛ー ′  ,/   
    /     ー‐   ィ

006

…this is the last experiment for today!

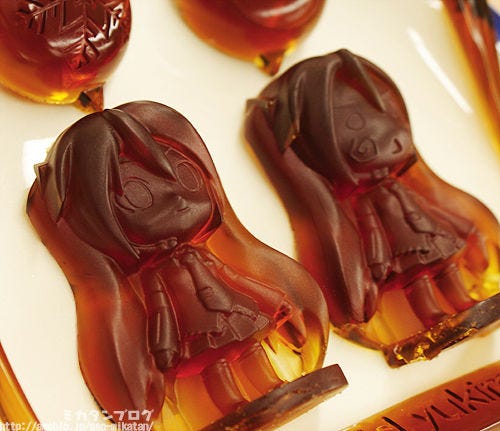
Miku Chocolate!

Now that we’re in February…

It’s the month of Valentine’s Day!

If you really want to impress that guy you’ve had your eye on then be sure to give him some Miku chocolate! I’ll go over how to make some quickly!
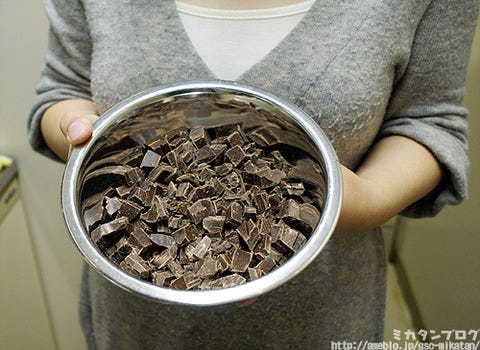

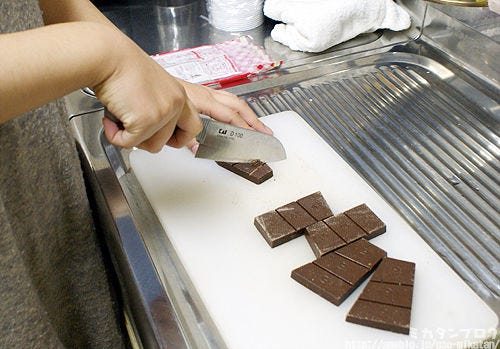
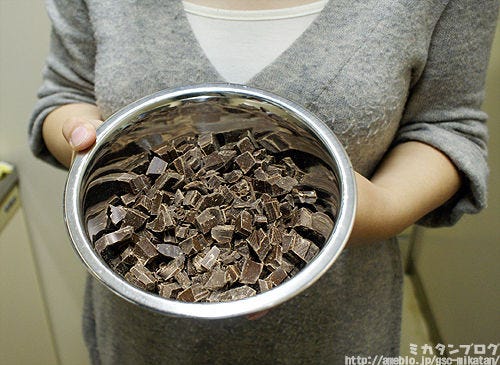
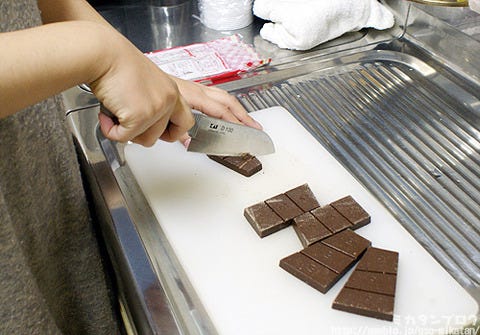
007

First buy some chocolate and cut it up into small pieces.

If you add some cream it might end up even tastier… but I was worried it wouldn’t harden as well, so I decided not to add any this time.
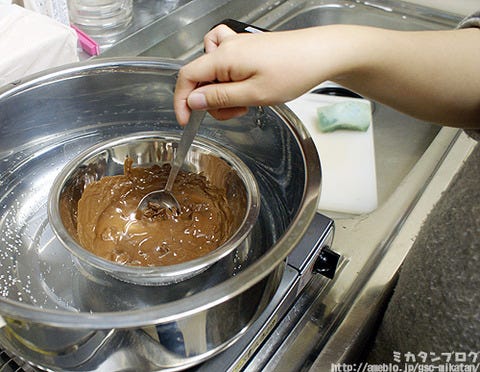

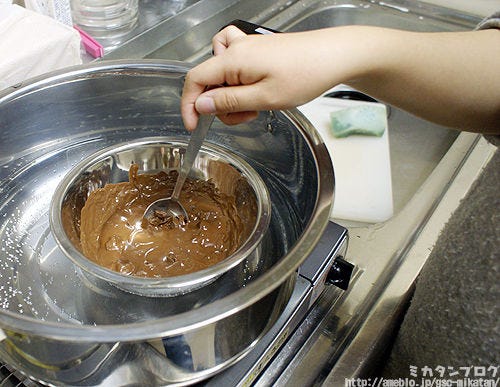
002

Place the bowl of chocolate in some boiling water to melt it!

You can turn off the heat of the stove completely and just use the heat from the water to melt it down… but be careful not to burn yourself!
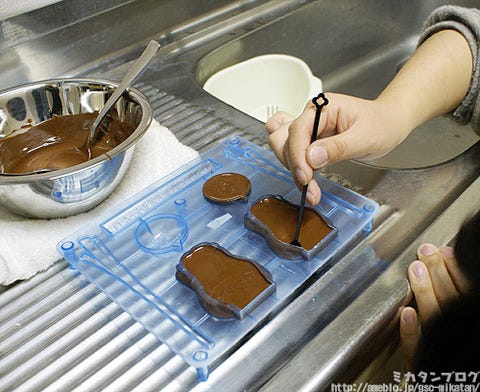

008

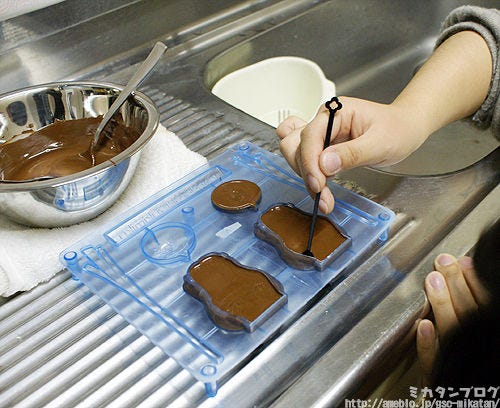
Pour the melted chocolate into the tray.

It’s quite hard to get the chocolate to fit neatly into some parts like the hair – just find something to spread out the chocolate so that it gets into all the nooks of the mold.

The leeks are the hardest to fill with chocolate!

Adding the chocolate in as slowly as possible is the best way to make sure it’ll all fit in nicely.
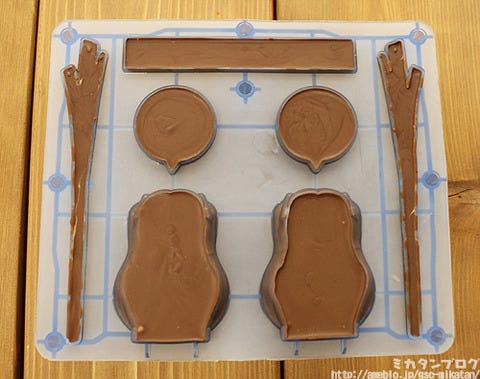

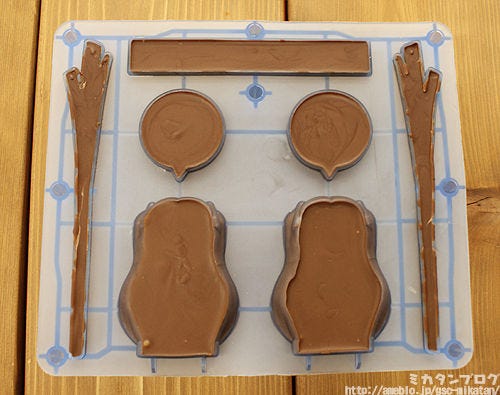
009

Place in the fridge for a few hours!

These seem to have hardened really nicely… now I’ve just got to get them out of the tray!
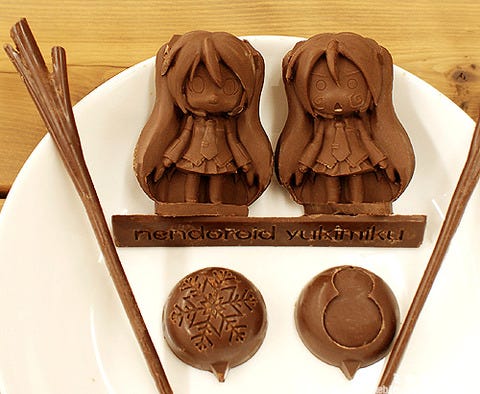
010

Miku Chocolate Complete!

You need to get them out of the tray quite quickly – if you take too long trying to get them out then they start melting from the heat of your hands… ^^;

It’s probably a good idea to find a cool place to get them out.

 
       ____
 / ) ) )/  \  /\  
 {   ⊂) (●)  (●) \    “Good Luck Girls!
 |   / ///(__人__)///\    If your confession goes well let me know!”
 !   !    `Y⌒y’´    |
 |   l      ゙ー ′   ,/
 |   ヽ   ー‐    ィ
 |           /  |

For those wondering… we also tried using a few other ingredients:

– Instant Jelly
Miku came out broken up into little pieces… plus the jelly got stuck onto the tray and getting it off was a mission…

– Sherbet
Miku came out broken up into little pieces again… the sherbet is just too soft to hold a shape.

Warning Time!

Never pour hot water on the tray!

The tray will become distorted from the heat and lose it’s shape… I should know… because I did it once… orz.
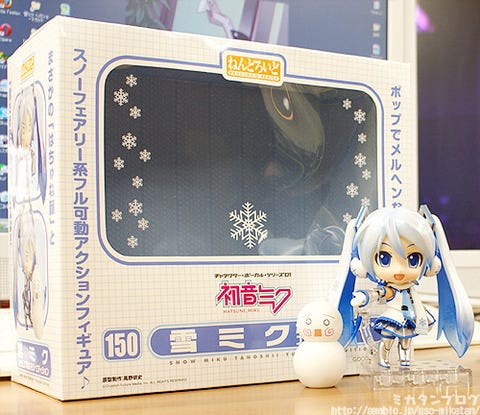

019

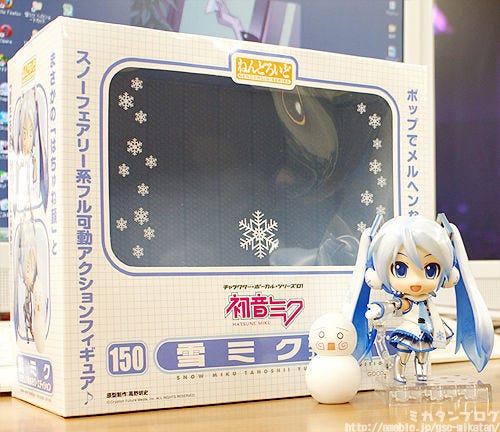
Nendoroid Snow Miku

Snow Playtime Edition!

She’ll cost just 4000JPY!

She also comes with some warm clothes, a snowman and of course the ice tray!

There are three ways to get her!

 
       ____
 / ) ) )/  \  /\  
 {   ⊂) (●)  (●) \ 
 |   / ///(__人__)///\
 !   !    `Y⌒y’´    |
 |   l      ゙ー ′   ,/
 |   ヽ   ー‐    ィ
 |           /  |

↑ Going to WonFes

She’ll be on sale on 2011/02/06 (Sunday) at the WHL booth!

For more info check this sales page: http://www.whl4u.jp/buy_kaijyo.html

 
       ____
 / ) ) )/  \  /\  
 {   ⊂) (●)  (●) \ 
 |   / ///(__人__)///\
 !   !    `Y⌒y’´    |
 |   l      ゙ー ′   ,/
 |   ヽ   ー‐    ィ
 |           /  |

↑ Going to the Winter Festival

She will also be on sale on 2011/02/11 (Friday) and 2011/02/12 (Saturday)  at nORBESA!

For more info read up on the ‘SNOW MIKU for SAPPORO2011’ page: http://www.crypton.co.jp/mp/pages/special/snowmiku2011/

 
        ____
        /     \
     /   ⌒  ⌒ \
   /     (●)  (●) \
    |   、” ゙)(__人__)” .)|  ___________
   \      。` ⌒゚:j´ ,/j゙~~| | |             |
__/          \  |__| | |             |
| | /   ,              \n||  | |             |
| | /   /         r.  ( こ) | |             |
| | | ⌒ ーnnn        |\ (⊆ソ .|_|__________|
 ̄ \__、(“二) ̄ ̄ ̄ ̄ ̄l二二l二二  _|_|__|_

↑ Buying Online

Orders will start on 2011/02/07 (Monday) from 0:00AM!

For more info check out the WEB Sales page:http://www.whl4u.jp/buy_web.html


This page is being updated fairly often, so if you want to keep up with WonFes info be sure to check it out: http://www.whl4u.jp/


That’s all for today!
I hope to see you all again tomorrow! (・∀・)ノ゛

(C)Crypton Future Media, Inc. ALL RIGHTS RESERVED.

* Please note that this blog’s contents is originally written for a Japanese audience and is then translated for our foreign customers. All pre-order and release dates are the Japanese dates. Also note that not all products can be sold in certain areas

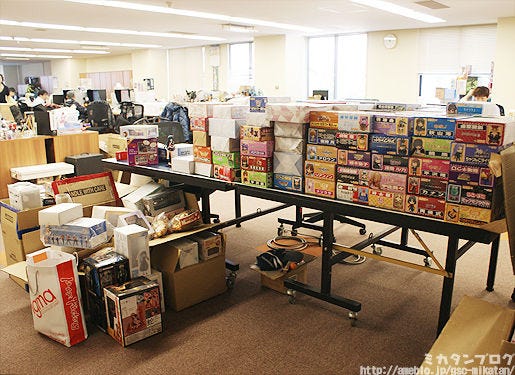

Mikatan Blog’s Three and a Half Year Anniversary!

 
                              ..◇・。..☆*。
                ゜゜・*:..。.。★◎@ ○☆。..:*・゜
        ゜゜・*:..。.。◇@☆*・゜★。。.:*・☆*・。..:*・゜
          。..:○★◎☆。∂∇。★◎*・゜゜。◎★
        ◎☆◇☆。*・.。..☆◎。.:☆◇*…..。
        ゜゜・*:..。.*・☆◎。__☆◎*・。..:*・゜ ゜
                          \       /
                            \    /
                    . ∧_∧\ /
                      ( ・∀・)..∞
                      / つ つ△    パッ
                  ~(   ノ
                        しし’

Mikatan Blog has been going for three and a half years!

The three and a half year mark was on the 11th January!

Next up is four years…. and then even five! I can’t believe it’s been so long! It feels like I’ve lost time somewhere!

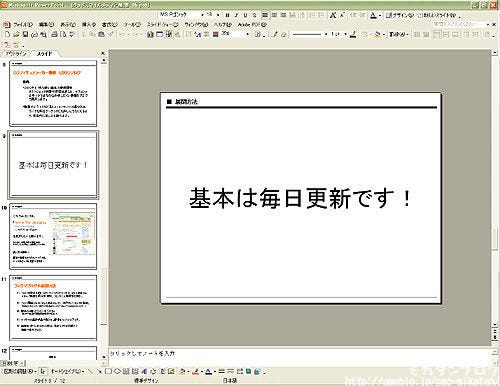
o0500038610574828815

This is the planning I did before the blog started!

I think I have shown this before, but I need to post it once in a while to compare it to how it has turned out.  The slide here reads “Update Daily”… I don’t think the me back then knew how much work that would be. ^^;

But even with that said, I really have enjoyed writing this blog every day!

But it’s time to decide on a new title for the Japanese version of the blog!


0001
“3 minutes walk from Matsudo Station.”

After half a year it became:

“2 minutes jog from Matsudo Station.”

‘Then after a year:

“1 minute run from Matsudo Station.”

After two years I started getting people to send in suggestions!

“5 minutes by panda from Matsudo Station”
from nobuo-san.
Two and a half years:

“4 minutes by dog sled from Matsudo Station”
from Pupu-san
And finally after three years:

“0 minutes by Google from Matsudo Station”
from Futagoneko-san

Those were all the titles of the past… and this time I’d once again love to hear everybody’s ideas for a new title!


The only condition is that it has to follow the pattern:
 
” … from Matsudo Station”!

You could also use something other than Matsudo Station… but that might be less likely to be selected…
[Thinking of a New Title]
 

Send an email with the title “Thinking of a New Title!”, along with the title you’ve come up with to the email address above – I’ll pick the best one which will be placed on the header of the top page of the blog. (Please note that the entries do need to be in Japanese, the translations here are just for understanding purposes.)
 
The deadline is the 8th February!

And maybe something more if I can find something more for everyone. ^^;

 
         ____
       /      \
      /  ─    ─ \  
    /    (●)  (●) \
   |       (__人__)  | ________
     \      |r┬-|   ,/ | |          |
    ノ      `ー’´  \  | |           |
  /´                 | |           |
 |    l                | |           |
 ヽ    -一ー_~、⌒)^),-、  | |________|
  ヽ ____,ノγ⌒ヽ)ニニ- ̄   | |  |

This is all just for fun, so feel free to send in an ideas you have!
I’ll be waiting for everybody’s entries!!


And finally…

A big thank you to everyone who reads this blog, as well as everyone involved in getting it done everyday. I’ll  keep going the best I can to keep the blog fun and interesting for everyone!!


That’s all for today!
I hope to see you all again tomorrow!  (・∀・)ノ゛

This part over here!

Originally this read: