The 4th report of my trip to the GSC factory in China!
My previous reports havecovered both the molding and painting of figures!
/ \
/ ⌒ ⌒ \ “I don’t remember that at all…. when was this…?”
/ ( ―) (―) \
| 、” ゙)(__人__)” .)| ___________
\ 。` ||||==(⌒)ー、| | |
__/ |||| \ 〉| | |
| | / , | ̄ ̄ ̄ ̄ ̄| ̄ ̄ .| | |
| | / / ヽ回回回回レ | | |
| | | ⌒ ーnnn.ヽ___/ |_|___________|
 ̄ \__、(“二) └─┘ ̄l二二l二二 _|_|__|_
Yes, well… it was quite awhile ago, wasn’t it….
Here are the links to the previous articles!
Mikatan’s Factory Field Trip! – Part 1
Mikatan’s Factory Field Trip! – Part 2
Mikatan’s Factory Field Trip! – Part 3
1/8th Scale Hitagi Senjougahara (Part 3) – (Stationary Painting)
1/8th Scale Hitagi Senjougahara (Part 4) – (Stationary Painting #2)
If you’ve already read them and just want a quick recap, then here we go…
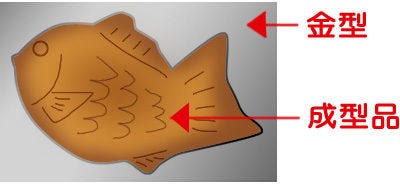
▼ The two types of molds!
▼ Mask Painting!

▼ Painted Product
That about covers it all in a nutshell, so let’s move onto today’s topic!

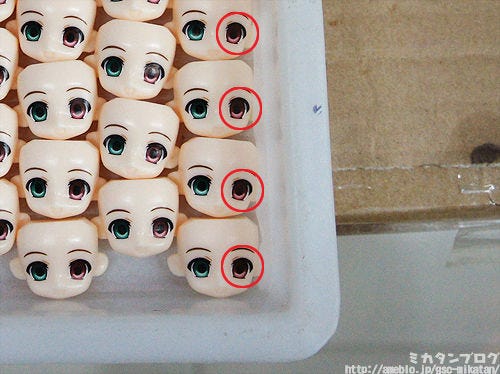
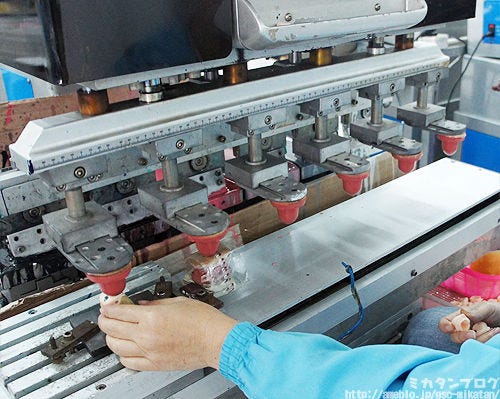
Stamp Printing!
Creating things like eyes and other patterns on figures would obviously take too long by hand, so these stamping machines are used!
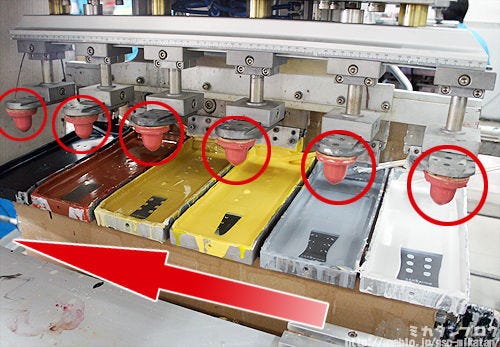
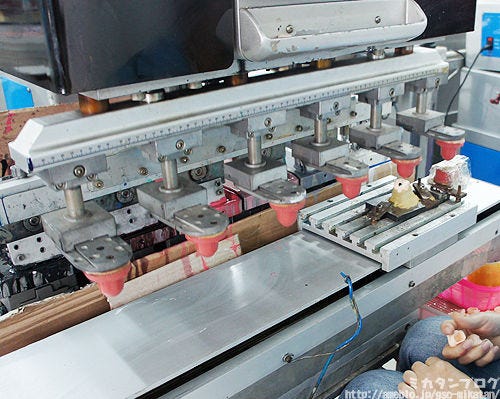
First a different color is set in each part!
The product needing the stamping will start on the right and move through to the left…
It normally goes from the lightest color to the darkest!
If you went from dark to light, then the lighter colors would not come out as clearly. There are some figures where the color process varies, however.

This is basically the order an eye would be stamped!
If you’ve used layers in Illustrator or Photoshop I’m sure you can get a good feeling for how the colors layer on top of one and other. It’s the same concept!
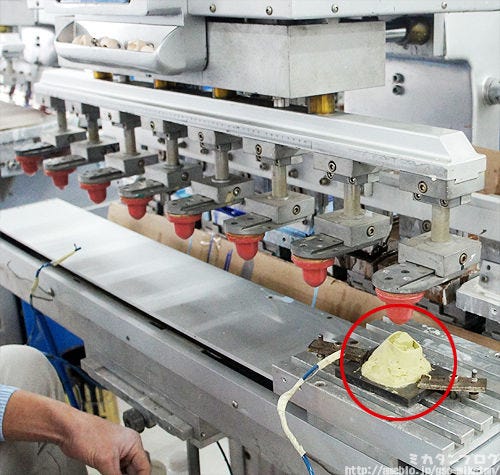
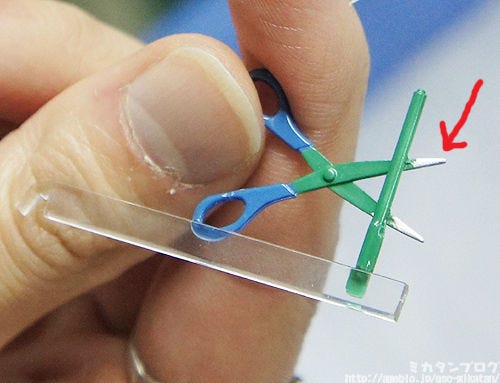
The parts to be stamped are placed on a stand!
I know it kind of just looks like a lump of putty from the photo, but it’s actually a lot more important than that! The stand has to be made to make sure that every single figure ends up identical – imagine if the eye on one of your Nendoroids was even 1mm off from where it should be! The stand is created to make sure that every position and angle stays the same on each figure.
Okay, let’s take a closer look at the actual process!
The next set of photos show the process of stamping the left eye above.

(1) First the paint is placed on the stamp…
(2&3) The white and gray are applied…
I missed taking a photo of the white part! The machine is really fast! …orz

(4) The light pink is stamped….
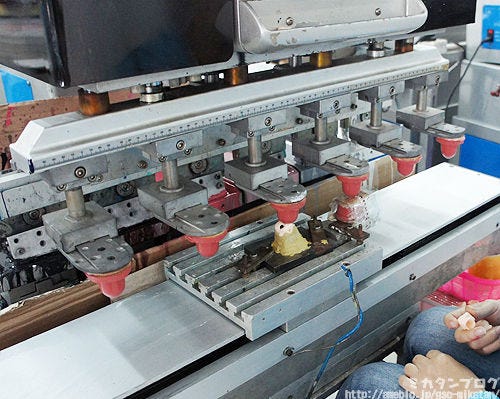
(5) The darker pink is stamped…
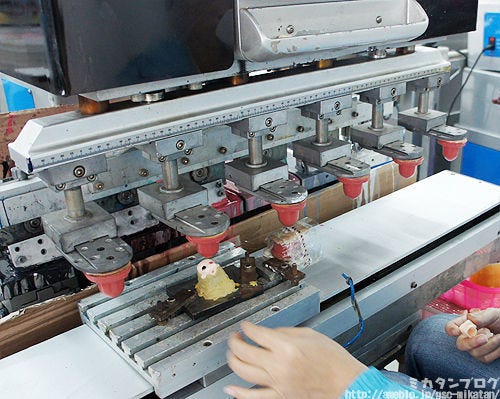
(6) The brown is stamped…
(7) The black is stamped…

(8) Complete!!
____
/ \
/ ─ ─\ ”Huh? The white of the pupil is missing…? “
/ (●) (●) \
| (__人__) | ___________
\ ` ⌒´ ,/ | | |
___/ \ | | |
| | / , | | |
| | / ./ | | |
| | | ⌒ ーnnn |_|___________|
 ̄ \__、(“二) ̄ ̄ ̄ ̄ ̄ ̄ _|_|__|_
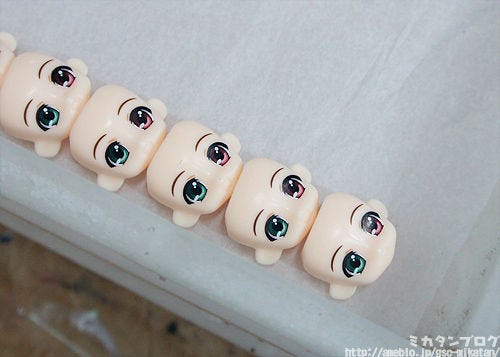
Correct! The white is stamped using a different machine!
Well, the same type of machine, but just in a different production line after the one above. The reason for this is quite simple…
The white needs to be stamped on twice seen it is being placed on darker colors!
The white bit on Nendo Petite eyes have a diameter of just 1mm, but even so the machine manages to stamp them on twice at the perfect location every time!!
It’s just like getting your name on a grain of rice… that’s how fine the work needs to be.
By the way…
http://vision.ameba.jp/watch.do?movie=3547155
It’s probably a lot easier to see what is going on from the video, so if you’re interested do take a look.
That’s all for today!
I hope to see you all again next week! (・∀・)ノ゛