Hi everyone.
This is the third in a series of articles on repairing figures.
The previous two blogs I did on the topic featured repairing joints, and reinforcing joints using glue – you can find them over here:
DIY Figure Repairs Part 1: Broken Joints
DIY Figure Repairs Part 2: Reinforcing Joints
Today I’m going to be covering dealing with scuffed paint… something that probably happened to loads of figures in the recent earthquake.
As a figure lover, I just had to write a blog on how to try and fix this.
Painting figures is even difficult for professionals, so I asked Oda-P to explain this one in the easiest way he possibly could… you’ll need a couple of tools and if something goes wrong don’t blame us! But even so, if you’re willing to take the challenge, then please do!
– Dealing with Scuffed Paint –
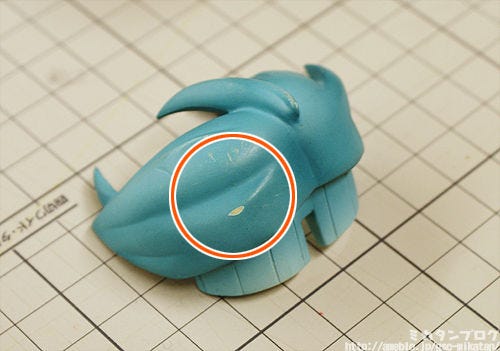
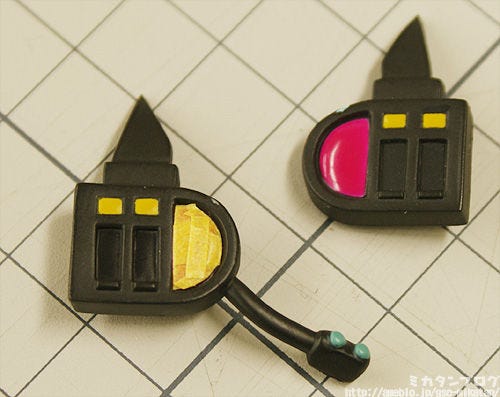
Often when figures fall down they end up like this.
There are a lot of little scratches in the circle, as well as one big one. What we want to do is try and hide these scratches as much as possible!
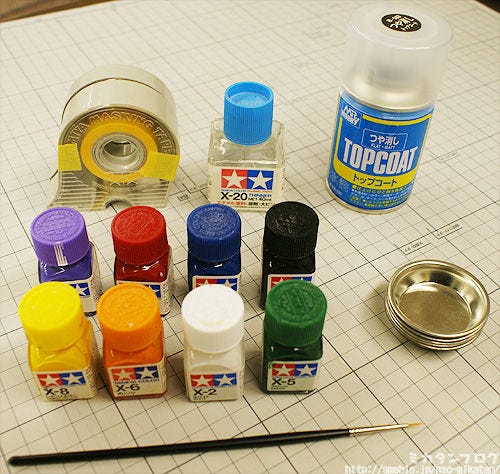
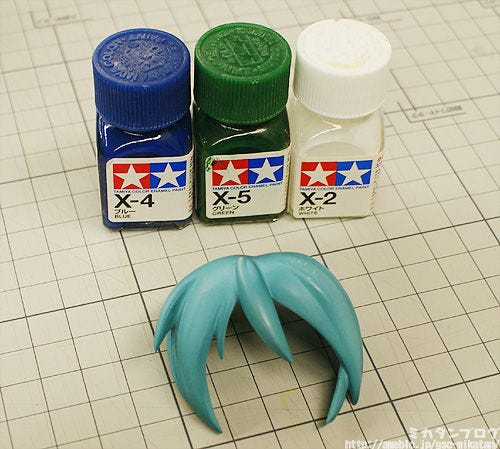
These are the tools for today.
At the top we have masking tape, enamel solvent and a top coat to remove paint shine. At the bottom we gave various enamel paints, a dish and a brush.
There may be some things you’ve never seen of before…. but you should be able to get them all at any model shop! 3000 yen would cover everything quite easily.
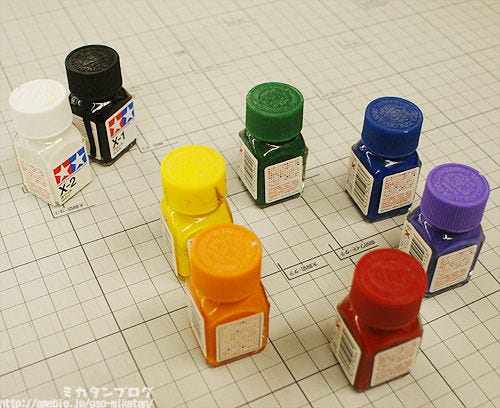
Enamel Paints!
Using these 8 colors you should be able to mix almost any color.
Well, I suppose you really only need the base colors of yellow, red and blue… but this set will make it easier to get the colors you need.

Now for a quick explanation about paints.
Paint comes in a variety of types, such as lacquer, acrylic and enamel – each of them has a different strength.
Lacquer paint is the strongest, next is acrylic and then comes enamel – the weakest. You can paint acrylic or enamel paint over lacquer paint, but you can’t paint acrylic or lacquer paint on top of enamel – it will melt from the strength of the other paints.
The master figures made here typically use lacquer paint for the hair and body and enamel paint for smaller things like eyes. However the actual products in stores use a special PVC-only paint.
This PVC paint is considerably strong, but there is a reason we are using enamel paint…
… will be explained right here.

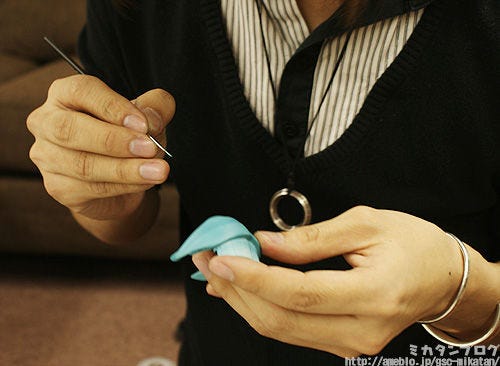
I’ve put some black enamel paint on the hair!
Now if you put some enamel solvent on here and then gently wipe it off…
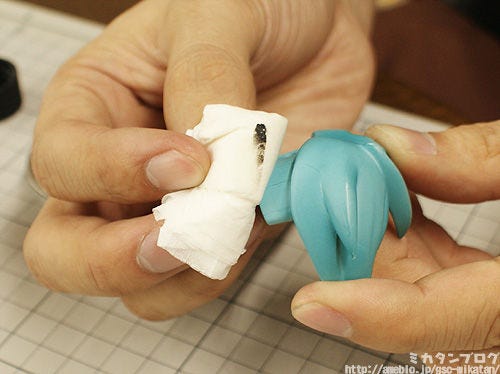
It comes off easily!
Almost all final products use this PVC paint, so painting over with the weakest enamel paint will hardly have any effect.
This means you can restart if you make a mistake!
What I’m about to explain is very prone to errors – chances are you won’t get the color right first time – so it’s always good to be able to retry. Just be careful and make sure that the figure isn’t initially painted with enamel paint, or you’ll end up with a mess. (you can test by putting some enamel solvent somewhere that can’t be seen.)
On to the mixing of colors!
I’m going to be mixing blue, green and white to try and make this hair color. Be sure not to get pain on your clothes or the desk!
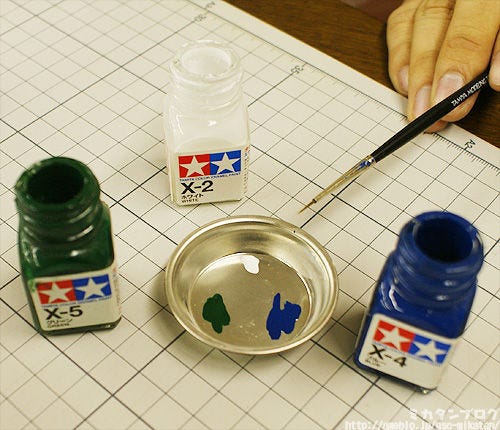
Place some of each paint on a dish.
The area that needs fixing is small, so I’m not using a lot of paint. It’s best to add little dashes of paint and then mix to try and get the right color.
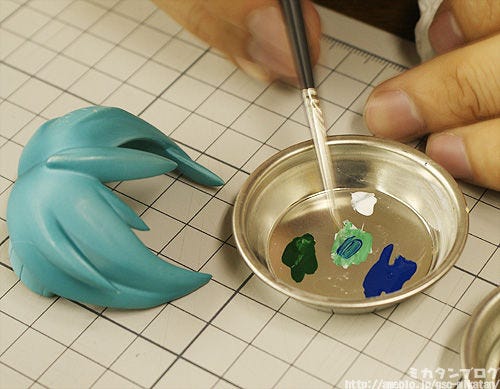
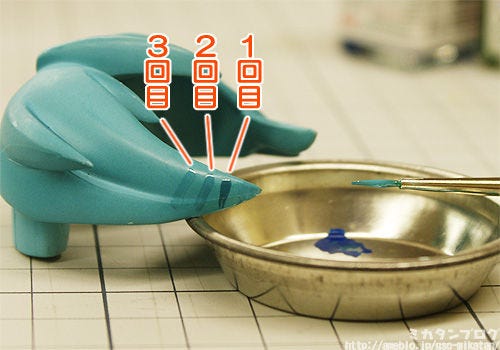
Mix them slowly one by one on the dish.
Without mixing them on the table or on your clothes, if at all possible.

That color looks pretty close!
By the way, the longer paint stands the thicker it becomes, you can counter this by adding a little bit of enamel solvent and mixing it in.
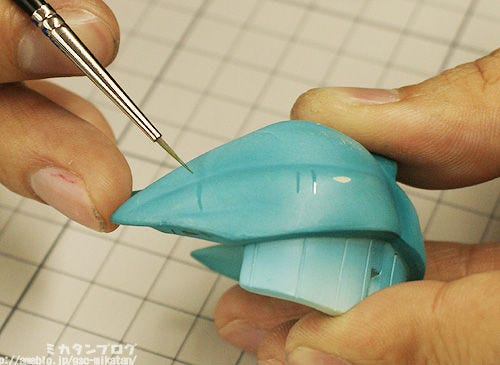
Time for a test paint.
It seems like my color is still a little bit too dark. So once again I use some enamel solvent and wipe it off for a retry.

Play around with the paints a little more.
Mix in some more white in order to make the color slightly lighter.
As a side note – sculptors use a very similar process themselves when trying to get the original colors right.
But they are incredibly quick about it… it truly is a work of a professional…

Color mixing complete!
If you compare it to the original image you’ll see it has covered up the scratches quite nicely. The problem is the paint kind of shines where you painted on.
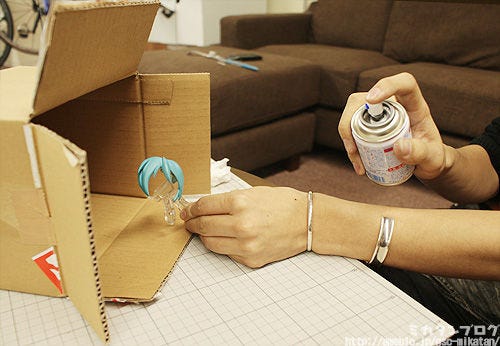
This is when you apply the top coat.
Please note the following though:
■ Be careful!
■ Use something like a cardboard box to stop it the spray from getting all over.
■ Try to constantly keep moving the spray to not put too much in one place.
■ Holding the part still with your hands or a clothes peg can help a lot.
Also note that once you’ve put this top coat on, you can’t remove the enamel anymore!
Make sure you’re happy with your work before you reach this step!

Complete!
You almost can’t even tell that there was once some horrible scratches on it… it may take awhile to do, but it’s worth the effort!

Finally, an introduction to the masking tape method!
Whilst my example didn’t need this, there are sometimes parts on figures that keep the shiny look – and if you put a top coat over it you’ll end up losing the shiny effect.
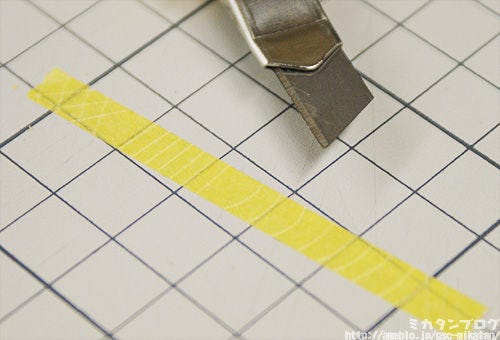
Spread out some masking tape and cut it out in various shapes.
If you use a craft knife be careful not to cut anything important… like your hands!
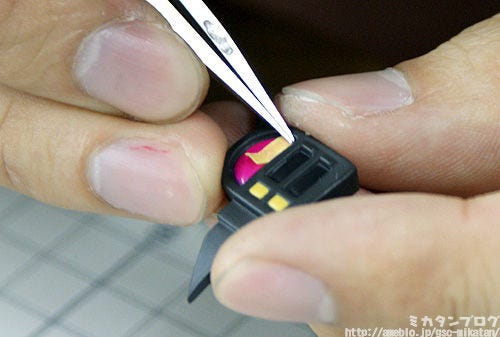
Place the pieces of tape over any parts that need the shine!
A pin set works great for applying the tape, but if you don’t have, the point of a pen will work fine too.
The tape is in place!
There is also tape on the two yellow squares…. it’s just hard to see. Now you can spray a top coat over the top without destroying the shine!
Extra!
I decided to try mixing colors myself!
Each time I tried I got closer and closer to the original color… but it is quite hard to get it perfect – although it’s a load of fun at the same time! It’s like you’re making the figure yourself! ^^;
____
/ \
/ ─ ─ \
/ (●) (●) \ ”Can’t I use Mackies or Gundam Markers?”
| (__人__) |
/ ∩ノ ⊃ /
( \ / _ノ | |
Simply put, as long as the color matches, then yes.
The problem is that a lot of hair and clothes have odd colors or gradients that will be hard to match up with those. As a side note, don’t use manicure paints as they are made using lacquer paint and will often melt off the base painting.
This was the very last in my series of DIY figure repairs. I hope you can find the time to try them out and fix up any figures hurt in the earthquake!
That’s all for today!
I hope to see you all again tomorrow! (・∀・)ノ゛