2013 Wonder Festival (Summer): WonHobby Website!

Wonder Festival 2013 (Summer)!

Taking place on the 28th July at the Makuhari Messe!!

005
There are only 37 days until WonFes!!

The GSC and Max Factory offices have slowly but surely started to get busier with WonFes preparations! What you can see here is a miniature simulation for the figure display space!

I can’t wait to see what products will be on display this year! (`・ω・´)

Today is also the day the the GSC & Max Factory joint booth ‘WonHobby 18’ website has been upped!

Let me have a quick look at the pages that are available so far! The limited edition WonFes products have also been announced, so be sure to take a look!! (・ω・)ノ

– Top Page –

http://whl4u.jp/

001
The site has a gentle, relaxing design!!

Just by visiting the page, I feel all cool and refreshed even during these hot Summer days… (*´∀`*)

The top page will let everyone know all the latest news, as well as passing on some tweets that use the WonFes hashtag! It’s a good place to check when you want a quick update on all the latest news!

By the way, ‘WonHobby’ refers the joint booth that GSC and Max Factory always have at the WonFes events! Note that in the WonFes catalog we are listed under this name, and not the companies names!

– Event Summary –

http://www.whl4u.jp/event.html

004
WonHobby 18 will be filled with all sorts of fun!

This year’s theme is ‘all-sorts of fun!’ I’m not entirely certain what ‘all sorts’ refers to, but I’m sure we’ll find out!! Σ(゜Д゜;)

This page is a quick summary of all the event information! A booth map of the WonHobby booth will also be placed up on this page at a later stage! The both is pretty big this time around, so I think the map will actually br rather helpful! You might want to print it out and bring it along, or keep a bookmark to the map on your phone for quick reference!

– Product Information –

http://www.whl4u.jp/products.html

002
The 2013 Summer WonFes Exclusives!

Nendoroid Nyaruko: Maid Ver.
http://www.goodsmile.info/product/en/3948/

Nendoroid Petite: IDOLM@STER Cinderella Girls –
Ranko, Uzuki and Mika + Live Stage Set

http://www.goodsmile.info/product/en/3951/

Kurisu Makise: White Coat Ver.
http://www.goodsmile.info/product/en/3953/

figma Mika Jougasaki
http://www.goodsmile.info/product/en/3950/

figma Rika Jougasaki
http://www.goodsmile.info/product/en/3952/

These five products will all be on sale at the event!! (=゚ω゚)ノ

Ooh! This line-up has so many products from the games and series I love!! As a Passion-type Cinderella Girls player, this selection is priceless!! 。・゚・(ノД`)・゚・。

Plus there will also be various goods on sale at the event along with these figures! There will also be the Square-chan Smart Phone case that was popular last year as well as Nendoroid More goodies and GSR’s Diagonal Pliers!

– Online Sales –

http://www.whl4u.jp/buy_web.html
002

Online orders for the WonFes products will be taken until the 5th August!

Orders will start on the day of WonFes, but they will only be shipped out to everyone in late November as they will be made to order. This gives a chance for fans who can’t make it to the event to still get their hands on these lovely figures! Plus there is one extra figure who isn’t available at the event, who can only be ordered online!!

Dekacchu Kirari Moroboshi ~Lovely Princess ver.~
http://www.goodsmile.info/product/en/3954/

A giant Kirarin!! Plus it’s the super cute version of Kirarin before she has special training! (not that she isn’t cute after the training! :P)

If you can’t make it to the event, don’t forget to get your orders in!

That’s all that’s on the site at the moment!

But the site will constantly be updated with all the latest information, so be sure to check the site every once in awhile! (At the moment it looks like it’ll be updated around each Friday!)

There are only 37 days to WonFes! All of us here at GSC are going to do our best to make it an event to remember!! (`・ω・´)

 
Anyway, that’s all for today!
I hope to see you all again tomorrow!! (・∀・)ノ゛
Dealing with Stickiness on Figures!

I have once again recieved an interesting mail!

Hello! My name is Tii!
I love reading your blog. ^^The other day I finally managed to find and buy Nendoroid Totori after searching for ages! I took her home and opened the box filled with anticipation…. only to find the surface of the figure was all sticky and gross! I guess that because the figure is a few years old, it kind of melted down into the base materials of the figure?

I really want to take her out the box and play with her, but she’s all sticky… is there someway to get around this? (´・_・`)!

I’ve had this experience before!! Σ(゚Д゚;)

When figures are left for a long amount of time, that sticky layer will often develop on the surface of them! I hope there is some kind of solution…
o0515045412580975795
Let’s check with Tori Bird from the manufacturing team!!

He was the one who made Nendoroid Cure Blossom which was really well recieved by fans of the series! I wonder what he is working on now…!!

But his actual job isn’t the sculpting of prototypes, but in fact the mass-production of all the figures that reach everyone’s homes! (`・ω・´)

Let’s find out from him what causes the sticky figures!

(*The Mikatan filter has been applied to this explanation to try and make this as easy to understand as possible – let me know if you think something is wrong!)

o0515057612580975797
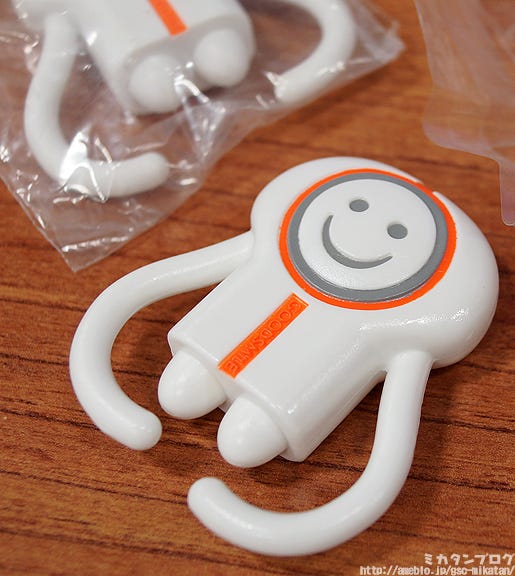
These are actually super special Mikatan business cards! Each one has my name and email address written on the reverse side – they were actually made for me around 5 years ago, when the GSC offices were still in Matsudo!

Some of them have become all sticky!! (((゚Д゚)))

It’s quite hard to tell from the photo, but I think you should be able to see from the reflecting light that there is a bit of a sticky surface. If you touch it it feels a little gooey too…

The strange thing is that even though all of them were all made at the same time, only some of them were going sticky! I wonder why…?

– Cause of Stickiness –The reason the figures become sticky is because of the plasticizer used when making them. This plasticizer is added to the PVC (the main material used in figures) in order to make it softer – the more mixed in with the PVC, the softer and more flexible it becomes.

However, over a long period of time this plasticizer vaporizes, and when this happens while a figure is sealed up in it’s box the vaporized plasticizer has nowhere to go, and thus sticks onto the surface of the figure creating a sticky layer.

Curse you, plasticizer!! (*`Д´)

But the truth is that I shouldn’t be mean to the plasticizer – it’s the reason we have flexible figure parts on our figures, and it’s apparently also used in order to get hard PVC parts like Nendoroid expressions out of their molds neatly! In other words, the plasticizer is a very important part of figures!

Although I’m also told that there is currently research going on to make soft, flexible parts without the need for plasticizers! The factories in China are constantly using the latest techniques, so let’s hope that this can also be put into practice soon! (((゜Д゜)))

– How to Prevent the Stickiness –・ Don’t leave figures in the sun for long periods of time. (This causes the plasticizer to vaporize faster)

・ Don’t leave figures in sealed boxes for too long. (This includes leaving them in the blister packs!)


It seems simple enough, yet I know it’ll be hard!!(゚Д゚;)

I’m sure I can be sure to keep my figures out of the sunlight, but when it comes to the figures in boxes… I have so many of those at the moment!!

But it’s definitely best to open up the boxes and blister packs and let the figure breathe if you really want to prevent the stickiness!

– How to Remove the Stickiness –Make use of a mild washing liquid – the same you’d use to clean things like eating utensils. Note that I can’t guarantee that this method will work for all figures, and there may be unexpected problems or damage to your figures.

You’ll see that I have tested a few methods below, but please keep that in mind that everything you try on your figures is your own responsibility!

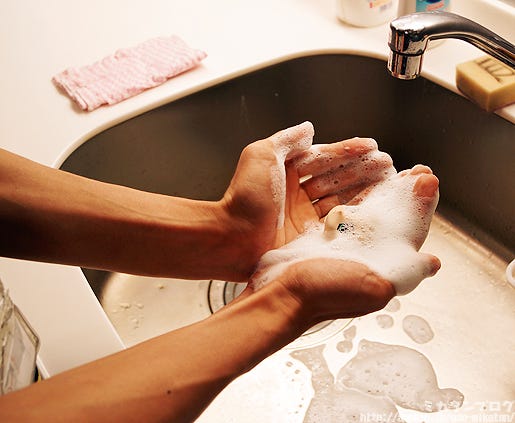
(1) Clean with some bubbly washing liquid!

o0515042312580975799

Making use of a sponge or brush might damage the figures – it’s best to gently wash it with your hands instead!

This should remove any light stickiness from the figure! When you’re wiping off the water after washing, be sure to use a soft cloth instead of tissues.

The reason for this is that if any stickiness is left behind, the tissues will end up sticking to the figure!

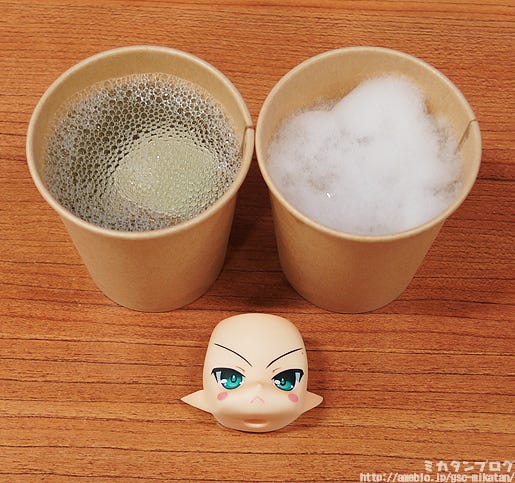
(2) Soak the figure in diluted washing liquid!

o0515048312580975798

Left Side: 10 Parts Water – 1 Part Washing Liquid
Right side: Bubbled up washing liquid

I tried leaving the figure parts in each of these for 12 hours! The results…
Left Side: Almost all the stickiness came off!
Right Side: The bubbles all died away after a few hours.

I really wanted to try the right side method even though Bird told me it wouldn’t work… he was right. 😛

I think that overall, the best method is to first soak it in left hand liquid from (2) and then wash it with bubbles and hands as in (1). One thing to note is that the smell of the cleaning agent might cling to the figure a bit, so if you’re sensitive to smells you might want to keep that in mind!

(3) Clean with a Scouring Liquid/Cream (Caution!)

I used this method on some expression parts and it seemed to work very well at getting rid of the stickiness! The problem with this is that these cleaning liquids usually include an abrading agent which have a very high chance of damaging your figure! They’ll also likely remove the shine on any glossy figures.

It’s not a method I recommend, but it certainly works at getting the stickiness off and having a very clean figure! Whatever you do though, don’t try to clean them using scouring powder, as that will almost definitely damage the figure!
o0515050412580975796
I tried cleaning one for myself! (`・ω・´)

My GSC Seijin is all nice and clean now!

W-Wow…! The stickiness is completely gone and he looks just as good as new! I can once again give him to someone without being embarrassed about it!!

Figures, like all other things, will unfortunately get damaged or break – nothing can last forever! But you can certainly do a lot of things to make your figures last longer – taking a few steps to make your figures last a bit longer really shows your love for them! ヽ(゚∀゚)ノ

I’m sure a lot of you have a few figures that are sleeping safely in boxes somewhere – at some stage when you have the time, consider opening up their boxes and giving them a little air. The other day I opened up all my older boxes and it was actually great fun to remember all the old figures!
Anyway, that’s all for today!
I hope to see you all again tomorrow!! (・∀・)ノ゛
Nendoroid Yukari Tamura

Back on the 20th May, I received so many messages!!

000
All the Yukari Tamura fans were asking for a review of the recently announced Nendoroid!

001
I’ve finally managed to get hold of a sample!

Oooh!!! Nendoroid Yukarin is right here!!! Yukarin! Hai! Yukarin! Hai!! \(゚∀゚\)

Today I’ll be doing a special review for all the citizens of the Yukarin Kingdom!! Don’t worry – I’ll be sure to get the cutest photos I can!!

004
Nendoroid Yukari Tamura!

The world’s cutest voice actor, Yukari Tamura, is joining the Nendoroid series! She’s also a well-known singer, so she is dressed in her stage outfit with a mike in hand, ready to sing for the fans!

The happi coat often seen during her live performances as well as the two cat plushies are all included as optional parts, allowing you to completely recreate her stage performance in Nendoroid form!

She looks just like the real thing!! She’s so cute!!

There’s no question about it! This is definitely Yukarin!! (((゚Д゚)))

The Nendoroid design creates an irresistible aura of cuteness around her, as one would expect from Princess Yukari!!
002
Her outfit comes from the jacket cover of the ‘Yukari Tamura: LOVE ♥ LIVE *Fall in Love*’, released on the 29th May!

Yukarin wearing cute cat ears and a tail! (*゚∀゚)=3

You can see that the detail is worthy of everyone’s favorite Princess!! Just look at all the layers on her skirt, not to mention that the white areas make use of a shiny pearl paint!
005
This is how she looks from the back!

Yukarin’s twirly twin-tails have also faithfully been recreated in Nendoroid form! They’re also fitted with joints allowing for some varying poses! (`・ω・´)

The included cats each come with their own little stands allowing you to create a super cute looking stage for Princess Yukari to perform on!
003
The first time the packaging has been revealed!

She comes with three different expressions, as well as an alternate body wearing a T-shirt and happi coat!

There are so many parts to play with – just look at all those different arm parts as well! Time to start having some fun! ヽ(゚∀゚)ノ
006
First up we have her mike and cats!

You can’t have Yukari perform without her microphone, so of course it is included for the Nendoroid as well – plus she can hold it in either her left or right hand!

She also comes with both of the two cats that are always seen during her live performances! They unfortunately can’t quite do the dances seen during her live events, but the heads are fitted with a ball joint for a little bit of posability!
007
The bunny plushie ‘present’ from her concerts!

Even the famous bunny plushie is included! For those who don’t know, Princess Yukari often kisses one of these plushies and then throws it out into the audience for someone to keep!

Whoever catches that plushie is so lucky! I can’t help but feel jealous! (*´∀`*)

008
Casting a spell with her magic wand!

The spell she casts is ‘Mero~n’, which is a spell that charms everyone watching to fall in love with her!! (There are quite a few people in the GSC Offices that have been under this spell for quite some time :P)

The magic wand is made as the same size as the microphone, which means she can hold it in either her left or right hand!
009
The pink happi coat!

By wearing one of these you prove your dedication to the Yukarin Kingdom, but this one is for Yukarin to wear herself!!

Before you swap out this body part, you first need to remove the neck joint and transparent pin! The neck joint can be used as a spare in case one of your Nendoroid joints breaks, so you might want to keep it safe somewhere!
010
A pink glow-stick is also included!

A pink glow-stick to match the pink happi coat!

Yukarin looks really adorable wearing the happi coat… but I think it might look good on some other characters too!

Anyone can join the Yukarin Kingdom!

Just by swapping out the body for Yukarin’s happi coat, you can transform any Nendoroid into a Yukarin fan! This is so much fun!! Σ(゚∀゚ )

All of her extra parts make it so easy to create the atmosphere of one of her live concerts!
011
Nendoroid Yukari Tamura!

She’ll be on sale at the ‘Yukari Tamura LOVE ♥ LIVE 2013 *Cute’n ♥ Cute’n Heart’ event at the Saitama Arena on the 21st, 22nd and 23rd of June!

But that’s not all!

For those who can’t make the event! There’ll be another chance to grab the Nendoroid! 。・゚・(ノД`)・゚・。

I know many of you have been wondering about this, so let me get straight to the point and ease your worries!

– Online Sales –

・GOOD SMILE ONLINE SHOP

The exact dates and details of orders are still being confirmed, but they will all be announced shortly! Don’t miss out on this chance to get your very own Nendoroid Yukarin!!

 
Anyway, that’s all for today!
I hope to see you all again tomorrow!! (・∀・)ノ゛
 
 
© Yukari Cafe

Nendoroid More: After Parts 01 & 02

So many Alices looking out at the Skytree!! (*゚∀゚)

001
She isn’t using magic to float in the air here, this is actually a test of the Nendoroid More: Suction Stands 1.5!

The 1.5 Nendoroid More stands were announced on the GSC site the other day, and here you can see they are being tested to ensure they can stick reliably without ever falling down and injuring your precious Nendoroids! The 1.5 versions not only feature new colors, but also a slightly larger suction cup which is designed to stick even better than before!

But the Nendoroid More series is going to be much more than just display tools! These new parts are coming soon which will make playing with Nendoroids a whole lot more fun to play with!
002
Nendoroid More: After Parts 01!

003
Nendoroid More: After Parts 02!

The Nendoroid More series is expanding with a new addition to the series called ‘After Parts’! The first set of parts includes cosplay parts to transform your favorite Nendoroid into either a devil or an angel, three different musical notes, a sun, moon and two star parts!

The second set of parts includes parts to dress up your favorite Nendoroid in a cat or bunny costume, two cats and three butterflies! A special 60mm x 120mm stand is also included with both sets, allowing you more than enough space to display your favorite Nendoroid in a cuter way than ever before!

This time Nendoroid More brings us two complete sets of extra parts to display with your Nendoroids!

Not to mention that included with the parts are ‘cosplay’ parts that let you take any one of your Nendoroids and dress them up in a lovely new outfit!! You can have your favorite character dress up as an angel, devil, cat or bunny girl!
004
Nendoroid Alice Kuonji!

Alice has just recently been shipped out from GSC on the 13th June, so she should be available in stores now! Today she’ll be our model for the After Parts!
005
From Set #1: Angel wings, a halo and a moon!
Alice has become a true angel!!

Well, what do you think? Doesn’t she make a lovely angel?! Σ(゚Д゚;)

Alice-san is without a doubt a character that I consider to be my very own little angel, so this looks lovely to me! But you can attach these parts to any Nendoroid you like – any character can become your own little angel to sit by your side and watch over you!
006
This is how she looks from the back!

The angel wings attach onto the arm of the display stand – the same goes for the devil wings, but there is one important thing to note here!
011
Arm-type stands that do not separate at the connection point are not compatible!

Alice did not actually come with one of these stands, but I borrowed one from another Nendoroid as I wanted to turn her into my little angel no matter what!

The compatible kind of stand is included with Miku 2.0, Sakura Miku and a number of other Nendoroids – take a look through your collection to ensure you have one!

The angel’s halo attaches using a transparent plastic panel that is placed between the hair parts, like an invisible Alice band!

The same goes for the horns and ears that I’ll be showing a little bit later, and of course that invisible Alice band part is included in the set!
007
The devil Alice-san is also adorable!

I’m sure we have had something similar to angel wings included with Nendoroids in the past, but I’m sure this is the first time we’ve had more sinister looking parts like these! It’s so much fun to see the how different the characters look when you change them into angels or devils!

As for the devil’s fork Alice-san is holding – any character that has hand parts for holding swords or other weapons will be able to hold it easily – Alice didn’t come with any such hand parts, so I got some double sided tape and connected it on that way… I wanted to turn her into my little devil no matter what!
008
From Set #2: White bunny cosplay!

The second set comes with both bunny and cat cosplay outfits for you to enjoy! Not to mention that both black and white version are included giving you so much variety! Note that the bunny tail needs to be connected with something like double-sided tape!
009
From Set #2: Black cat cosplay & two cats!

I somehow get the feeling that absolutely any TYPE-MOON characters will look good with the black cat parts! (`・ω・´)

The ears connect with the invisible Alice band I spoke about earlier, while the hand parts simply swap out like any other hand parts! The long tail also comes with a transparent part that attaches into the skirt, but unfortunately it wasn’t compatible with Alice-san, so I went for the double-sided tape method!

Plus there are two cute kitties included with set #2!! (=゚ω゚=)

They have such innocent looking expressions!!
010
From Set #2: White cat cosplay and three butterflies!

When you want to display your Nendoroid with a bit of an outdoorsy feel, I strongly recommend these parts! Plus if you use the really long rods included with set #1, you can place the butterflies at varying different heights!

Alice-san looks like she’s trying to catch the butterflies… little does she know that I am about to catch her!! (*゜∀゜)=3

002
Nendoroid More: After Parts 01!

003
Nendoroid More: After Parts 02!

 
They’ll be up for preorder soon!!
Get in contact with our partner shops if you have any preorder or sales queries!

 
But that’s all for today!
I hope to see you all again next week!! (・∀・)ノ゛

Placing Stickers on Blank Nendoroid Expressions!

Once again an interesting mail has arrived!

Hello Mikatan! I look forward to your blog all the time!The other day I bought a Nendoroid. It was a load of fun to swap all the cute parts around and I was very satisfied with my purchase, but there was one thing I’ve been a little stuck with. The Nendoroid came with a blank face and stickers to make a new expression, but I’m too afraid that I’ll mess it up when sticking the expression on! Is there some special way to make sure the stickers are in the right place and look cute?

That’s a very good question!! Σ(゚Д゚ )

I’m not sure if it’s a boy or a girl who sent the question through this time, but I’ll certainly try and help out either way!

Today’s blog will be a little article on how to stick expression stickers onto a blank Nendoroid face! I was actually wondering myself of there were any tricks to putting these stickers on! (`・ω・´)
%e3%82%b1%e3%83%93%e7%94%a8
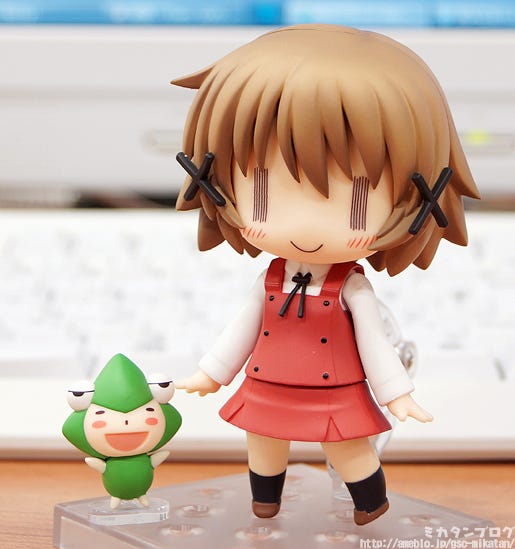
Today’s Nendoroid guest is Nendoroid Yunocchi!

Ume Aoki’s characters are amazing! They make for such cute Nendoroids! I have this huge urge to just play with Yunocchi now… but I can’t! This is work time! 😛

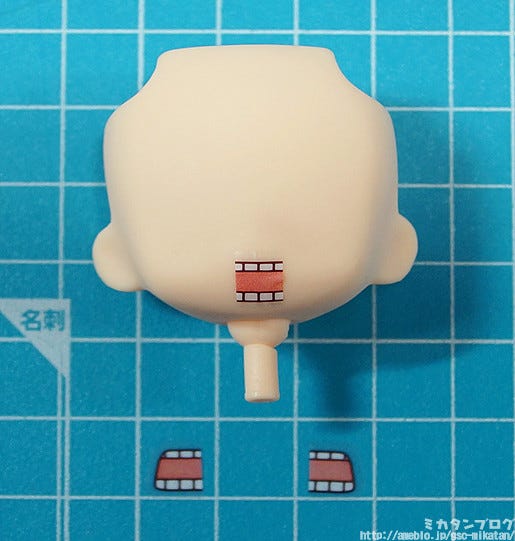
This was one of the Nendoroids that came with a blank face as well as this lovely set of expression stickers inside the box!
%e3%82%b1%e3%83%93%e7%94%a8
First you need to determine the position!

Unlike when you’re drawing an expression for yourself, the size of the eyes and mouth are already figured out and printed for you – but this also means that there is a single ideal place for each sticker!

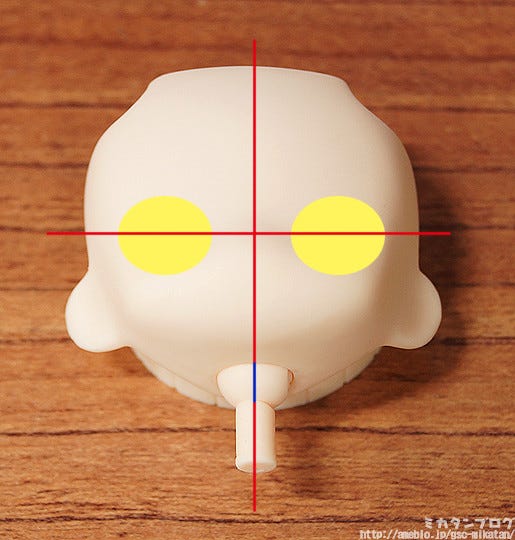
First determine where the horizontal center line is!

The very top of the nose is generally the overall center, but there are some easy tips to find the exact center part! If you twist the Nendoroid neck joint around till you see the parting line (the blue line above), that parting line will show you the vertical center!

Next, try to determine the vertical center line!

There is no easy way to determine the horizontal center like there is with the vertical, but Nendoroids (just like real people), have a little depression on their faces where the eyes should be. The idea is to stick the eyes on so they match up with these depressions. I’m going a little off the point here, but without these depressions on the face, the quality would seem much lower!

You need to picture these lines within your head while sticking the expression on in order to try get symmetry and good positioning. I really think this picturing the lines in your mind can help out a lot!
%e3%82%b1%e3%83%93%e7%94%a8
I want to start sticking on the expression… but first let’s ask Tori Bird about the more technical aspects of placing stickers!

Mikatan: “I want to stick some expressions on Yunocchi, got any advice?!”
Tori Bird: “As long as you decide on the position it’s really quite easy…”

Ehhh!! Don’t say that! I still have a blog to write!!

We need your advice as a experienced expert of the figure community! There must be some secrets! (`・ω・´)
005
How to place large stickers on a curved surface!

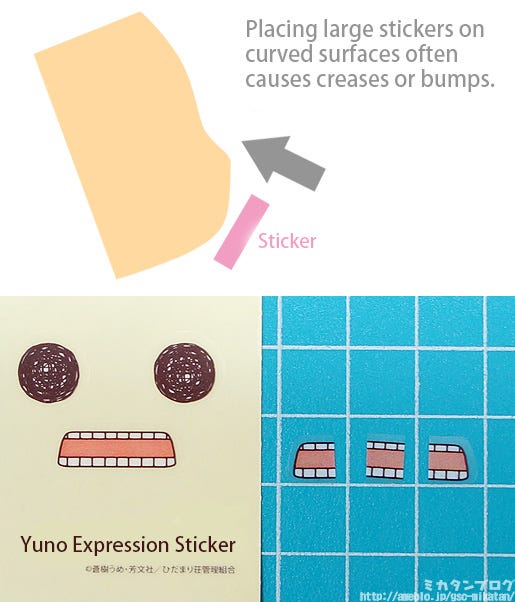
There’s no problem with smaller stickers, but big stickers tend to leave creases or bumps when stuck onto curved surfaces… I’m told this is a fairly high-level technique, but let’s take a look!

In Yunochi’s case, we’re going to cut the mouth into three parts!

The reason the stickers are on a cutting board here is just to make them easier to see in the photos, when you actually try this, you can stick them onto the face as you cut them apart.
%e3%82%b1%e3%83%93%e7%94%a8
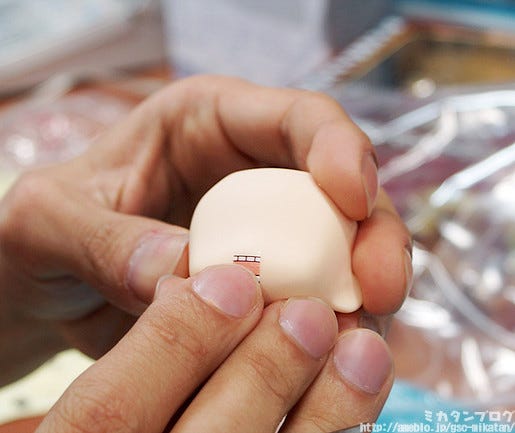
It’s best to stick the middle piece first!

If you start from the edges then it’s much harder to work out the overall positioning. The photo above has the sticker just lightly placed on the face part in order to get the positioning right.

Somehow this shot reminds me of Plastic Nee-san… 😛
%e3%82%b1%e3%83%93%e7%94%a8
Use your finger to stick it firmly in place!

I asked Tori Bird if it was alright to use a cotton swab or something and he said there’s no problem, but you need to be careful not to get any of the cotton stuck on the stickers. Of course! Σ(゜Д゜;)

If the sticker still seems bumpy or wrinkled, then you can try correct it by making a small but with a craft knife and pushing down again on the sticker again. Just be very careful not to damage any other parts of the figure!
%e3%82%b1%e3%83%93%e7%94%a8
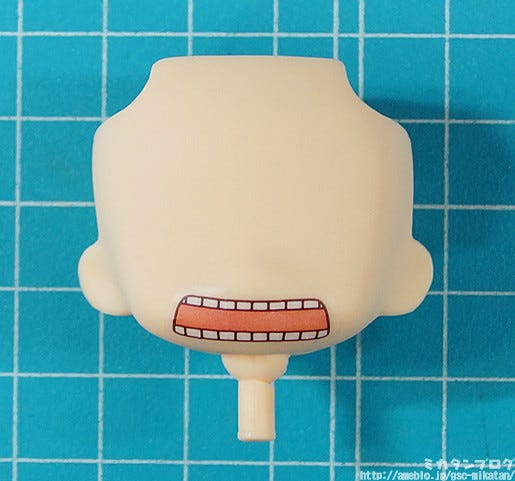
Stick the left and right parts on… and you’re done!

This is a rather complex method, isn’t it? ^^;

You also need to be careful to not leave any skin space between the stickers, while still also making sure they don’t overlap. But if you manage to get it done neatly it looks really nice!
%e3%82%b1%e3%83%93%e7%94%a8
Let me try put the eyes on now!

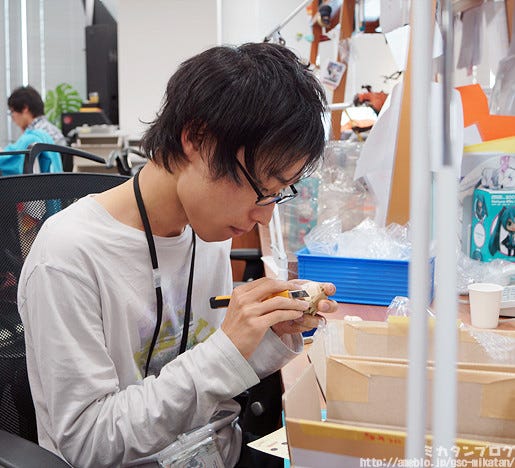
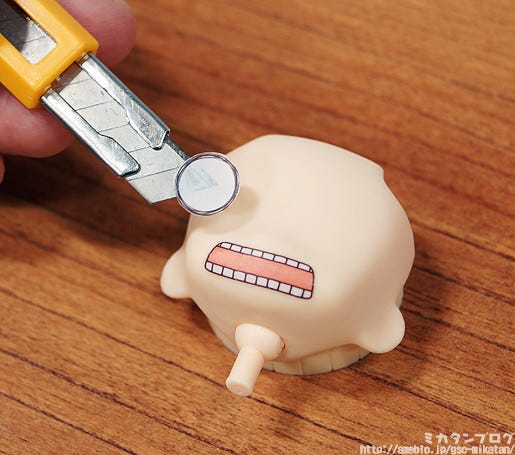
Bird was kind enough to do the mouth for me, but I’ll do the eyes myself! I’m always worried I’ll leave fingerprints if I put the sticker on with my hand, so I decided to position the eye with a craft knife.

If you’re right-handed, start with the right eye first!

The most difficult thing about the eyes is getting them symmetrical! By starting with the right eye, the left eye will be a guide for you, making it easier to align!
%e3%82%b1%e3%83%93%e7%94%a8
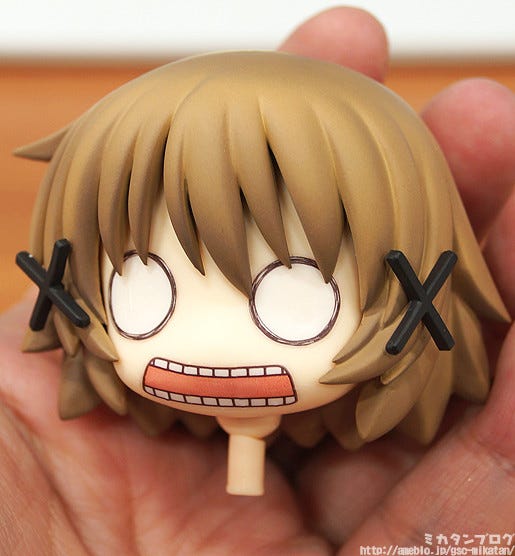
Be sure to check how it looks with the hair attached!

Before you stick the eye on completely, be sure to check how it looks with the hair attached. When sculptors are working on the expressions, they constantly have to check things like this!

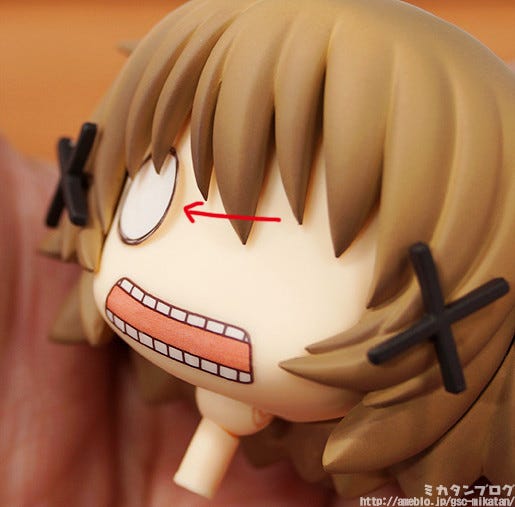
You can see from where the arrow is pointing that the sticker isn’t stuck on properly just yet. This is just for me to check! Now that I’ve seen it looks alright, I’ll stick it down properly.
%e3%82%b1%e3%83%93%e7%94%a8
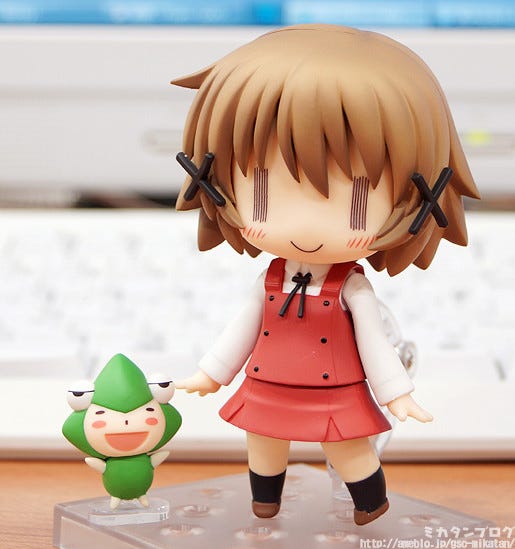
Complete ━━(゚∀゚)━━!!!!!

There we go! I think it came out looking rather nice! The curve on the expression for these eyes wasn’t bad at all, which is why I simply stuck them on as they were – there was no need to cut them.
%e3%82%b1%e3%83%93%e7%94%a8
But if you want even more quality…

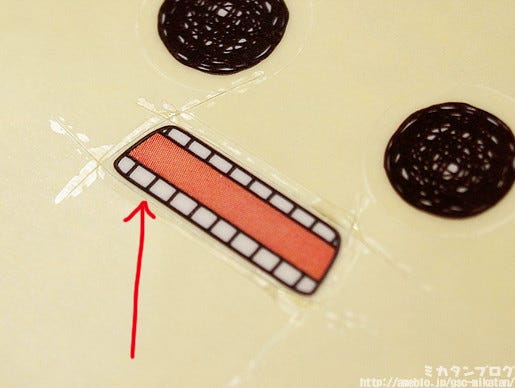
If you cut off the extra, transparent area of the stickers before you stick them down, it’ll look even better! In Yunocchi’s case the stickers are very thin so I recommend a very fine craft knife if you want to try!

for those who are interested, the reason the stickers are so thin is so that once they’re stuck down they don’t protrude outward which would look a little strange. If they were any thicker it would be obvious that they were stickers.
%e3%82%b1%e3%83%93%e7%94%a8
I tried with another expression!

What do you think? I think she’s come out looking adorable! (That might just be because I stuck the expression on myself through :P)

As a final piece of advice, place stickers lower rather than higher!

Just like when I was painting my Nendoroid expression, when you first start sticking expressions on they tend to end up too high for some reason. Both Oda-P and Bird have told me this now and I still can’t figure out what it happens, but it does!

I know many people are too afraid they’ll mess up and tend to not try these things too often (I’m one of those people…), but I also think that doing things like this with your own two hands is one of the things that makes the hobby industry so fun! There are three of the same expressions included on each sheet with Nendoroids, so just keep trying and you’ll get it looking perfect!

It’s certainly easier to put stickers on than it is to paint the expression, but even just by placing the stickers, it still feels like you’ve put it all together yourself which is a lovely feeling! I really recommend everyone gives it a try!
But that’s all for today!
I hope to see you all again tomorrow!! (・∀・)ノ゛
© 蒼樹うめ・芳文社/ひだまり荘管理組合

Nendoroid Stands of the Past & Nendoroid Stand Tutorial!

The other day I received this email…

Hello, my name is Riru! I’m a big fan of your blog!

Ever since he was first announced I had been really looking forward to Nendoroid Kirito, so when he finally released I picked up two of him! However, this was the first time I’ve bought a Nendoroid, or a figure for that matter, and I wasn’t really sure how to set up the stand correctly. It made me think it might be nice to have an article that explains the basics of figures – things like setting up the stand and switching expression parts!

I managed to figure out the expression parts while worrying I was going to break something the whole time… but I’m still very confused about the stands. (I can’t seem to connect the parts together, and Kirito just won’t stand up nicely…)

Help me, Mikatan!!

There is no way I can ignore a request from a fellow girl!!

So today I’ll be writing a special article on Nendoroid stands! I hope it’ll be of use to Riru-san as well as any other newcomers to the figure world!!
001
But before we move onto today’s main topic…

I thought I’d start off with a short look into the history of Nendoroid stands and how they’ve evolved! In order to do so, we’ve come to the GSC stock room!

The box here is exactly what I’m looking for – the text reads ‘Round Nendoroid Stands’! I’ll be finding some older stands in here to show to everyone!
002
The first generation Nendoroid stands!

This stand really brings back memories for me! This is how Nendoroids used to stand!! For those who are interested, this stand belongs to Nendoroid #5 – Nendoroid Runaway Rin! These stands were just a circle with a U-shaped connection that held the Nendoroid up at the hips. I must also add that back with this stand, Nendoroids would fall over all the time! 😛

There was a slightly upgraded version of this stand which was articulated – it was used for Nendoroids #40-#50. The original Nendoroid Rin and Len made use of it!
003
The second generation stand!

This stand went by the nickname ‘The Chair Stand’ or ‘The Sitting Stand’! It was used by ‘seating’ the Nendoroid’s bottom onto the stand to hold them up. The stand you see here comes from Nendoroid #25, Nendoroid Kotona Elegance!

This was a lovely improvement from the U-stand, which let you pose Nendoroids with their lower half firmly in place and their feet just floating a little bit in the air. I remember being really excited when I first used this kind of stand!
004
The third generation stand!!

This was simply an improved version of the second stand! The connection to the circular stand was changed into a Nendoroid joint for more posing control! This stand was used from Nendoroid #63, Nendoroid Kureha!

There was a need to increase the angle of posing in order to pose Kureha with being pulled out from her, and thus this stand was created! It was actually around for quite awhile afterwards as well!
005
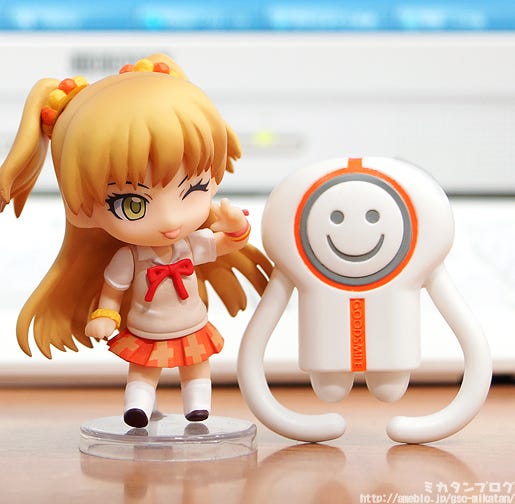
Moving on to Riru’s requested Kirito stand!

Kirito really is handsome isn’t he… even lying in the blister pack his expression is amazing! Nendoroid stands are generally found in the little opening at the very bottom of the blister pack. The stand is normally in a little packet – so let’s open it up and take a closer look!
009
The forth generation Nendoroid stand!

Also known as the ‘Square Stand’ or ‘Arm Stand’! A very different stand to the previous versions, as it has a square base instead of a circle and also has an articulated arm for various poses!

This stand started to be used from Nendoroid #120, Nendoroid Neko Arc: Ultimate Version! Initially it was made for the fully-posable edition series of Nendoroids, but then everyone realized that the stability and posability it offered was nice for any Nendoroid, and so it simply became standard!

The first thing to do is connect the side with the grey arrow!
008
Like this!

There are a number of holes on the stand – you can connect it to whichever one you want, except for the ones circled in yellow!

The circled ones are 4mm in size, the others are all 3mm in size. In case you’re wondering, the 4mm holes are used for Nendoroid Petites – which means you can display a standard Nendoroid with Nendoroid Petites on the same stand!

The red arrows show the articulated points!

These points basically separate the arm into a top, center and bottom part which can easy be moved around to create different positions! You can alter the height, alignment and angle the Nendoroid is facing – you can even display them jumping through the air!
006
The other side of the arm connects into the Nendoroid!

The connector is the part with the white arrow. You can see that the arm and the hole on the Nendoroid both have a hexagonal shape. The reason for the shape is that it allows for a nice fit, and makes it harder for the connection to accidentally come loose.

Occasionally, the hole may feel too stiff and just won’t connect to the Nendoroid nicely – this is normally when the temperature is low as the PVC plastic the Nendoroid is made from contracts in the cold. Try warming it up with a hairdryer or heater and then connecting it again!
007
Kirito: Complete!!

Now you just need to play around with the arm and get him into the position you want! By altering (1) you can change the angle and with (2) and (3) you can change the height he is standing at. You might find it easier to attach his optional sword onto his back after getting his position right on the stand.

If the arms feel loose and don’t seem to stay in place, grab a screwdriver and tighten the screws on the side – it fixed up the problem nice and quick! If the connection itself seems loose, try making the tip of the connector a little bit thicker with some glue in order to make it hold in place better. There is more information on how to do this in the link below.

DIY Figure Repairs Part 2: Reinforcing Joints
http://mikatan.goodsmile.info/en/2011/03/28/diy-figure-repairs-part-2-reinforcing-joints/
010
That brings my Nendoroid stand blog to an end!

I hope this was of some help to you, Riru-san! It was a rather crude explanation, but I hope you were able to get something out of it!

If anyone else has any queries, you’re welcome to send a mail through! (If you’re in a rush for an answer, it’d be best to send it through to the support team though!)

 
Anyway, that’s all for today!
I hope to see you all again tomorrow!! (・∀・)ノ゛
 
 
© 川原 礫/アスキー・メディアワークス/SAO Project

Nendoroid Yoshika Miyafuji: Shinden Ver.

Hmm… is that the prototype I think it is…?

001
Uchitarou-san from Phat! Company!!

Uchitarou-san recently moved seats and is now sitting much closer to me!! I’ve been waiting for this prototype to come back into the offices for ages so I could play around with her! 。・゜・(ノД`)・゜・。

But I know that many of the Strike Witches fans out there have been waiting even longer! Today I’ll be taking a look at this much awaited Nendoroid…!
002
From Strike Witches 2:
Nendoroid Yoshika Miyafuji: Shinden Ver.!

From ‘Strike Witches 2’ comes a new Nendoroid of the highly requested Yoshika Miyafuji, using the new Nendoroid specifications from #300! She is the same cute Yoshika as before, but the overall Nendoroid design and coloring of her guns have been reworked.

Her Striker Unit is the new ‘Shinden’ unit that featured in the later episodes of the series as well as in the movie and Sakamoto’s Zero-Type 22 Combat Aircraft unit. The propellers can be swapped out with the previous version for even more play value, and of course her dog ears and tail are included as before!

An improved rerelease of Miyafuji!

Loads of fans have been asking for a rerelease of Nendoroids like Zetsubou-sensei and Miyafuji – so many in fact that it was worth releasing slightly updated versions so fans can enjoy the upgraded quality of newer Nendoroids!

The overall sculpting is the same as the previous version, but there have been a few adjustments to the coloring as well as some additional optional parts to play with! The quality and volume have both increased! (`・ω・´)
003
This is how she looks from the back!

This version makes use of a slightly darker color on the blue areas on her outfit, increasing the overall contrast a little. The stronger contrast suits the chibi Nendoroid design really well!

Additionally, the stand has been changed into the arm-type Nendoroid stand, meaning that flying poses will be much easier than before! The horizontal flight adapter part will also be included as before, so you don’t miss out on anything from the original version! Σ(゜∀゜ )
004
The Zero-Type 22 Combat Aircraft Strike Unit!

This is Miyafuji using Sakamoto’s Strike Unit as she did in the series! The propellers can even spin around! Having this part might even convince people who got the original version to pick up this one up too! ヽ(゚∀゚)ノ

As before, the dog ears and tail are included too!

There are alternate front hair parts included for use with the dog ears, and the tail is a little bit brighter compared to the previous version. Phat! Company really puts so much detail into the tail! It’s lovely!! (*´∀`*)
005
Her new ‘Shinden’ striker unit!

Not only does she come with the Sakamoto strike unit, but also the new ‘Shinden’ unit from Strike Witches 2!

Each side has six propeller blades making for a lovely addition!
006
An angry expression, gun and effect parts!

An extra new part included with this version is effect parts to display the propellers spinning around! The photo above is the 6-blade Shinden unit, but there is one with three blades included for the other unit!
007
Here are some of the new or altered parts!

The gun has more of a metal color to give it a more realistic appearance. Another change is of course that Miyafuji’s head joints have been changed into the new Nendoroid format! If you missed out on getting her the first time, don’t miss this chance! (`・ω・´)
008
Saluting with bent right arm parts!

Making use of the special bent arm and hand parts you can recreate this adorable pose! Her hat is also completely removable!

Another thing that I love about the Nendoroid is that she comes with open and clenched versions of both her left and right hands. Just changing the hand type can sometimes make a very different pose!
002
From Strike Witches 2:
Nendoroid Yoshika Miyafuji: Shinden Ver.!

 
She’s already up and ready for preorders!!
Get in contact with our partner shops if you have any preorder or sales queries!

 
Anyway, that’s all for today!
I hope to see you all again tomorrow!! (・∀・)ノ゛


© 2010 第501統合戦闘航空団

Nendoroid Faris Nyannyan

Bwahahahaha!!!

001
Shuu-chan has transformed into Kyouma Hououin!

There can only be one reason for this! The prototype of one of the figures he was in charge of must have been completed! A figure that was announced nearly two years ago during the live broadcast at Tokyo Tower!

Everything is decided by Steins;Gate, and mankind have no way to oppose it so we simply had to wait this long, but the much-awaited Nendoroid is finally here! El psy congroo!
002
From ‘Steins;Gate’:
Nendoroid Faris Nyannyan!

The ‘hypothetical science adventure’ game Steins;Gate has just recently had a sequel and movie version released, and from that series comes a Nendoroid of lab member number 007 – Faris Nyannyan!

Alternate parts are included allowing you to pose her in her trademark ‘Nyannyan’ pose! The adorable Faris is hoping you’ll play with her as much as possible! ♪

“Faris-tan is so cute!!” (To be read in Tomokazu Seki’s voice)

She’s wearing the super cute uniform from the maid cafe, ‘May Queen Nyan-nyan 2’!! Even in Nendoroid size, all the little details of huke’s original illustration are faithfully kept! Just look at the belt around her waist or the zig-zag red lines on the edges of her sleeves!

It’s a perfect Nendoroid rendition of the original design! ヽ(゜∀゜)ノ
003
This is how she looks from the back!

One of Faris’ most important features is definitely her twirly twin-tails, and the sculptwork on them is magnificent! Each of the indents and twirls are sculpted in such a way that the shadows fall in just the right places creating such a lovely twirl effect! Of course her cat ears are also attached!
004
Moving onto the optional parts…
A winking face and silver tray!

I’m sure many of you who have played the game will recognise this expression very quickly! It was often seen when Faris spoke with you in the game!

Faris is known to be a zealous worker at the maid café, so a silver tray is included to display her hard at work as a Nendoroid! A special left arm to hold the tray is also included to create the lovely pose above!
005
“The world is in trouble” omelette rice!

The famous dish that arrived when Daru and Okarin visited the maid café!! It’s such a tiny optional part, but you can still make out the writing perfectly!!

This pose makes use of the bent right arm part to display Faris dropping off the dish at someone’s table! “Enjoy your meal before the world ends ♪”
007
“Rai-Net Access Battlers”!

If you’ve played the game or watched the anime you’ll know just how good Faris is at this game!! (`・ω・´)

The tiny Nendoroid-sized cards come in both a stack to hold in her left hand and a single card to hold out and play in her right hand! It’s hard to decide whether to display her at work as a maid or instead enjoying a game of Rai-Net Access Battlers!! I want to display both!
006
A smug expression with hands on her hips!

This particular pose is a scene from the ‘Rai-Net Access Battlers’ tournament! She looks so chuffed and cute in this pose!

Both left and right bent arms are included, and her puff-sleeves come in both a normal version and an open version – the ones in this photo are the open version!
008
“Welcome home, master! ♪”

The adorable pose when Faris and Mayushii welcome Okarin to the maid café!!
I want to go to May Queen Nyan-nyan 2 myself and be greeted like this!!!

Just a quick swap of her arm parts and she is instantly in her famous ‘Nyannyan’ pose! Just swapping around shoulders and arms can create so many different poses! Challenge yourself to find the cutest possible Faris-chan! ^^
010
And to celebrate Faris-tan’s announcement…
Nendoroid Kurisu Makise is being rereleased!

Those who missed out on her the first time, or those who have only recently become fans of the series, don’t miss out on your change to grab Christina this time! Her embarrassed expression is really something else! You can’t help but shout out about how cute it is!!

Shuu-chan actually has a replica of Okarin’s cellphone! It was one of the items included in the ‘Senkei Kousoku no Phenogram’ limited edition box and it’s really well made! Areas such as the camera look just like the real thing, and the battery can even be removed!! I was super impressed!!
009
Bonus!! (*゚∀゚)=3

Christiiiina in a maid outfit!!

Using Faris’ body you can recreate the scene from ‘Darling of Loving Vows’ where Christina wears a maid outfit!

I know you may be thinking that the two girls have far too different bodies to swap them like this… but according to Shuu-chan their busts are only 1cm difference in size! 😛
002
From ‘Steins;Gate’:
Nendoroid Faris Nyannyan!
Nendoroid Kurisu Makise (Rerelease)

 
They’ll both be up for preorder from tomorrow!!
Get in contact with our partner shops if you have any preorder or sales queries!

 
Anyway, that’s all for today!
I hope to see you all again tomorrow!! (・∀・)ノ゛


© 2009-2010 5pb. Inc./Nitroplus

Nendoroid Hayate Yagami: Unison Edition

So many products get announced at the end of the month!! Σ(゚Д゚;)
001
But what exactly does that mean…? (・ω・)

If you’re not sure, then take a look at the ‘Release’ section of the ‘Jargon in the Figure Industry: Part 1’ post!

To put it simply, it refers to products that are being put up on the GSC website, which are ready to be preordered! For some reason, GSC seems to stack these up at the end of the month… (`・ω・´)

Jargon in the Figure Industry: Part 1
http://mikatan.goodsmile.info/en/2013/05/01/jargon-in-the-figure-industry/

Jargon in the Figure Industry: Part 2
http://mikatan.goodsmile.info/en/2013/05/08/jargon-in-the-figure-industry2/

But anyway! Today we’ll be taking a look at the prototype in the photo above!
002
From ‘Magical Girl Lyrical Nanoha The MOVIE 2nd A’s’:
Nendoroid Hayate Yagami: Unison Edition!

From ‘Lyrical Nanoha The MOVIE 2nd A’s’ comes a Nendoroid of Hayate Yagami, the keeper of the Tome of the Night Sky. She also comes with intelligent device ‘Schwertkreuz’ as well as two different variations of the Tome of the Night Sky. Her stand is made to look like one of the magical circles from the series!

I know many fans have sent me mail asking about a Hayate Nendoroid… apologies for the long wait!! 。・゚・(ノД`)・゚・。

This is actually the first Nendoroid Hayate-chan!! Nanoha and Fate have been made into Nendoroids by Good Smile Company a number of times… and now finally Hayate is here to join them!! Yay!! ヽ(゚∀゚)ノ
003
This is how she looks from the back!

The six wings on her back are made from semi-transparent parts just like the other Nendoroids in the series! Plus they each have their own ball joint, allowing you to display each wing at the perfect angle!

The gold on her hips and shoulders makes use of a lovely metallic paint, giving her a really gorgeous appearance! Even when looking at her from the back, the amount of detail and quality is fantastic!! (((゜Д゜)))
004
She’s a part of the fully articulated ‘Edition Series’!

The Nanoha series is well known for it’s flashy combat scenes, and the full articulation of the Edition Series will give fans a way to recreate those scenes! Along with all the standard Nendoroid joints, she also comes with joints in her elbows, shoulders and more!

The best thing for me personally is that the hip area is also a lot more posable, which makes it much easier for me create poses! Even if you’re not that good with poses, if you just twist the hip area a little it can create a wonderfully dynamic looking effect!!
005
She comes with a shouting expression!

Another part to match up with the previously released Nendoroid Nanoha and Fate! Combat scenes really need a serious expression like this to really get the feeling across!! (`・ω・´)

Plus her human-form unison device ‘Reinforce’ is also included!!

A special stand just for Reinforce is also included to have her floating by Hayate’s side! (Although there is a possibility that the stand may change on the final product version). Reinforce’s head is not even 1cm in height, but still has incredible quality!!
006
A chanting expression and the Tome of the Night Sky!

As you may have already noticed, the Tome of the Night Sky is included in both an open and closed form! In it’s closed form, you can display it floating by Hayate’s side, just like Reinforce.

Her intelligent device ‘Schwertkreuz’ is included and can be held in one hand or two! Her hat can also be removed for a quick change!

Hayate actually looks really cute without the hat!!

But it’s not just the cute factor, but also that she has so much versatility! If you’re a Nanoha fan don’t miss out on adding her to your collection!
007
All three displayed together!

Putting all the characters from a series together always looks so great!! (*´∀`*)

This time around even the Nendoroid bases match up nicely as they all have the magical circle design! Now I just hope we can see Vita-chan and Shamal-san join them as well…!
002
From ‘Magical Girl Lyrical Nanoha The MOVIE 2nd A’s’:
Nendoroid Hayate Yagami: Unison Edition!

 
She’ll be up for preorder tomorrow!!
Get in contact with our partner shops if you have any preorder or sales queries!

 
Anyway, that’s all for today!
I hope to see you all again tomorrow!! (・∀・)ノ゛


* Photos represent a product still in development.
(C) NANOHA The MOVIE 2nd A’s PROJECT

Nendoroid Ricca Morizono

♪ Sakura Happy Innovation~♪ (゚ω゚)

001
The D.C.III ~Da Capo III~ Stage at February’s WonFes!!

This picture is taken the day before the performance, at the rehearsal! (=゚ω゚)ノ

On the actual day of the event, the voice actors of all the main cast were up on stage singing the opening theme! There was so much excitement over what a wonderful song it was! Even after WonFes, the song remained popular for some time here in the GSC offices! 😛

It’s already been three months since then… but it’s finally time for this lovely Nendoroid to be officially announced! (`・ω・´)
002
From D.C.III ~Da Capo III~:
Nendoroid Ricca Morizono!

From the anime series “D.C.III ~Da Capo III~” comes a Nendoroid of the ‘official’ newspaper club’s president, the smart and beautiful magician – Ricca Morizono! The cape and stick seen in the series are both included as optional parts. Recreate your favorite scenes from both the Hatsunejima and Kazamidori arcs from the series!

It’s Ricca-senpai! The school idol!

Da Capo III is based around the official Kazami Academy newspaper club, and the relationships between the main character and all the lovely girls around him, which I suppose means that it falls under the ‘harem’ genre of anime.

Personally I like Ricca-senpai and Himeno best! Ricca-senpai looks absolutely lovely, and also a bit of a mature charm to her! (*´∀`*)
003
This is how she looks from the back!

The huge ribbon tied on her left twin-tail, as well as her refreshing blue and white uniform both look so cute in Nendoroid size! I think she looks cuter than ever!

Whenever it comes to Circus’ character designs, I always notice they have such intricate ribbons which have a big opening for the hair to come though – even on the Nendoroid this lovely design has been faithfully sculpted!

004
‘Ricca Greenwood’ from the Kazamidori arc!

In the parallel world (if that’s the best way to put it…?) of the Kazamidori arc, Ricca has a different uniform which is also included with the Nendoroid! The head and lower body parts are all the same, but she comes with a completely alternate body part to switch uniforms!

The uniform above from the Hatsunejima arc is lovely, but this Kazamidori uniform is also super cute! I can’t decide which I prefer!
005
A winking face to recreate the DVD cover illustration!

This pose is based on the illustration seen on the cover of the 1st volume of the ‘D.C.III ~Da Capo III~’ DVD/Blu-ray! She comes with the expression, left and right bent arms as well as a pointing hand and a hand to place on her hips to completely recreate the pose!

It’s an energetic pose with a bit of a mature air, which suits her character perfectly!! (・∀・)
006
You can create a matching pose in the Kazamidori uniform!

The Hatsunejima uniform has her with her right hand pointing up, while the Kazamidori uniform has her left hand pointing instead! If you buy two of the Nendoroid you can display the two of them together in a mirrored pose!

I could hardly believe that separate bent arms were included with both of the bodies! (((゜Д゜)))
007
‘Cattleya of Pride’!! Σ(゚∀゚ )

Using the included magician’s cape and pointing stick, you can recreate this magical appearance! When I first saw Ricca-senpai like I felt so happy inside!

She also comes with an upset expression! (=゚ω゚)ノ

Those twisted twin-tails are super cute! By the way, the twin-tails are not fitted with Nendoroid joints, but they can be moved forward and backward! (`・ω・´)
008
Trying the cape in the Kazamidori uniform!

You can also put the cape and stick on the Kazamidori uniform version! I’m not entirely sure if it’ll work the same way on the final product… although I’m fairly certain it shouldn’t be too hard. (But if it doesn’t work out, I’m sorry!!)

Whether or not it works, she still comes with two bodies, various bent arms and a number of accessories… a load of different parts to create poses with!! (`・ω・´)
002
From D.C.III ~Da Capo III~:
Nendoroid Ricca Morizono!

 
She’ll be up for preorder on the 30th May!!
Get in contact with our partner shops if you have any preorder or sales queries!

 
Anyway, that’s all for today!
I hope to see you all again tomorrow!! (・∀・)ノ゛


© 2013 CIRCUS/D.C.Ⅲ製作委員会