Hello everyone, my name is Arizono (@gsc_arizono), a member of GSC’s manufacturing team!
I’m sure there are many of you who have had the experience of your Nendoroid figures breaking at some point or another! Whether you were just playing around and it broke or perhaps you knocked it off the shelf while cleaning… there are many different reasons those precious members of your collection can break, and it’s always so difficult to remove the broken parts from the figure!
However! Today I’m going to be showing you how to remove those broken joints and replace one of the most common parts that break on Nendoroids…
DIY Nendoroid Repairs: Removing Broken Joints!
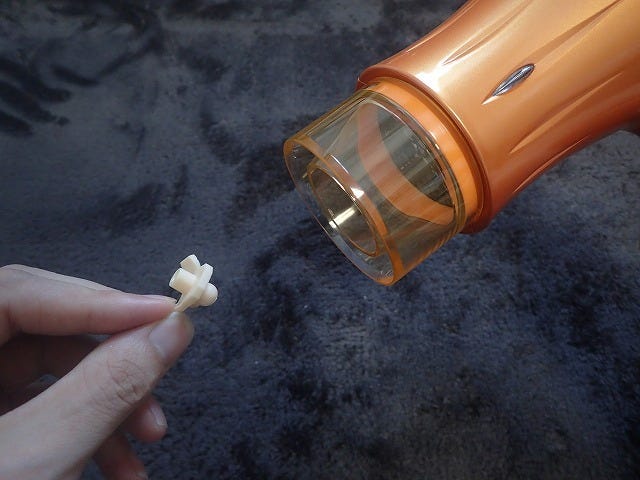
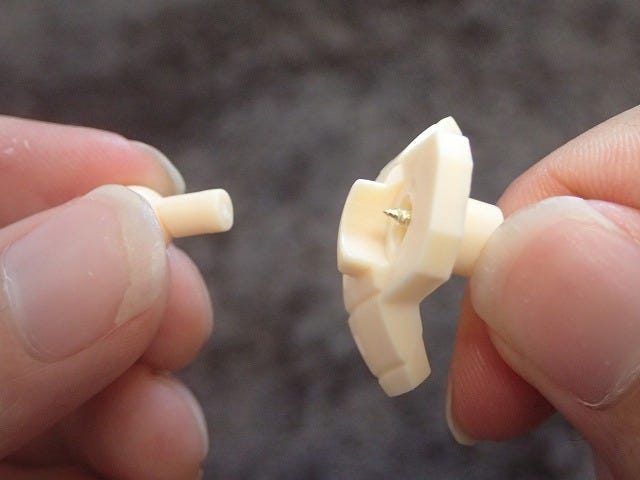
Today we are going to be removing this broken joint!
Please note that this blog is simply introducing a method to fix the joints! If you choose to try and repair a Nendoroid using this method you do so at your own risk!
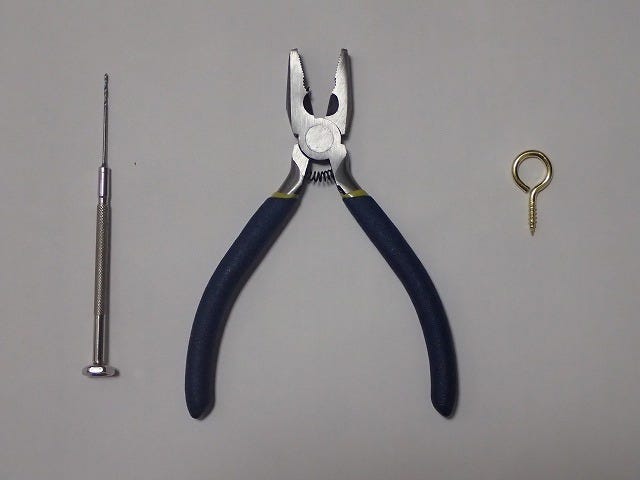
You will need the following four items to preform the extraction!
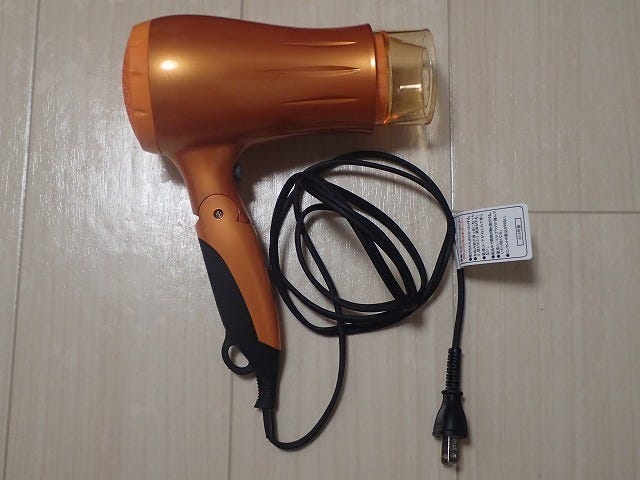
The second photo is a standard hair dryer!
Be careful not to injure yourself with the pin vise or eye bolt!
“What exactly is a pin vice?”
There might be some of you that may not be familiar with this particular tool. It’s also sometimes known as a miniature drill or twist drill and is a useful, fairly inexpensive tool for anyone who works with small scale miniatures and models! We will be using a 1mm pin vice for this particular removal!
“What about an… eye bolt?”
An eye bolt is a bolt with a loop at one end. They have a shape a bit like a question mark and are normally used to create a hold to suspend ropes or cables from!
“Where am I supposed to find these things? How much will they cost me?”
These items can be found in any hardware stores as well as cheaper stores such as ¥100 stores or $1 stores depending on the area you live in! They are normally very affordable tools and are handy to have around for all sorts of repairs! If you do a little bit of research you should be able to find a store selling them at a very fair price! In addition, if you can’t find the exact tools above, similar tools that you have around the house should also do the trick!
Anyway, with the tools out of the way, let’s get started with the actual removal!
First we need to remove the broken joint from the body!
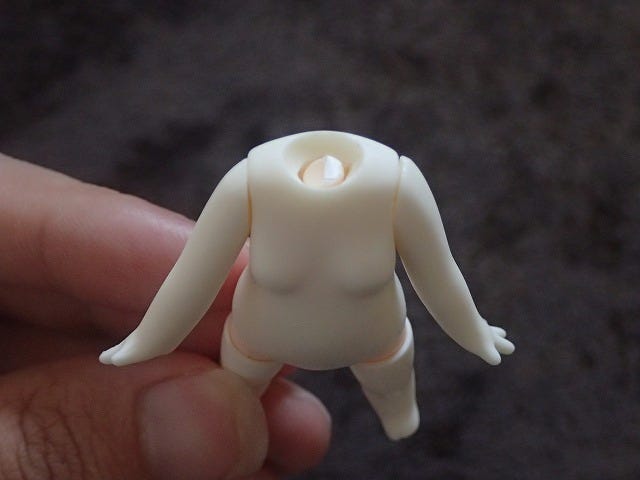
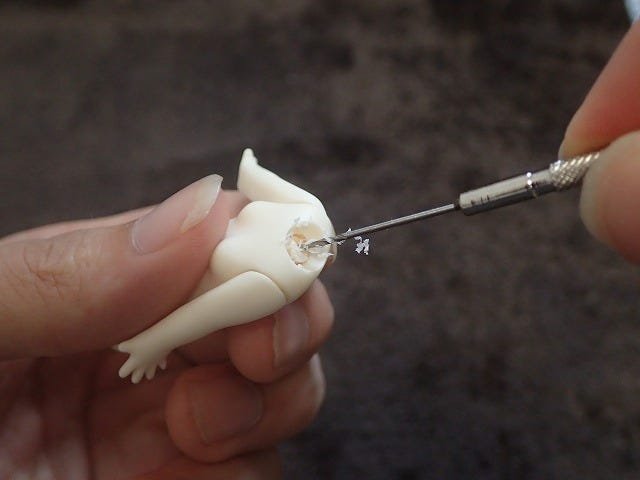
▲ A Nendoroid body with the joint stuck inside!
1) Open a small hole using the pin vice.
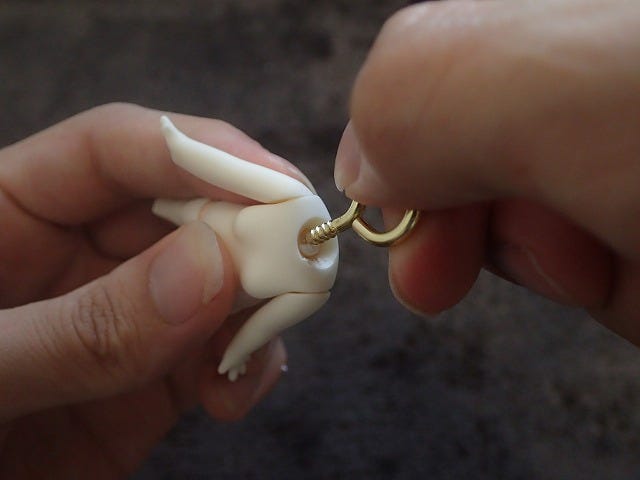
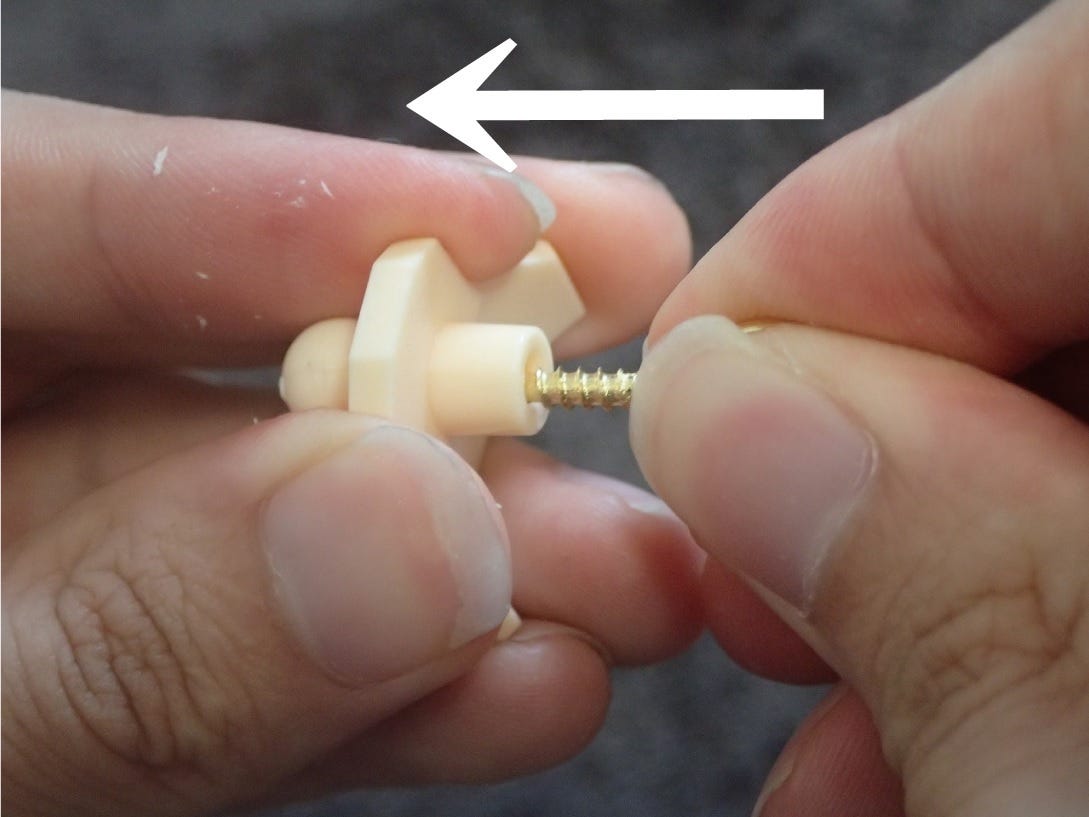
2) Screw the eye bolt into the hole you have made
Try to keep the bolt as straight as possible to avoid any unnecessary damage!
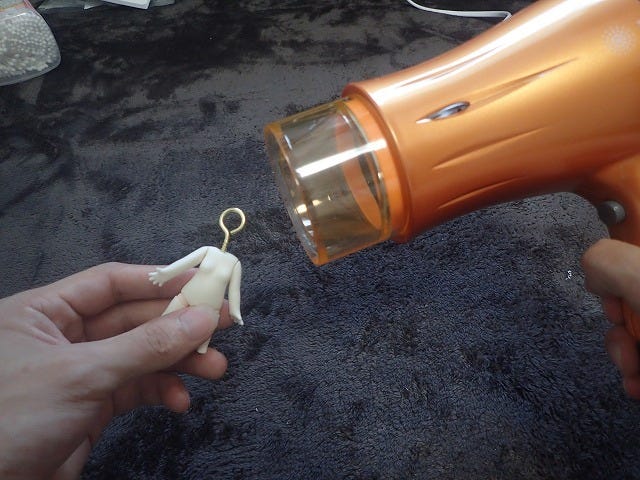
3) Warm up the eye bolt with the hair dryer.
Heating up PVC which is what most figures are made from makes the plastic much softer allowing you to safely and effectively remove the broken joint! Do be careful not to burn yourself with the hair dryer while doing this!
4) After about 20 seconds of heat,
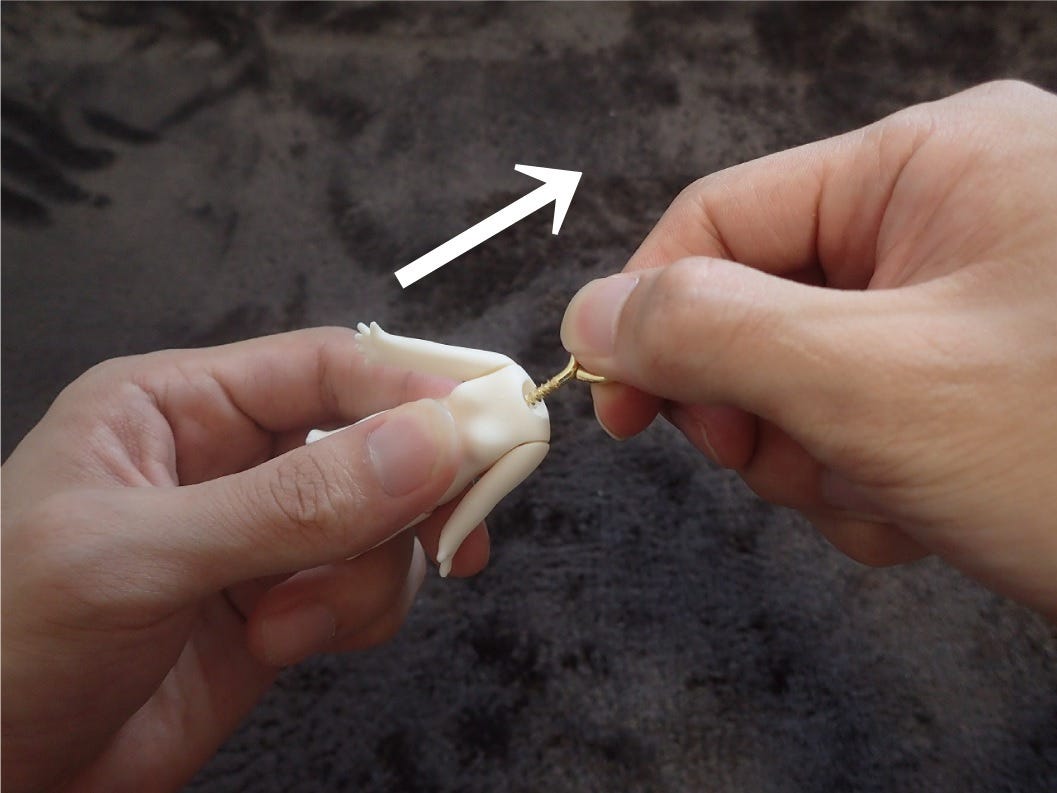
gently pull on the eye bolt, and the joint should come loose!
*First make sure the eye bolt isn’t too hot to the touch!*
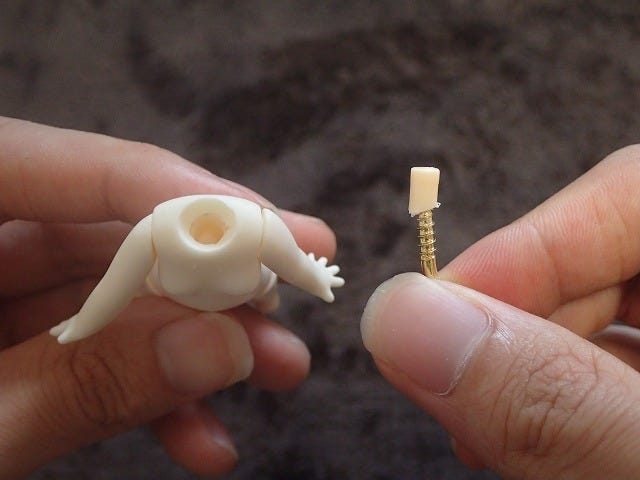
Joint Removed!
The first step of our repair process is now complete!
Next we need to remove the broken half in the neck!
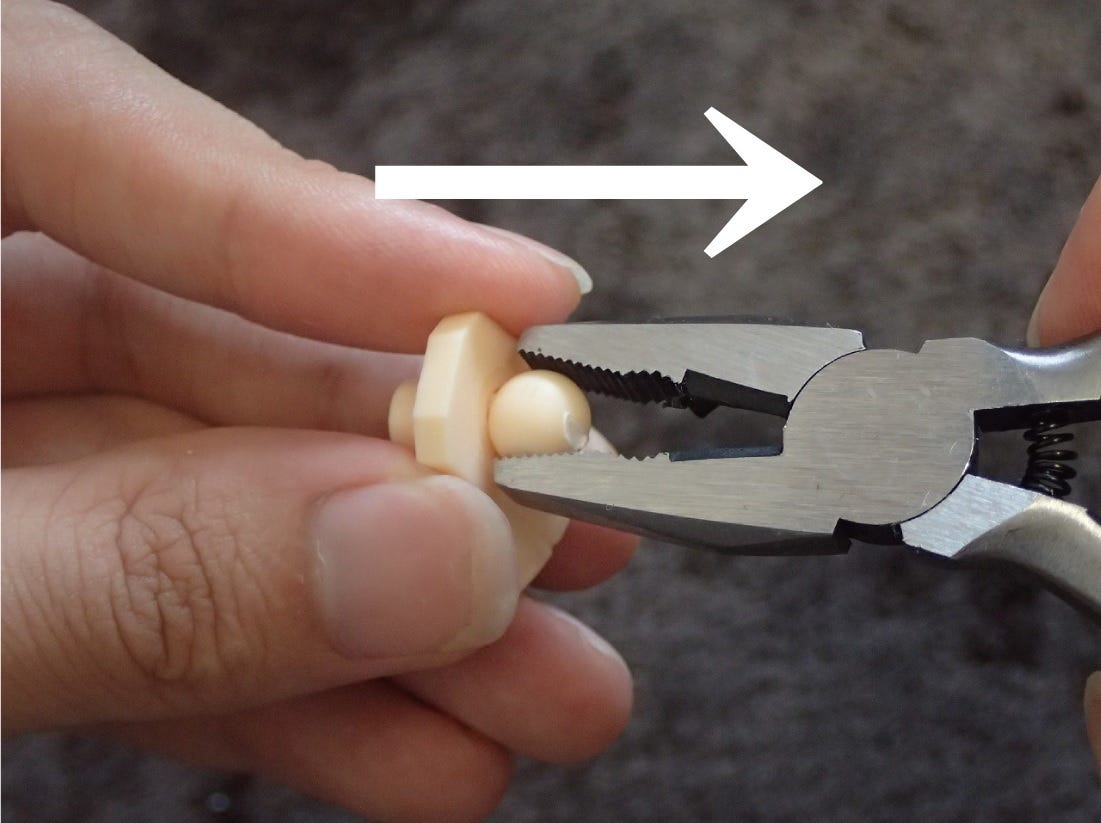
1) Warm up the neck joint part with the hair dryer.
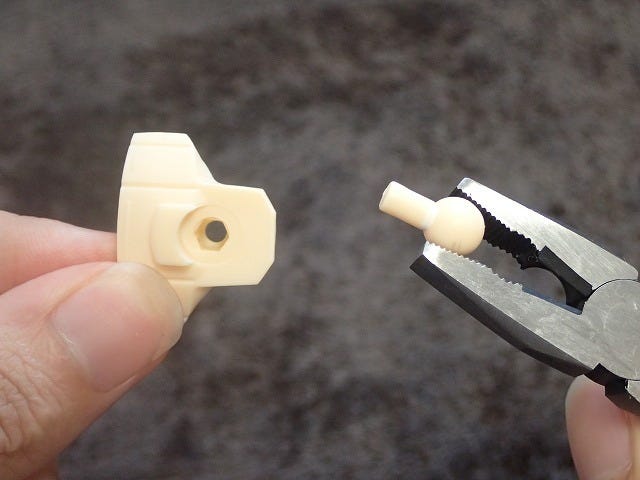
2) Grab the round part with pliers and pull!
Joint Removed!
But there is actually a second option for removing this side of the broken joint!
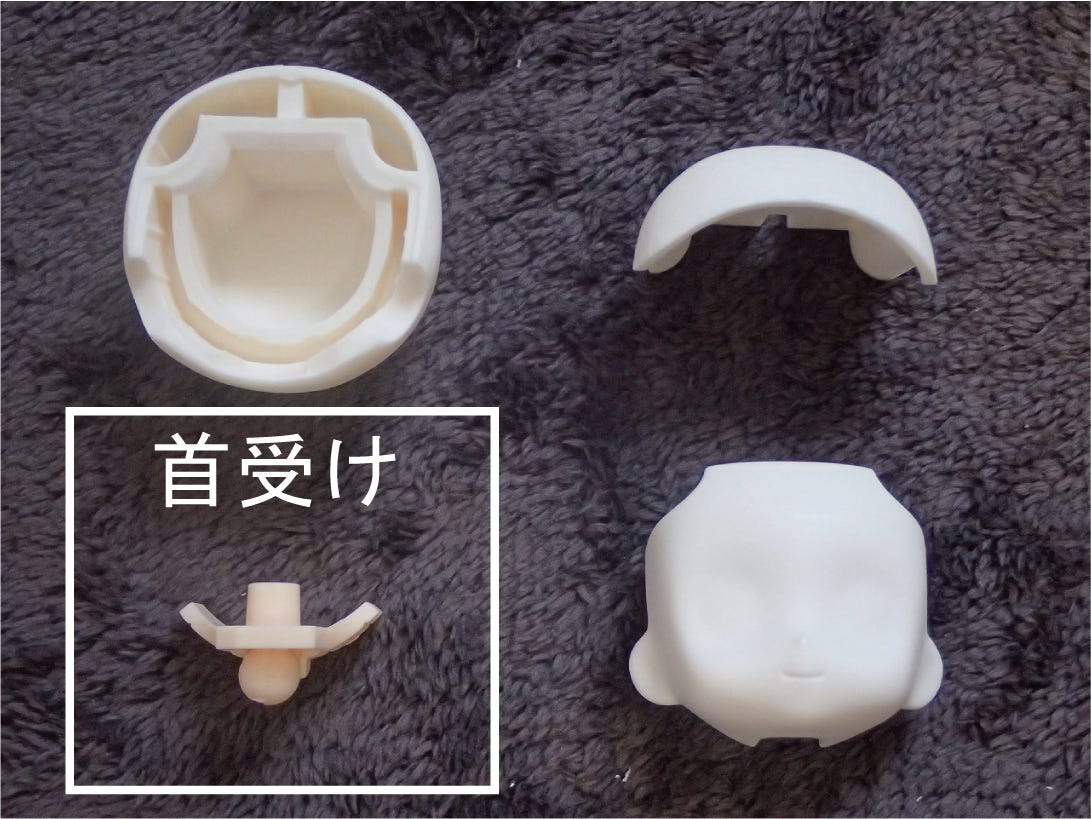
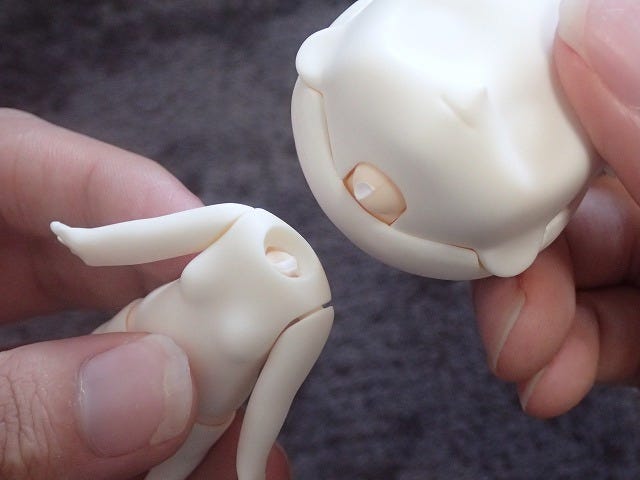
The alternate method makes use of this hole in the neck part of a Nendoroid!
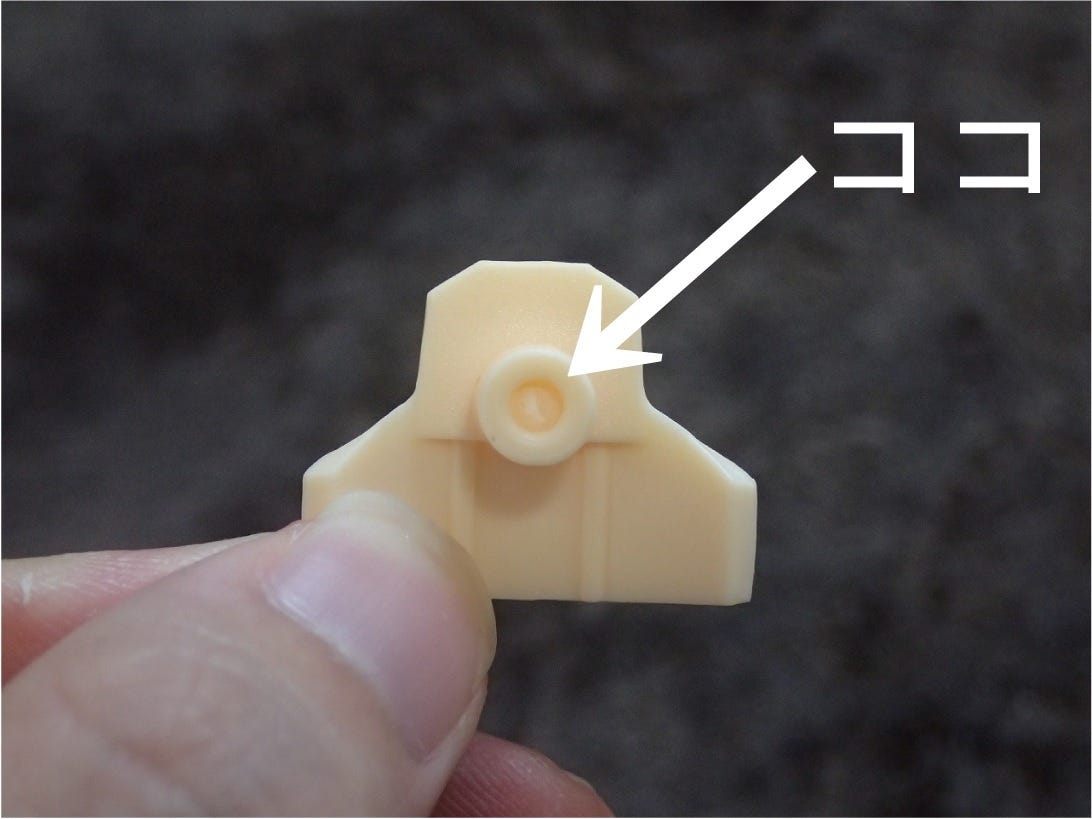
Just like in the first option, first warm up the neck parts…
Then use an eye bolt or similar thin item to push through this hole!
Simply choose the method that suits you better!
Note that there are some products that don’t have the hole in the neck joint, in which case you will have to go with option one!
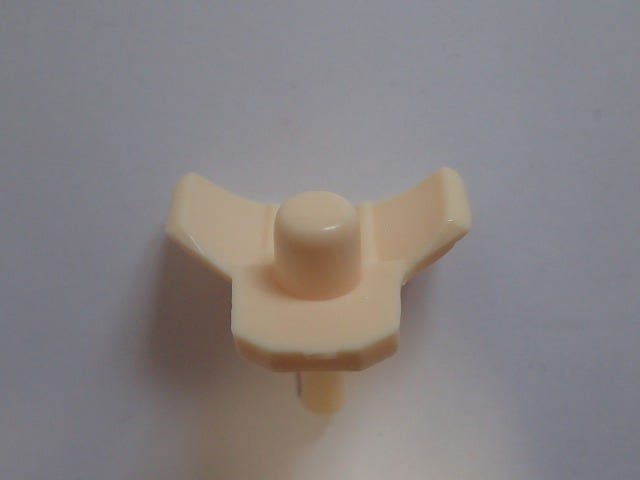
▲ Joints such as this one will require the method with pliers!
This example had the breakage with the round joint stuck in the neck section, but the break can also just as easily happen the other way around – in that case you simply need to switch the tools around and pull the two broken halves out in the same way!
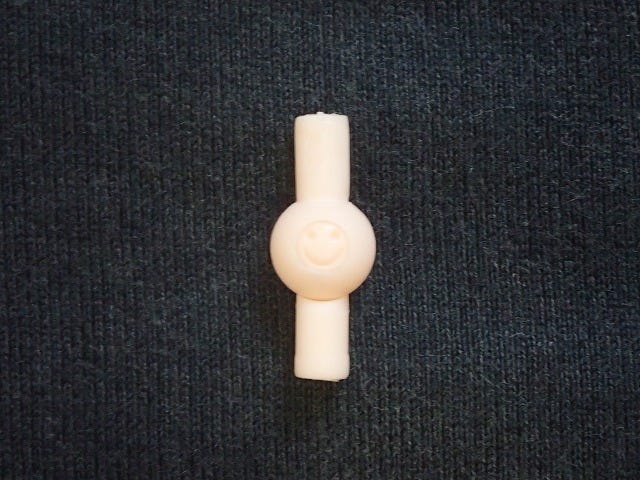
Once you have successfully pulled the broken joint out you need to find yourself one of these!
A spare joint is almost always included with each Nendoroid!
You’ll normally find it in the same package as the base and stand! Simply replace the joint with the spare and…
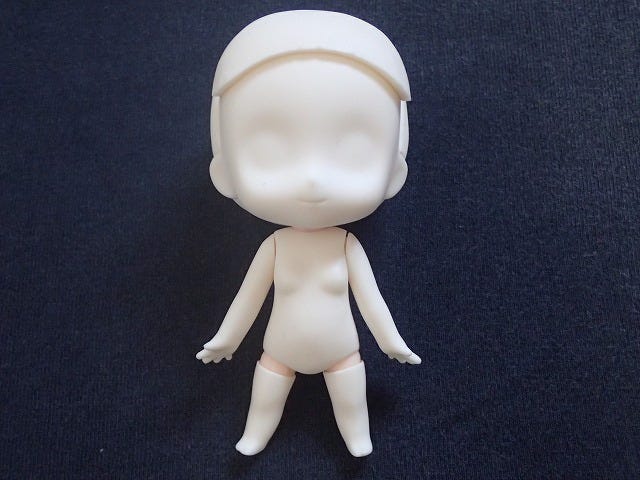
We have our Nendoroid back to normal!!
The next time you drop your Nendoroid or bend it too hard in the wrong direction, be sure to try out removing and replacing the joint with these simple steps!! m(_ _)m
This was my first ever attempt at the repair and it when through without any problems!!
Next in this series, we will be looking at how to get rid of unwanted dirt and marks on your Nendoroids!
Look forward to it!!


